All materials on showgamer.com are protected by copyright. Partial copying is permitted with an open (for search engines) link. ShowGamer (2015)
The Archon quests in Genshin Impact are the main quests you must complete in order to progress through the story and find a way to rescue the protagonist's twin who has been kidnapped by a mysterious deity. These story missions open gradually, with the release of new game updates. And we will describe each task! For convenience, they are all divided into chapters.
After watching the introductory video, during which you choose a playable character (boyfriend or girl, brother or sister), it becomes clear that for some time the brother and sister successfully traveled between worlds, until some unknown deity intervened. The goddess will kidnap the second character, and the entire plot of the game will be aimed at finding her missing brother or sister.
Who to pick at the start of Genshim Impact? It doesn't really affect anything. The story will remain the same no matter which twin the player chooses. However, if you are interested in what to call a brother or sister, we inform you - Ether and Lumin, respectively. Choose one and the other twin will be trapped in the deity. Watch a few cut-scenes, after which you will take control. You will find yourself on the beach in the company of Paimon.
The first half of the game will be devoted to management. Carefully study the keys, which are described in the prologue of the game. You will learn how to run, climb walls, move the camera and so on. Now you can move, so run ahead and gradually get used to the controls, which resemble a hybrid of the two systems used in Breath of the Wild and NieR Automata. You need to head south to Paimon, which is next to the fast travel point. Activate it. From now on, you can teleport to the activated point at any time.
How to teleport in Genshin Impact :
Также рекомендуем сайт наших партнёров — ТОП лучших игр.
Then continue southwest, continuing to follow Paimon. You will reach a wall that you need to climb. Once you get to the top, the quest will end. Keep in mind that climbing, like swimming, takes stamina. And if stamina runs out, then you will fall or drown, respectively.
Reward :
This quest starts automatically upon completion of the previous Genshin Impact Archons quest. Continue on the dirt road. You can deviate from the path, explore the surroundings and collect various ingredients. However, you won't be able to go too far, as Paimon will remind you to follow her. As you progress, you will be able to find various items. To your left is a small waterfall with fish that you can catch with a trite interaction. There are also plants such as calla lilies .
Mushrooms and some fruits can also be found, including zakatnik and apples . You can even climb trees to collect bird eggs . Cutting down bushes and small trees will bring you random resources. Note that all cut down plants regenerate shortly, so don't even try to destroy every bush/tree in the area. That won't work!
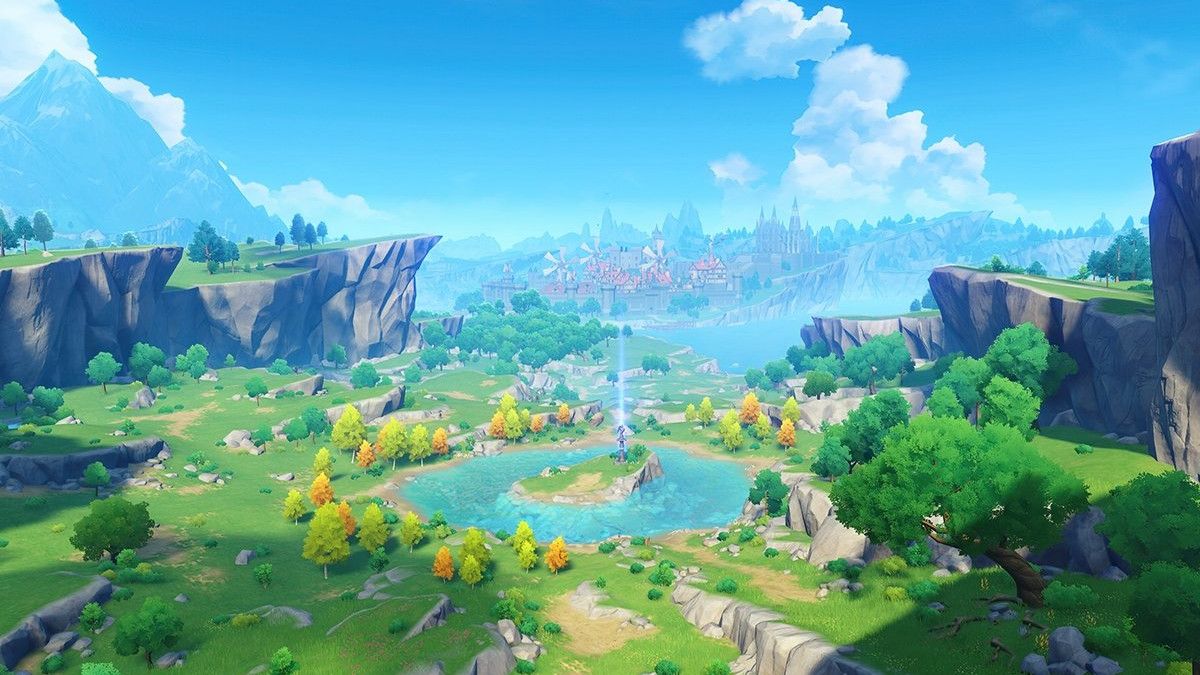
When you're ready, continue down the path until you find Paimon standing on the edge of a cliff looking into the distance. Approach it, watch the video with views of Mondstadt. Paimon will point to the statue of the Seven Archons located nearby. This is Archon Anemo, lord of the wind. Follow Paimon down the hill and collect various resources. Soon you will reach the lake that surrounds the statue of Archon Anemo.
Swim across the lake to the statue. Do not forget that stamina is consumed, and if it runs out in water, you will drown. This area will be labeled "Starfall Lake". Approach Paimon for another cut-scene. The hero touches the statue of Anemo and receives his blessing. The map will also open and you will see some locations.
What are the statues of the Seven Archons for? These statues are comparable to the sheik towers from Breath of the Wild. They also work as towers that reveal nearby territories. Similar to many other open world games!
Open the map to see different locations and icons. So far, you have no idea what they all mean. Don't worry, I'll talk about it later. The quest itself will end while watching the cut-scene. The next task of the Archons starts immediately.
Reward :
As soon as the quest starts, fire slimes will appear. Use E and Q to defeat them with various skills. Keep in mind that you need to press E once, and the other - hold and release after a couple of seconds. Also, each elemental skill has a certain cooldown. You can see the countdown on the skill icon in the bottom right corner of the screen. When you kill enemies, you get special spheres that gradually fill the elemental explosion gauge. When it is full, activate the skill on Q. Once all the slimes are destroyed, the task will end. The Archons quest, described below, will begin.
Reward :
The quest marker now points to the southwest. You need to visit Mondstadt, one of the main cities of the game. Right now, you're being advised to check out the settings and controls, as well as explore other things. Don't forget to check your mail to collect various rewards. It all depends on what console/platform you run Genshin Impact on.
When you're ready, go southwest past the pool to the marker marked on the map. There will also be a chest on the right hand. These chests usually contain random items and a few units of Morata. Keep moving. You will see a huge blue creature flying above you. How cool is that! The path will lead you to the first enemy camp. These hostile creatures are called Hilichurls. Defeating them is a simple task! Also don't forget to destroy fragile objects like barrels and crates. The chest itself will be surrounded by a red ring. It will only disappear after you defeat the last enemy in the area.
Continue walking along the path. When you start moving south, you will see a small puddle of water. To the southeast of it is a large camp. You can explore this area to collect various items, open chests, and so on. However, there is one thing that cannot, and even must be done. Blue dandelions are scattered everywhere. Use an elemental skill to attack them. This will inflate the dandelion seeds and unlock the Traveler and the Wind achievement.
Once you've done that, follow the marker and watch a short cut-scene. You will see the creature that flew over you earlier, as well as a person. It seems to be a dragon. During the cutscene, Paimon will notice some kind of red rock. Examine it to pick up Crimson Agate. The quest will end.
Reward :
The marker leads you a little further down the road. Go there to see a cut-scene with the appearance of Ember, the Knight of Favonius. She will join you and become the first member of the team. You will be able to play as Ember! Switch to it right now to try out the new feature. The same key allows you to switch back to the main character. use Ember to defeat the flying slimes.
A small guide will start that will show you how to play Ember in Genshin Impact. Unlike the main character, she uses a bow for ranged attacks, so the best option is to fight from a distance. Aim to perform a charged shot. It takes time but does more damage. Management is standard - RMB and LMB. Shoot the flying slime. Before you leave, open the chest located nearby.
Ember's elemental skill is very good! She throws a small plush toy that explodes after a couple of seconds, damaging nearby enemies. The longer you hold the throw key, the farther the toy will be thrown. Please note that the power of the throw has its own limit. And if you hold down the key long enough, Ember, upon reaching this limit, will automatically throw the toy as far as possible.
Go to the place pointed out by Amber. You can explore the surrounding area. To the west of where you left off is a new area - Cider Lake. At the moment, it is impossible to study it, but it looks fascinating, doesn't it? Head southeast to the quest marker to find another fast travel point . Fantastic!
After that, the camera will automatically move towards Hilichurl. This is your goal. But deal with him will be in the next quest.
Reward :
Just past the fast travel point, there will be a group of Hilichurls on the slope opposite you. Climbing up the slope, you will see their camp ahead. During the attack, you will learn about the reaction when different elements come into contact. You will also be told about attacks on vulnerabilities. Aimed shots are a great option to hit weak points on opponents.
Council . In the case of humanoids, aim for the head. Vulnerable place of Hilichurls - similarly. Shoot for the head!
Defeat all enemies and watch the video. Go forward, break boxes and barrels, and open chests. When you're ready, head west back onto the main road to find a crack. Don't rush to leave. There is a campfire, a pot, and Lynn cooking. After talking with her, you can get the task "Culinary Art". We talk more about this task in a separate guide. After that, head northwest across the bridge and go through the gate to Mondstadt to complete this quest.
Reward :
Watch the video that activates when you enter Mondstadt. Amber will tell you a little about this place and the Storm Terror that terrorizes the city. Also, the girl will say that she has a gift for us, so we need to follow and pick it up. move to the specified location. You will be prompted to open the quest menu to select the desired mission (bottom left).
Advice. There are two types of quest markers in the game - the traditional one (the icon on the map and radar), and the golden footprints that appear whenever you display information about a quest.
Now open the region map. Mondstadt has several places to visit, but some you can't see. Let's take a look at all the sellers and places marked on the map. This will come in handy in the future!
Again, at the moment the city is closed, so there is not much to do here. However, if you wish, you can visit all the listed places. We will return to them later. I recommend visiting the Adventurers Guild and picking up all your rewards. You should be at Adventure Rank 4 by now. You can also visit the Rassvet distillery and inquire about special offers. As a result, you will get Chicken Skewers with Mushrooms. " Great!
Talk to the little girl in brown clothes. This is baby C.R. It stands right in front of the Dawn distillery. For this you will receive "Black Bass" . The man under the tree nearby is a merchant who has a full set of adventurer's artifacts.
If you go to the restaurant "Good Hunter" and ask for any activities, you will receive a Nourishing Salad " . After that, open the map and find an inactive fast travel point to the west of the alchemist's station. What needs to be done? Right! Activate it. To do this, move over through the wall.
After that, go to the main square in the northwestern part of the city, where the marker points, and approach Ember. Watch a short cut-scene. You will receive from her "Vortibird" , which allows you to hover in the air and not take damage from the fall. Sounds familiar?
This device is easy to use. Press the indicated key/button in the air to open the wings. You can move in any direction, but remember that you will gradually start to lose altitude. Your current task is to go to the Fountain Square where Ember is standing. Jump off the edge in front of you and hover between the buildings on the vertibird. When you approach Amber, a cutscene will play. Out of nowhere, a violent storm is coming. It's the same dragon! It looks like they call him the Tempest Horror.
Reward :
Once you get to Amber during the previous quest, you will have to travel over Mondstadt and practically the entire continent, fighting the Tempest Dread. This will begin the battle with the boss, as evidenced by the scale at the top of the screen. Don't worry, this will be an easy fight as the Storm Dread won't attack back. No, he's just trying to hide from you. You can attack him by shooting small beams. You have an unlimited number of them, so shoot as much as you like!
After a few shots, another cut-scene will start, in which a new character will appear - Keia . After this battle, a locker room will become available to you, where you can change rotorcraft and clothes. But first, new outfits will have to be unlocked. You will also get the achievement "... new storm?" .
After that, you will regain control of the character. Head to the headquarters of the Knights of Favonia (the "swords" icon to the southwest of your current position), next to which the quest will end.
Reward :
Enter inside the headquarters to watch a video. You will meet a couple of new characters. In addition to Kaya, it will be Jinn and Lisa. Long but exciting conversations will begin. You will learn about the Temple of the Four Winds. Continue to watch the cut-scene, after which two new functions will open in the Paimon menu - "Prayers" and "Shop". We will tell you more about all this in a separate guide !
After all this, you can talk to anyone. Please note that you will also receive new items called Fateful Encounters . With their help, you can get new characters in the "Prayers" menu! Next, you will find a short tutorial on how to access the prayer screen. Spend 10 Fateful Encounters on the Beginner's Prayer banner. There is no randomness here, since you will get Noelle anyway , who uses fantastic claymores in battle.
Talk to Amber and the others. Now you have some quests. Each quest is connected to one of the three temples of the wind! You will have to do:
You can complete these missions in any order! After completing the first two tasks, you will receive two new characters - Lisa and Keia, who will become members of your squad. But before you go to complete these quests, you need to do something. And we'll start at the headquarters of the Knights of Favonia.
Before you leave the headquarters room, note that there are some shiny items in it. You can collect them (in this case, they will be books). I strongly recommend doing this, as many of them are necessary to get achievements. Luckily, you don't have to read these books:
Leave the room and check the room ahead, to the south. This is a huge library. There are even more books here, again marked with sparkling icons. I will not say where to find each book, but I will emphasize that there are only 33 of them here (not counting the books from the previous room):
Now you have a LOT of books! However, this number cannot be compared with lore and books from Skyrim. Before you leave the library, be sure to chat with the little girl who practices Hilichurlian communication. If you ask her who she is, you will get Hilichurl Poetry Book II from her. However, you should have found it in the library.
When you're done, leave the Knights of Favonia Headquarters to get a new world quest - "Sharpening the ax won't get in the way of work." To complete it, you need to talk with Wagner.
Go behind the headquarters to find a chest. If you go to the northwest, you will see a sparring partner. There is also a chest here, so you can search it.
How to find luxury chests in Mondstadt? Open the map and you will see an inactive fast travel point in the headquarters of the Knights of Favonia. In fact, this place is located at the very top of the headquarters, and you can go up there! Move along any wall, and linger on wider areas of outdoor scenery to regenerate stamina. When you climb to the top, you will find a regular chest. Look at the top of the northwest small tower to find a deluxe chest . The waypoint is on top of the tower to the north.
After that, head to the cathedral in the northwest and climb to its top. Here is another luxury chest . This is a very rare object that contains amazing things.
Head down to the area with the large winged statue. Look to the left to see a small shimmer on the stone ledge next to the stairs. Get closer to see a ring that you need to run through. After doing this, you will see another ring. Run through all the rings until you reach the opposite side of the square. Don't run, just go around the fence. The rings disappear after about 2 seconds, so you need to act quickly. You can also jump from square to square to get to the other side and get a reward - another luxurious chest .
Reward :
Let's start with Mondstadt. If you open the map, you will see that the quest marker points to some distant "unknown" territory. In any case, leave the city and follow the main road, leaving at the fork to the south. Along the way, you will find several enemy camps, and pretty soon you will notice a red beam in the distance, emanating from a column under a huge tree. Get closer to find another Statue of the Seven. Activate it to reveal the next part of the map.
You will remove the "fog of war" from the entire southeastern part. Isn't it great?! And now the temple we need is not so far away. This entire area is called the Windsong Hills. There is a separate world quest associated with the blessing of the statues. We talk more about it in another guide. Be sure to pass it so that an air current appears from the hole in the southeast, allowing you to fly up. Use it to get to the temple!
In addition, a new icon in the form of a four-pointed star will appear on the map. She points to anemocules, which we will cover in more detail in a separate guide. Anemocules are used to level up the chosen statue of the Seven. Climb the giant tree behind the statue to find one of the anemocules.
If you've come here from the north, you've probably already seen them. Otherwise, for the first time you will notice creatures resembling anemocules. These are fairies. They travel all over Teyvat. If you follow the fairies and help them get to their destination, you might get some kind of reward. Therefore, whenever you see a fairy, be sure to help her. Usually they try to get to a small statue. You will receive various items and experience.
And if you help enough fairies, you will unlock the Guiding Wind achievement altogether. He has three levels - you need to help 10, 20 and 40 fairies, for which you will be rewarded with 5, 10 and 20 Source Stones, respectively.
If you look at the south side of the tree across the river, you will notice a bunch of energy. Right next to the bushes. Get closer to learn about Anemogranums. These are curious spirits full of wind magic that will follow you everywhere. They reduce the cost of stamina. Use Anemo's abilities on them to create a stream of wind. Directly above you will be an anemoculus. Use your elemental skill to climb up and grab it.
Probably, you have already noticed three different pedestals with symbols of fire, electricity and ice. You need to attack these pedestals with the appropriate elements. Don't worry if you don't have such characters. Literally in the next few minutes you will receive new heroes with the elements of Cryo and Electro! Amber just belongs to the elements of Pyro. Look southeast of the tree to see a huge blue beam. This is the temple we need! At the foot of the mountain there is a huge flow of air. It's northeast of the temple. Use it to get higher. Or run up the slopes and climb up individual sections of the mountain. Outside the temple , Lisa is waiting for you.
Talk to Lisa and go inside. You will be offered a choice of several dungeons. So far, only the first one (with a recommended level of "5") can be completed, so choose it. The cool thing is that you will receive rewards both for completing the dungeon and for completing the quest itself. Once inside, go forward and talk to Lisa again. A small cut-scene will start, and from that moment on, Lisa will become part of your squad.
But Lisa will only be an invited companion. This is a temporary member of the group, who is not considered its official member. Such a character will always have a pre-planned level, equipment, and so on. Usually this is done so that you can look at the character from the outside, think about whether you need him in the future. And after that, try to knock out the hero through Prayers. But let's get to the bottom of the dungeon!
As you progress through the dungeon, Lisa will tell you where to go next. Unfortunately, getting straight to the right place will not work, so you have to go around the entire territory of the dungeon. Move south across the bridge, break the boxes on the other side, on the right, to reveal a chest. Rise up on the air current to find the Door of Resurrection . There are several more boxes in the corner, behind which another chest is hidden. Examine the cube to open the door behind it. Behind her is a Pyro Slime. If you attack it with Lisa, then cause the fall of its elements. Ahead, in the center of the room, there will be a pedestal with a sealed chest.
Lisa will call it the Electro Monument. It is important. When you get closer, you will learn about Lisa's elemental skill. Attack the monument once to start the 20 second timer. Four Pyro Slimes will appear. Defeat them before time runs out. If it doesn't work, repeat the steps. Use your elemental skills. After defeating them, you will open the door to the west. Before you go through it, look in the chest with the reward, and also go to the northeast corner, where there will be another chest.
Head west to the next room, where there will be several Hilichurls standing in the water. Kill them using electro skills. Never stand in the water! You will also learn about the electrical circuit that is formed if other opponents are standing next to the attacked enemy. Defeat the Hilichurls and look in the chest. Break the boxes, go north through the opened door and rise on the air current. Continue north to find another Resurrection Door. Activate it, break the crates to find a chest, and continue north to find a room below with some Hilichurls and a huge Hydro Slime located in a giant pool of water.
A health bar will appear at the top of the screen. Hydro slime is a kind of dungeon boss. However, the most difficult part is that the Hilichurls will constantly attack you, and there is not much safe space on the location where you can position yourself. However, once you kill the Hilichurls, stay away from the Hydro Slime and you can safely destroy it.
Next will be an area without a floor. Use the moving platforms to get to the other side. There will be no problems with the first one. Activate the switch on the other side and you will see how all the platforms move. They create a bridge that leads to the flow of air. Climb it to the next bridge, go through the hole and open the door. Climb the stairs and look for the large Anemo stone. Break it to get an anemoculus. As a reward, you will also receive a precious chest. Leave this place and get ready to visit the next temple!
Reward :
This temple is located opposite Mondstadt. When you exit from there, follow the road to the southeast to see how the sanctuary glows. Ember will be waiting for you outside. You can choose an Ember from the squad and approach another Ember at the temple. Agree, it looks strange. Talk to her and go inside. As in the previous case, you will receive rewards for the quest and dungeon. Use the console in the corner to open the door and go through. You will learn about Ember's fire arrows, which can be used to set fire to combustible objects. Burn two thorns. Behind the one on the right, there will be a chest. Search him before moving on.
Burn the next thorn bush and activate the door behind it. You will learn about elemental gaze, which allows you to see the attributes of each item: green for Dendro, red for Pyro, and so on. you'll also learn that you can burn opponents' equipment made from elemental Dendro. Activate the elemental gaze to understand what and from what element is created on the lower floor. Most of it is green, which means you can burn it with Pyro skills.
You are on top, so you can burn everyone and everything without taking damage. All enemies have shields, but they are green, so burn them. after the battle, open the chest. There are thorns and explosive barrels in the corner. Shoot them to reveal another chest. Continue up the stairs to face other enemies. Amber will notice the barrels standing in the corner. Use them to kill opponents faster. Open the chest, destroy the barrels and boxes, and find the Pyro Monument at the exit. Shoot him with Ember's fire arrow to create a stream of wind. Climb up on it, looking in the opposite direction to find a hidden chest.
Open it, rise again on the wind flow and go to the marker. Destroy the big Anemo stone to get the Anemoculus. You will also be given a gem. Head outside to complete the mission.
Reward :
Follow the road that goes southeast from Mondstadt. This is how you get to Kaya. Once inside the temple, talk to Kay. He, like Lisa, will become a guest in your squad. Walk forward and activate the door on the left. Ahead you will see a large room with Hilichurls. You will learn that you can freeze water with Kaya's Cryo Element. You can also freeze all wet enemies. Go ahead and take advantage of this. Freeze the enemies, find the next door and the flamethrower behind it. you can freeze the flamethrower to keep it from spewing flames, but the effect is short-lived - only for a couple of seconds. However, you can just jump over this flamethrower.
Behind the first flamethrower there will be an open area with a chest and some Hydro Slimes. Kill them and go past the second flamethrower. Use the current of wind, activate the door and enter the room with the Hydro Stone. You will learn more about it. By activating this stone, you will cause rain, making all enemies wet. And then freeze them with Kayem. Open the treasure chest after killing the enemies and then look out for the spikes underwater. Freeze the water to cross the pond. Behind the first set of spikes, on the right hand side is a Rich Chest.
Freeze the water and use the moving platform to pass this place. Activate the door and keep looking for your target - the large Anemo stone. After breaking it, watch the cut-scene to see a character with fiery red hair. Going outside, if this was your third dungeon, will complete the first chapter and rid Mondstadt of the storm.
Reward :
The action game also received a content update.
")


 Our YouTube channel
 Our VK group

.jpg)
