Nemezis Mysterious Journey 3 is a first-person quest that was originally called Schizm 3: Nemesis. Continuation of the famous series of adventure games with challenging puzzles. We tell you how to complete the whole game.
The main character of the game resides on Regilus, a distant planet. This became possible due to the discovery of teleportation technologies, as well as the further emergence of Teleport travel agencies. Strange things are happening on this planet, and the heroes (a girl and a man) have to figure everything out.
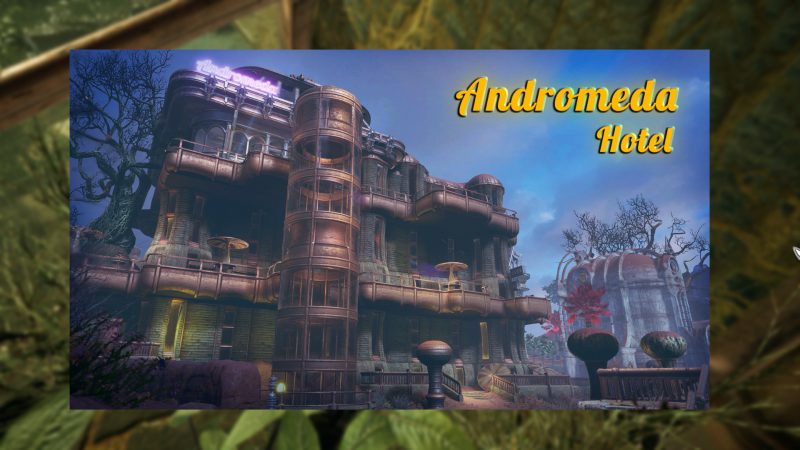
After appearing on the planet, you will contact the guide and find out that your partner is waiting for you at the Andromeda Hotel. Move along the nearest bridge to the bench on which the old woman is sitting. Click LMB while looking at it when the circle is white. This will lock the screen. Then use the cursor to hover over the old lady and left click again. Listen to her. In the grass on the left you can find a collectible - a postcard with the image of the Andromeda Hotel .
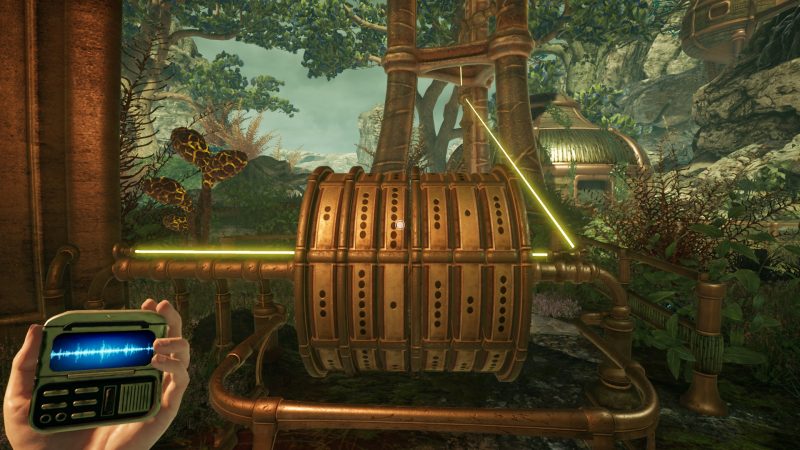
In order for the elevator to work, you need to conduct an energy beam to it. To the right of the old lady is the first disc. Rotate it until the yellow beam on the left passes through the hole in the disc. You can even see this hole if you look at the disc from the side. Move in the opposite direction and you will see another device. It consists of two discs. Locate the hole on the left and right discs and then rotate them to the correct positions. If you look at both disks, then in the upper part on the left there should be 6 points, on the right - 7.
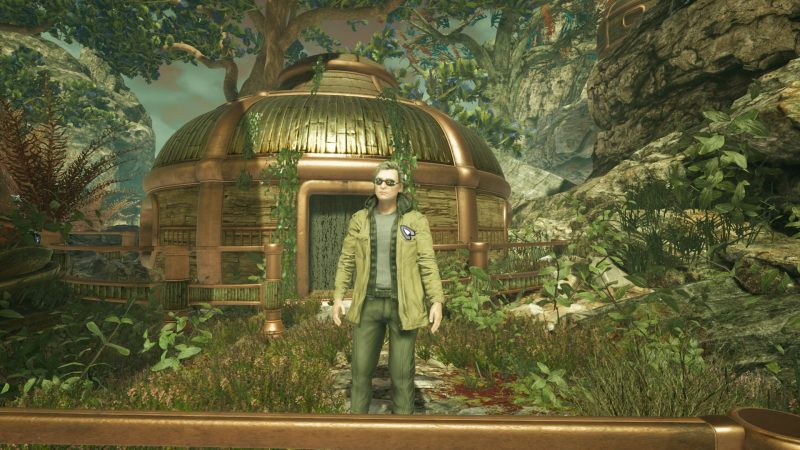
Walk along the bridge to the right of the device. On the right hand there will be barely distinguishable gray steps. But first, go down even lower and go to the right, to the man. This is Professor Tarat. He is looking for a rare star cat, and also warns you not to trust the guide. It is also surprising that the main character and the professor confirm the absence of obvious signs of animals, but at the same time, going downstairs, I clearly saw a multi-colored parrot (prem.?Substantially red color). The path to the left leads to a platform with a terminal. You can read the message.
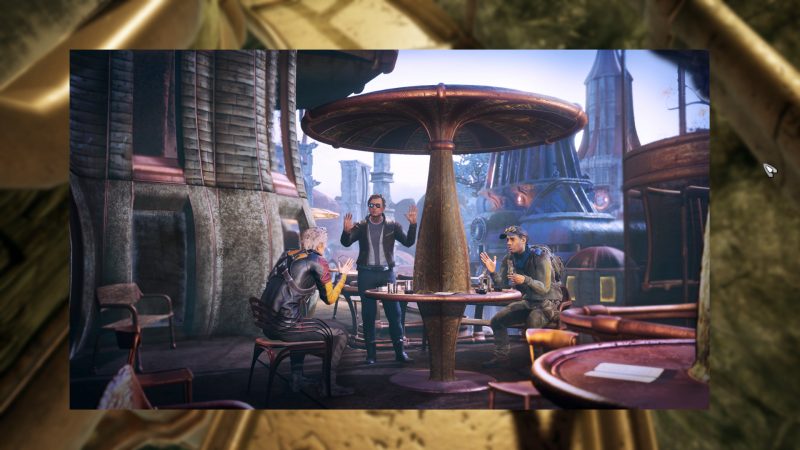
Go back and up the gray steps. Read the message on another terminal and use the device on which the beam falls. First adjust the left and right discs as they show holes, and then rotate the middle one. From left to right, the disks should have 5, 2, and 6 dots, respectively. There is a bridge to the left of the device. Run forward along it and take the collectible item from the windowsill - a postcard with a desert . Continue forward on another bridge and look behind the next building for the third collectible - a photo card with Professor Tarat and two other people sitting at a table .
Go down and find the elevator on the left. There will be another device, consisting of six disks. The sides are covered, so the holes are not visible. Instead, remember what characters were on the configured previous drives. Coincidentally, they were justsix. So that you do not suffer, here is the answer (from left to right):
This number of points should be on the disks from left to right, and in their lower part. You have energized the elevator, but now you need to adjust the devices to the left of it. Go to them and take a look. Interact with the first column and turn the beam to the right. Approach the pipe that the beam hit and click on the lower right blade. The tip will turn in the direction of the beam, two additional beams will fly out of the pipe - blue and red. In fact, a red beam hits the next pipe, and a blue beam comes from its lower part.
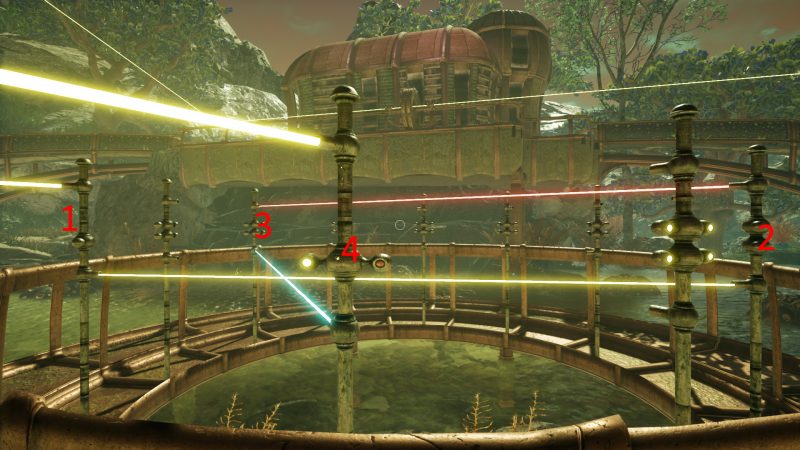
Approach it and turn the blue beam to the right clockwisetree. Go to the pipe hit by the blue beam and turn the tip so that it receives this beam. The beam from the top will go to the elevator. You turned it around! Enter the elevator to go up to the hotel.
P.S. If you are playing the prologue, then it will end there. Buy the full version of the game!
Playing as Bogarde
Bogarda is greeted by his electronic guide Emanuel. He claims that Amia is already at the hotel. Connection is cutting off.
Notebook 4 - near the path leading to the cave;
Photo number 5 - near the path leading to the cave.
Notebook 5 - near the fence in the starting area of the location;
Photo #6 - behind the fence in the starting area of the location.
Characters 4 and 5 are engineers near the gate to the second area of the location.
We need to go to the second area of the location, which requires opening the gate. To open the gate, you need to solve puzzles with the direction of the beam on the disks.
There are three discs on the platform to the left. It is necessary to draw a beam from the first disk to the main disk, to the left of the gate.
Listen to Emanuel's prompt. At this stage, we need to activate the sectors from the center of the disk to the outer circle so that each outer circle has one more highlighted sector than the previous one.
In the same way we solve the puzzle with a beam on the main left disk.
There are also three disks on the platform to the right. You also need to lead the beam to the main right disk and solve the puzzle.
The difference between the solution and the puzzle for disks on the left side is that here the unlit part of the circles is taken as a basis.
Similarly, we solve the puzzle with a beam on the main circle on the right. We go to the open gate.
Photo No. 4 - in the gazebo on the left.
When you try to pass under the canopy, a charge of energy strikes through the gap in it.
We manipulate the levers that control the individual parts of the roof of the canopy:
We pass unhindered under a canopy.
Character 6 - near the steps.
To go further, you need to use the turning wheels on the left and right to turn the rooms of the palace, making a passage through them.
We rotate:
We pass through the built-up labyrinth of rooms to the next area of the location.
To open the first lock on the gate, you need to push each of the six columns to a certain height. Exploring the areas of the location, we pay attention to the devices installed under the arches. Interacting with the arrows on them, we put forward, or vice versa, we push the columns. When the column stops at a certain height, marked with a risk, the key below lights up, which has a certain color.?. There are six such arches.
After activating all the devices and counting the risks, we return to the gate. We pay attention to the six illuminated buttons - by pressing each such button, we move to the arch for a short time in order to see once again the number of risks on which the column is raised. Change the color of each of the keys under the columns to a color that corresponds to the height of the column (the number of marks).
Flowers Arrangement:
The first lock of the gate opens and the holographic barrier to exit to the bridge on the second tier disappears.
We rise to the second tier, go along the bridge, reach the place of failure.
In order to pass the dip, it is required to ensure that each board has the same color as its edges.
We manipulate the levers, find out which of the boards the lever controls and what colors it paints the edges with.
Interact with levers: 5, 6, 10, 10, 4, 4, 3, 3
We cross the bridge.
Notebook 6 - on the left , next to the arch.
In the area behind the bridge we find three arches with retractable posts. We press the key, remember the color at which the column extends. We also remember the number of risks to which he advanced.
We go down to the first tier, interact with devices in three arches - one is located on the right platform in the first area, and two behind the gate, in the second. We perform manipulations, through the labyrinth of rooms of the Khashu-Ichu palace we exit to the gate.
We put forward the columns to the required height (1, 3, 3, 2, 2, 5), go to the elevator.
Playing as Amiya
Photo No. 8 - is there an elevator behind the cabin ??.
We head to the east tower.
Photo #7 - Behind the second pavilion (with a torch on the roof) on the right side of the path.
Notebook 7 - near the steps to the east tower elevator.
Photo number 9 - on the third level of the eastern tower.
We take the elevator to the upper level.
We interact with the buttons on the panel, we find a combination in which the required buttons light up. We go down, go to the south tower.
Notebook 8 - on the platform in front of the entrance to the south tower.
We rise to the upper level. We interact with the buttons on the panel, we find a combination in which the required buttons light up. We go down to the third level, go to the monorail car, move to the central tower. In the monorail car we move to the West Tower.
We rise to the upper level. We interact with the buttons on the panel, we find a combination in which the required buttons light up. Spoo?We repent to the third level, go to the monorail car, move to the central tower. In the monorail car we move to the North Tower.
We interact with the buttons on the panel, we find a combination in which the required buttons light up. We go down to the third level, go to the monorail car, move to the central tower.
We go into the elevator, floor by floor (with a stop at each level) we rise to the upper level.
Notebook 9 - On the top level of the Central Tower.
We interact with each of the panels. First, click on its center, look at the combination of active buttons, then repeat it on the panel.
If everything is done correctly, the capsule's motor will activate.
Playing as Bogarde
Photo number 11 - in the corner , to the right of the elevator.
Photo number 13 - in the recess on the way to the gate on the left.
We examine the panel standing in the aisle. Remember the locationmarked rectangles and burning bulbs.
We pass to the gate on the left. We click on the upper half of the panel, set the rectangles, open the first, second and fourth valves at the top (the lights light up under them).
We try to change the lower part of the panel, but we can not find the position corresponding to the template. We return to the panel in the aisle, we look at the following arrangement of rectangles and light bulbs at the bottom of the panel. We try to put the same combination on the gate, but fail.
We get the third position of the template, put it on the gate panel.
We open the second and third valves at the bottom - the gate opens.
It is required to place the balls in the pockets marked with yellow circles. The ball being moved moves in one direction until it encounters an obstacle.
We place the balls in the pockets - the bridge rises.
Note . Since the process of dispersing the balls into the pockets is quite long and the description takes up a lot of space, a ready-made save is offered.
Climb the stairs to the cave , move along it.
Photo No. 12 - in the corner of the fence, at the exit from the cave.
We cross the restored bridge, climb the stairs.
Notebook 10 - by the stairs to the elevator.
We approach the elevator shaft, look up - the cabin is at the top. After making sure that the elevator call button is missing, we return to the arrival cave. We go deep into the cave, we run into another gate.
Photo number 10 - in front of the gate we go to the right . In the depths of the passage, at a dead end, we find a photograph .
Author's note . I could not understand what the developers were guided by, offering puzzles for unlocking the gate. Emmanuel's hints are very general. As in the previous one, in this puzzle I had to resort to a hint built into the game.
We unlock the gate, setting the values of the template , we pass forward.
Character 7 ( geologist Frank ) - in the depths of the cave.
Notebook 11 - near the path , right behind the character.
We leave to the big mechanism.
INIn a conversation with Emanuel Bogarde, he mentions the duodecimal system.
Based on this, we interact with the levers, find the maximum lifting height (eight rods), find a solution for raising the bridge to the desired height:
We rotate the wheel, connect the chain drive - the stone bridge rises.
We go to the stairs on the right, we pass along the bridge. We interact with the lever , open the gate.
We return to the levers, interact with them (from the values already set earlier):
We go to the stairs, jump onto the bridge raised to the desired height, go through the open gate. We leave on a clearing of Golden mushrooms.
Notebook 12 - in the clearing.
We interact with the lever, lower the elevator car down.
We go to the elevator, we go into the cabin. We rise, go along the suspension bridges, enter the teleport .
A gameeat for Amiya
We pass forward, we go into the monorail car, we move to the central platform. jump down.
Laptop 13 - under the power supply on the platform under the bridges.
Photo No. 15 - on the site under the bridges.
We rise on the platform.
We need to build bridges to transition to each of the four energy sources. Each valve rotates two sections of bridges.
Turning the valves:
We go to the first source of energy.
Character 8 is an engineer next to the power source.
To activate the source, you need the marker in the view on the rotating panel to become in the window.
Press arrows:
We return back to the bridge control platform.
Turn the third valve from the top to the left once. We are heading to the second source of energy.
Press arrows:
We return to the platform.
Turning valves:
We go to the third source.
Press arrows:
We return to the platform.
Turning valves:
We follow the fourth source.
Press arrows:
From the fourth source we go along the bridge to the rock on the right.
Photo No. 14 - on a stone island.
Notebook 13 - on a stone island.
We return to the bridges, we head to the main mechanism.
Character 9 is an engineer near the main mechanism.
Notebook 14 - near the main mechanism.
Photo #16 - near the main mechanism.
We interact with a level 1 source.
Press arrows:
We click the second button from the bottom of the switch, we rise to level 2.
Press arrows:
We click the third button from the bottom of the switch, we rise to level 3.
Press arrows:
We click the fourth button from the bottom of the switch, we rise to level 4.
Press arrows:
We click the first button from the bottom of the switch, we go down to level 1.
We head to the portal.
Playing as Bogarde
Bogarde finds himself in a city that reminds him of the earth, which he informs Amiya about.
ABOUT?We pay attention to the tunnel at the end of the street, inside of which there is some kind of mechanism - in order to leave the city, you need to bring the energy beam to the mechanism in the tunnel. In order to bring the energy beam into the mechanism, we first need to get it by running two fans, and then use a system of racks with reflectors and receivers.
You can approach the fans themselves by going down the stairs.
Bogarde suggests that they are sources of energy. Emanuel advises him: “Look at the streets, Bogarde. Look for a clue." Bograd's attention is drawn to the fact that the fans rotate left and right. He believes that the key to the puzzle will be to find the correct location of the contacts.
Our attention is drawn to the fact that both on the left fan, rotating to the left, and on the right fan, rotating to the right, the contacts are in the same positions.
Author's note . As with the cave gate puzzle, after many fruitless attempts to figure it out on my own, I had to turn to the built-in hint. What she said shocked me: “It is necessary to install the correct contacts only for rotation to the left side (device on the left side) and only?? right (device on the right side). That is, a simple statement of an obvious task and nothing more.
At four points of the city streets there are small fans, interacting with which, according to the developers, we can find a solution (Emanuel scoffs at the same time: “Arrange the contacts so that the direction of rotation is correct, and remember what they are”). By manipulating each of the four fans, you can see that at certain points of the contact location, the rotation of the fan stops or reverses. The solution was found intuitively, without the use of rationale.
We expose the contacts on the left fan (1568) and on the right fan (2479) - an energy beam appears.
Notebook 15 - on the veranda of the summer cafe, to the right of the fans.
Photo No. 18 - on the veranda of the summer cafe.
Photo No. 17 - on the porch of the house, opposite the fans.
We manipulate the buttons on the rack 1. We direct the beam in the direction opposite to the tunnel.
Character 10 (Professor Tarat) is against the wall on the right.
We manipulate the buttons on the rack 2, direct the beam alongd corner down the street on the left.
Laptop 16 - next to rack 2.
Photo No. 21 - in the corner of the street (opposite fan 4).
Come back, go to counter 3.
Photo number 20 - near the door of the store.
Laptop 17 - against the wall along the street leading to counter 3.
We direct the beam along the street.
Character 10 (an inadequate woman) is at a cafe table on the street.
We go to the counter 4. We interact with the buttons, we direct the beam to the receiver - the gateway is open. We're heading out of the city.
Amiya and Bogarde meet. Emanuel tells them that they need to get to the largest building, and for this they need to activate the elevator mechanism.
We look at the elevator control mechanism - Emanuel advises looking for tips on how to rotate the details of the mechanism in the city. We explore the city. We pass forward, turn left.
Photo No. 23 - in the grass , to the left of the road.
We go further, we go into the building , inside whichAbout there is a mechanism similar to the elevator control mechanism. We manipulate with the rotating disks at the top, mark the disk and the direction of its rotation, which affects the appearance of the luminous rim below.
Note . In the above description, the words "left" or "right" mean clicking on the left or right side of the disc.
We leave the building, go forward, turn right.
Notebook 18 - near the arch .
We pass under the archway, move to the right.
Photo #24 - behind the stone pillar, to the left of the tall building.
We approach the gate of a tall building.
Using the selection method, we light the buttons on the lower panels. On the top panel, we light those buttons that glow on the two bottom ones.
Inside the building we manipulate with the rotating disks at the top, note the disk and the direction of its rotation, which affects the appearance of the luminous rim below.
We leave the building, go forward, turn into the arch on the right .
Photo #25 is in the grass on the right.
Notebook 19 - near the steps of the elevation.
On the dais, we interact with the mechanism, note the disk and the direction of its rotation, which affects the appearance of the luminous rim below.
We go back, we pass through the archway, we follow to the right. We go up the stairs to the building on the right .
Photo No. 22 - at the wall of the arch , to the right of the entrance to the building.
Using the selection method, we light the buttons on the lower panels. On the top panel, we light those buttons that glow on the two bottom ones. Inside the building we manipulate with the rotating disks at the top, note the disk and the direction of its rotation, which affects the appearance of the luminous rim below.
We go to the gate of the building opposite.
Photo No. 19 - to the left of the entrance to the building.
Using the selection method, we light the buttons on the lower panels. On the top panel, we light those buttons that glow on the two bottom ones. Inside the building, we manipulate with the rotating disks at the top, mark the disk and the direction of its rotation, whichWhich affects the appearance of a luminous rim at the bottom.
We head to the elevator control mechanism.
We see that the first (upper) circle glows. We analyze the collected information. We press disks 1, 3, 4 on the right.
We go into the descending elevator cabin.
Notebook 20 - on the platform in front of the entrance to the room.
We watch the finale of the game, in which Amiya and Bogart are talking with Emanuel Fort.
Amiya and Bogart enter the elevator. And only Amiya comes out. Maybe this is a hint that the game will have a sequel?
End

All materials on showgamer.com are protected by copyright. Partial copying is permitted with an open (for search engines) link. ShowGamer (2015)