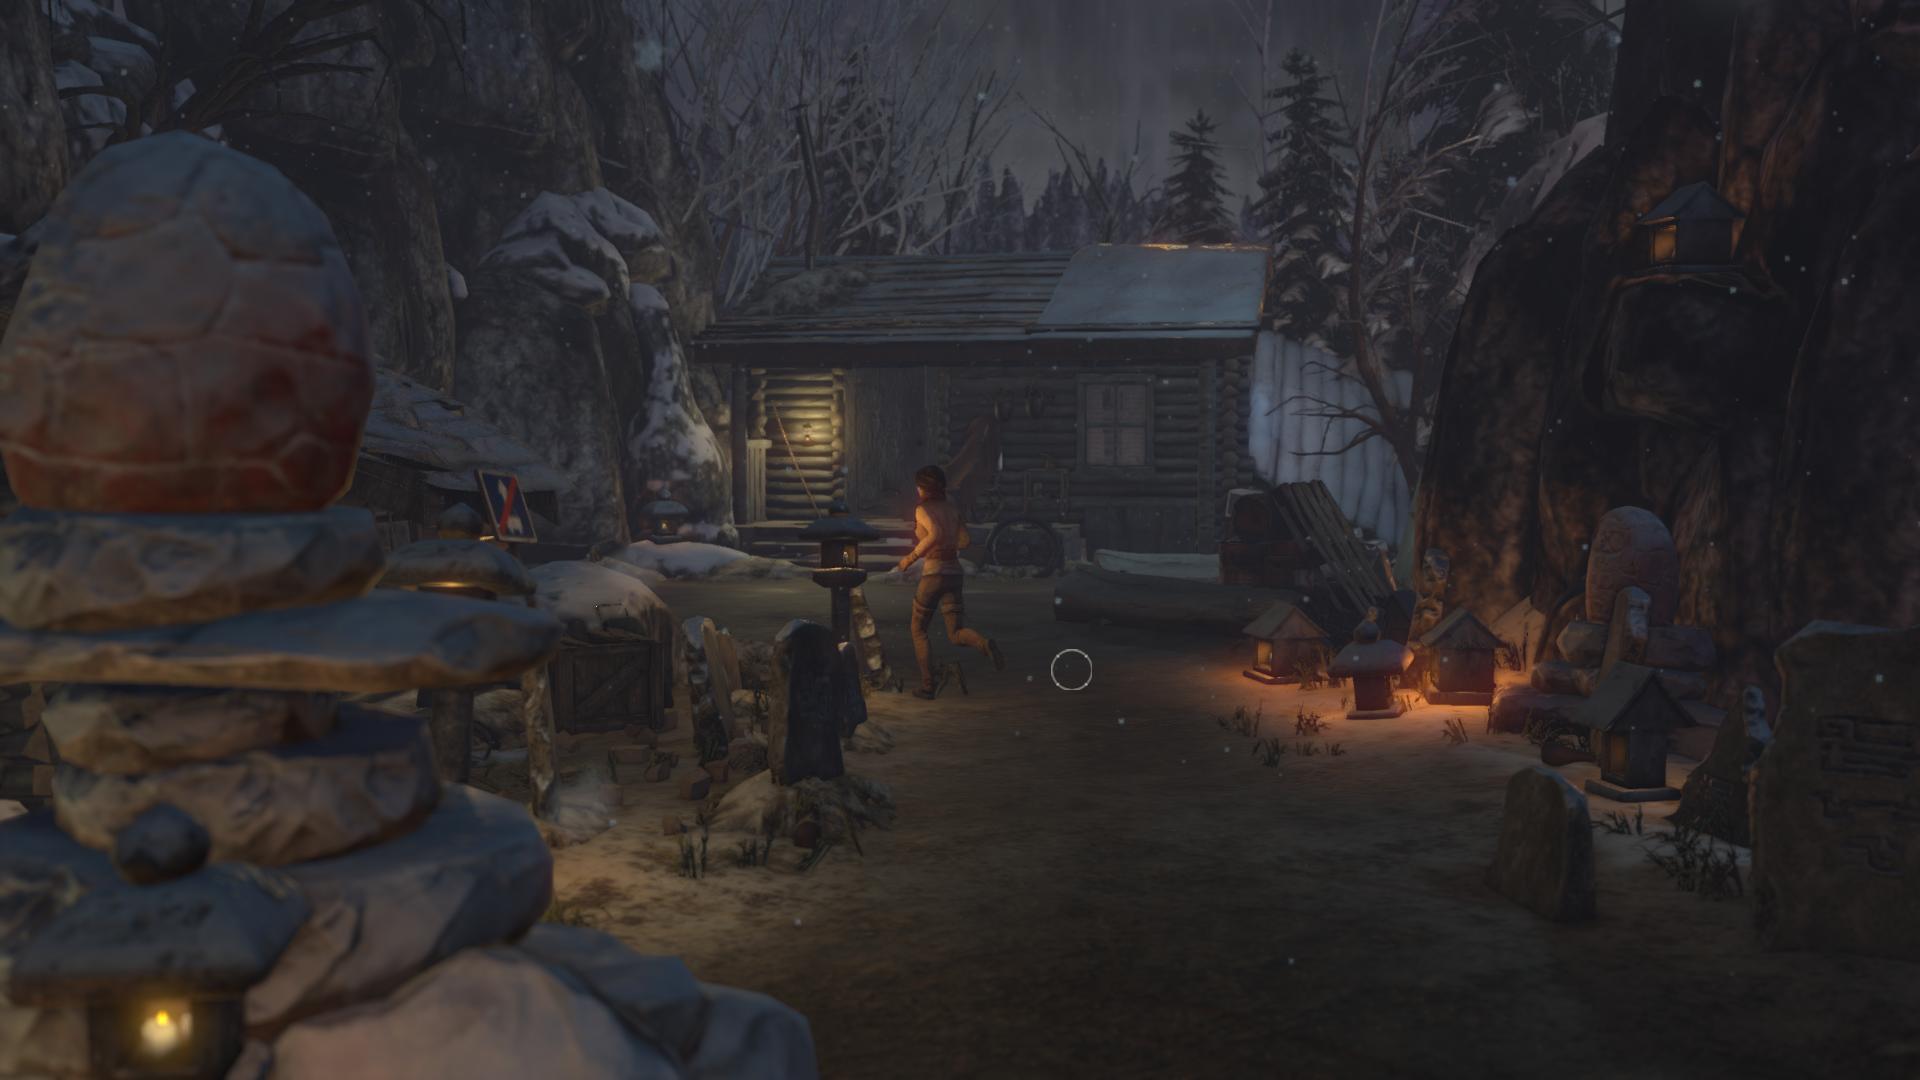
After the introductory video, chat with the guy in the hospital chair. Now you need to leave the room. There is no point in going to the right, to the balcony, so immediately go to the door on the left side of the screen.
To move, use the W, S, A, D keys. To inspect the invisible parts of the room, move the mouse cursor to the edge of the screen. Examine the door and then the red button to the right of it. The call is not working.
While in zoom mode, move the mouse cursor to the right side of the screen to see what is on the side. This is a schema.
But without opening the box, the bell cannot be repaired. Need a tool.
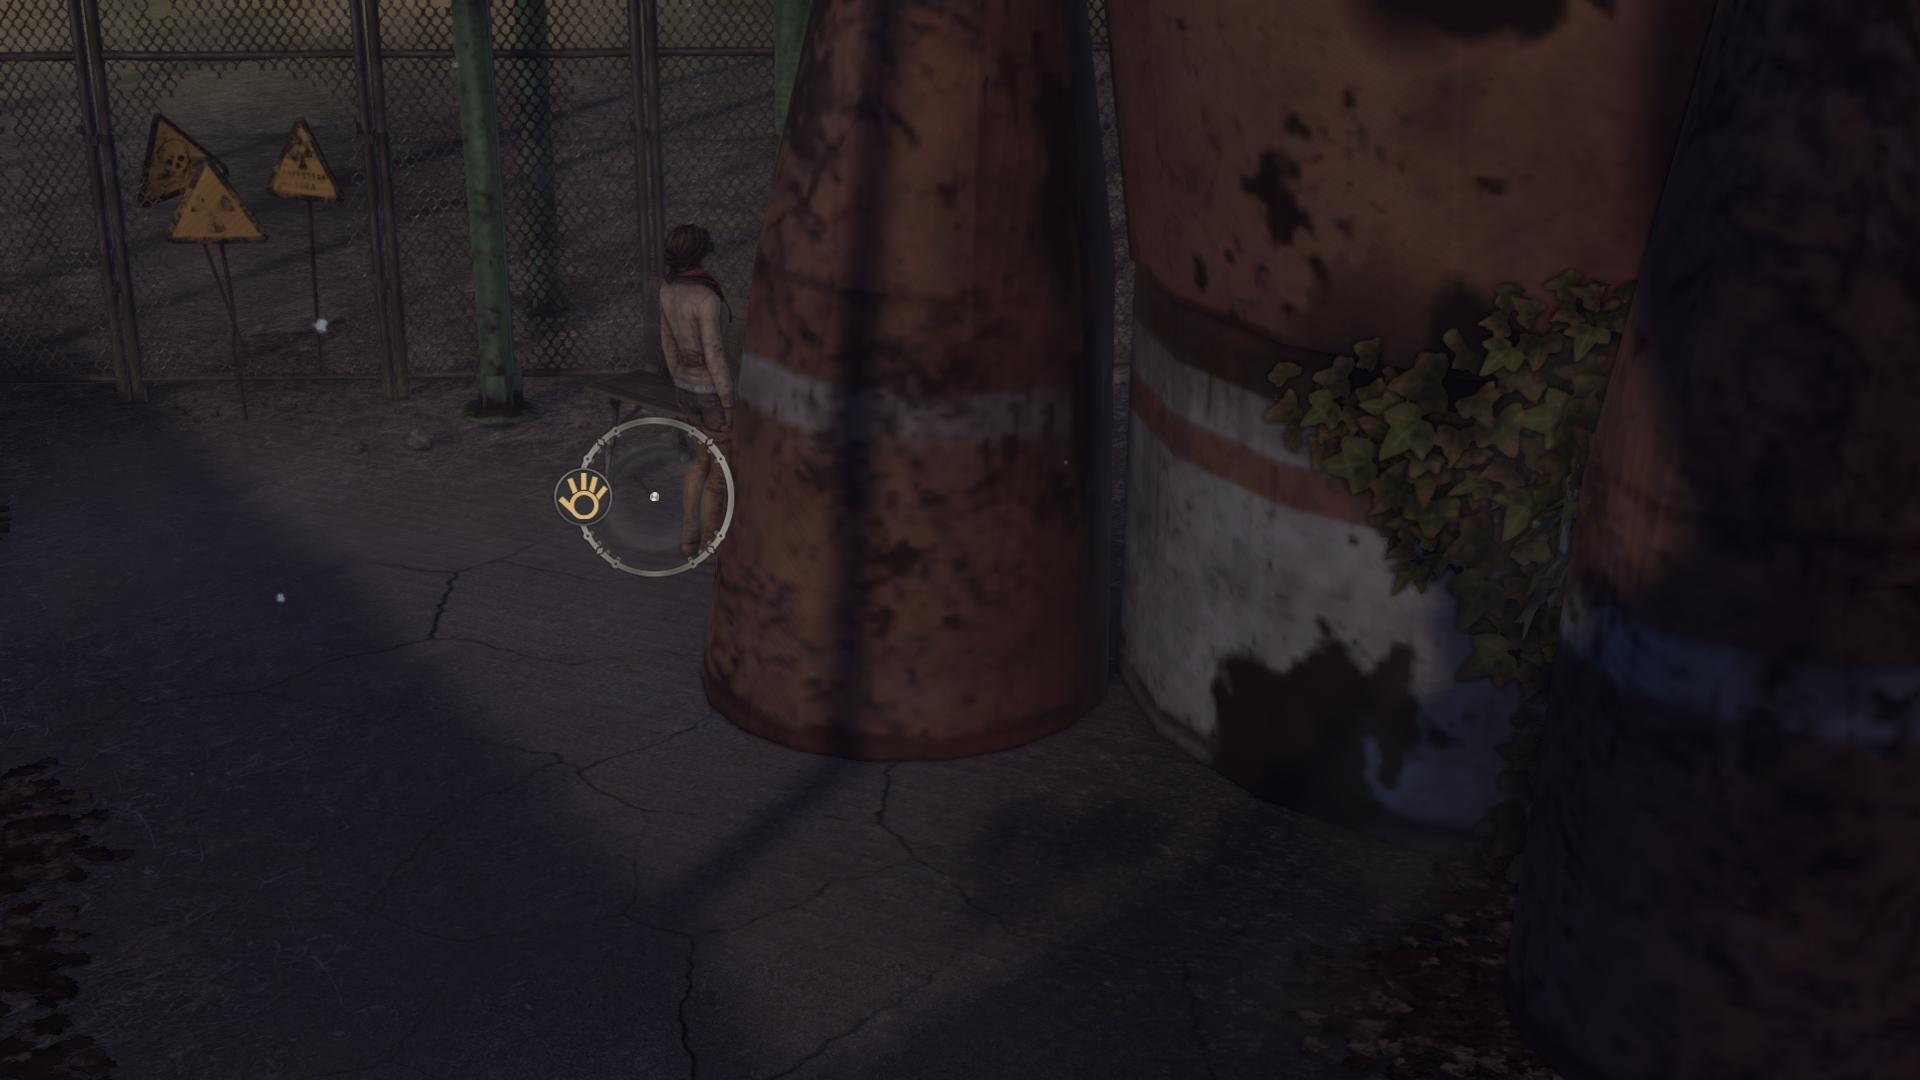
Go to the table in the center of the room that has a bowl of soup on it. Examine it and take the knife lying here. Return to the call and open inventory. Select the knife instead of Oscar's heart, and then click on the bolt. Move the mouse by holding the left mouse button in a circular motion counterclockwise. After opening the box, inspect the contents.
Pick up the green wire and, without releasing the LMB, move it to the hole in the upper right hour??And.
Next, pick up a cylindrical object, from which red and green wires come out, and, without releasing the LMB, lower it down. Close the lid, interact with that part of it into which the cylindrical object is immersed. Click on the red button to leave the room.
Take a look around. You need to go to the opposite part of the common hall to find the door leading to the doctor. Open it and watch the cut-scene. Answer the doctor's questions. If you want to get “ticks” everywhere, then in the first two, select the truth, in the third - half-truth (do not tell everything about Siberia and your trip, in the fourth - the truth. When you can remain silent, if you do this, the doctor will bite you (“cross In the end, you will convince the doctor that there is no point in keeping Kate.
Now you need to take your things and leave the floor using the unusual key that the doctor gave you.
After the interrogation, approach the metal locker while standing?mu in the corner near the window, and take Kate Walker's belongings from one of the drawers.
Follow the grated elevator and use the key from inventory on the hole on the side. You need to solve a puzzle. Everything is quite simple: move the mouse cursor over each point in the center in turn, hold down the LMB and move the mouse by turning one of the petals of the key. It is necessary to make sure that the petals of the key coincide with the slots.
Unfortunately, the key will not help you. Return to the doctor and talk to him. He will say that you are not yet healthy enough to leave the clinic. Examine the key in inventory and click on the hole on the handle to understand that something is missing.
Go to the doctor's office and interact with the chair to open the drawer. Move the books and other items to the left side to get to the red and white brochure. Scroll through the brochure until you find a page with the same key. Examine it to see what detail is missing.
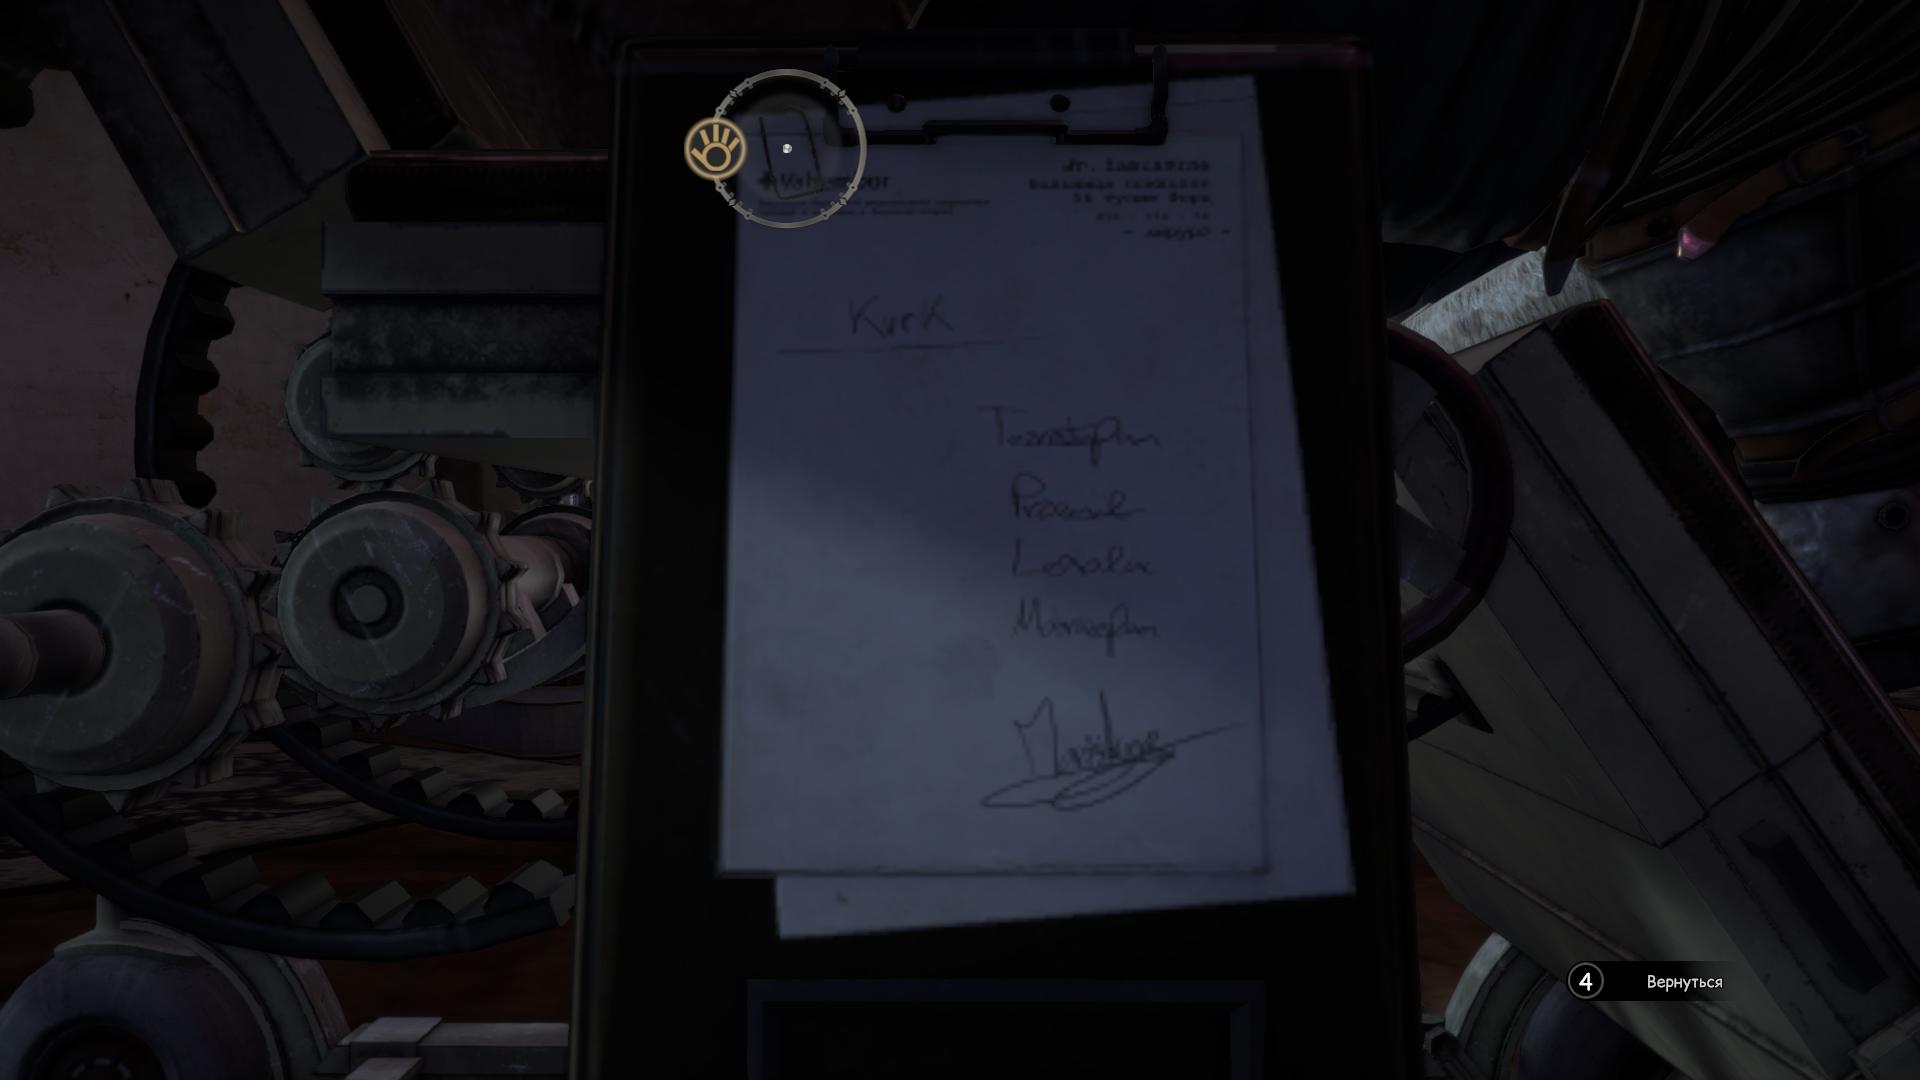
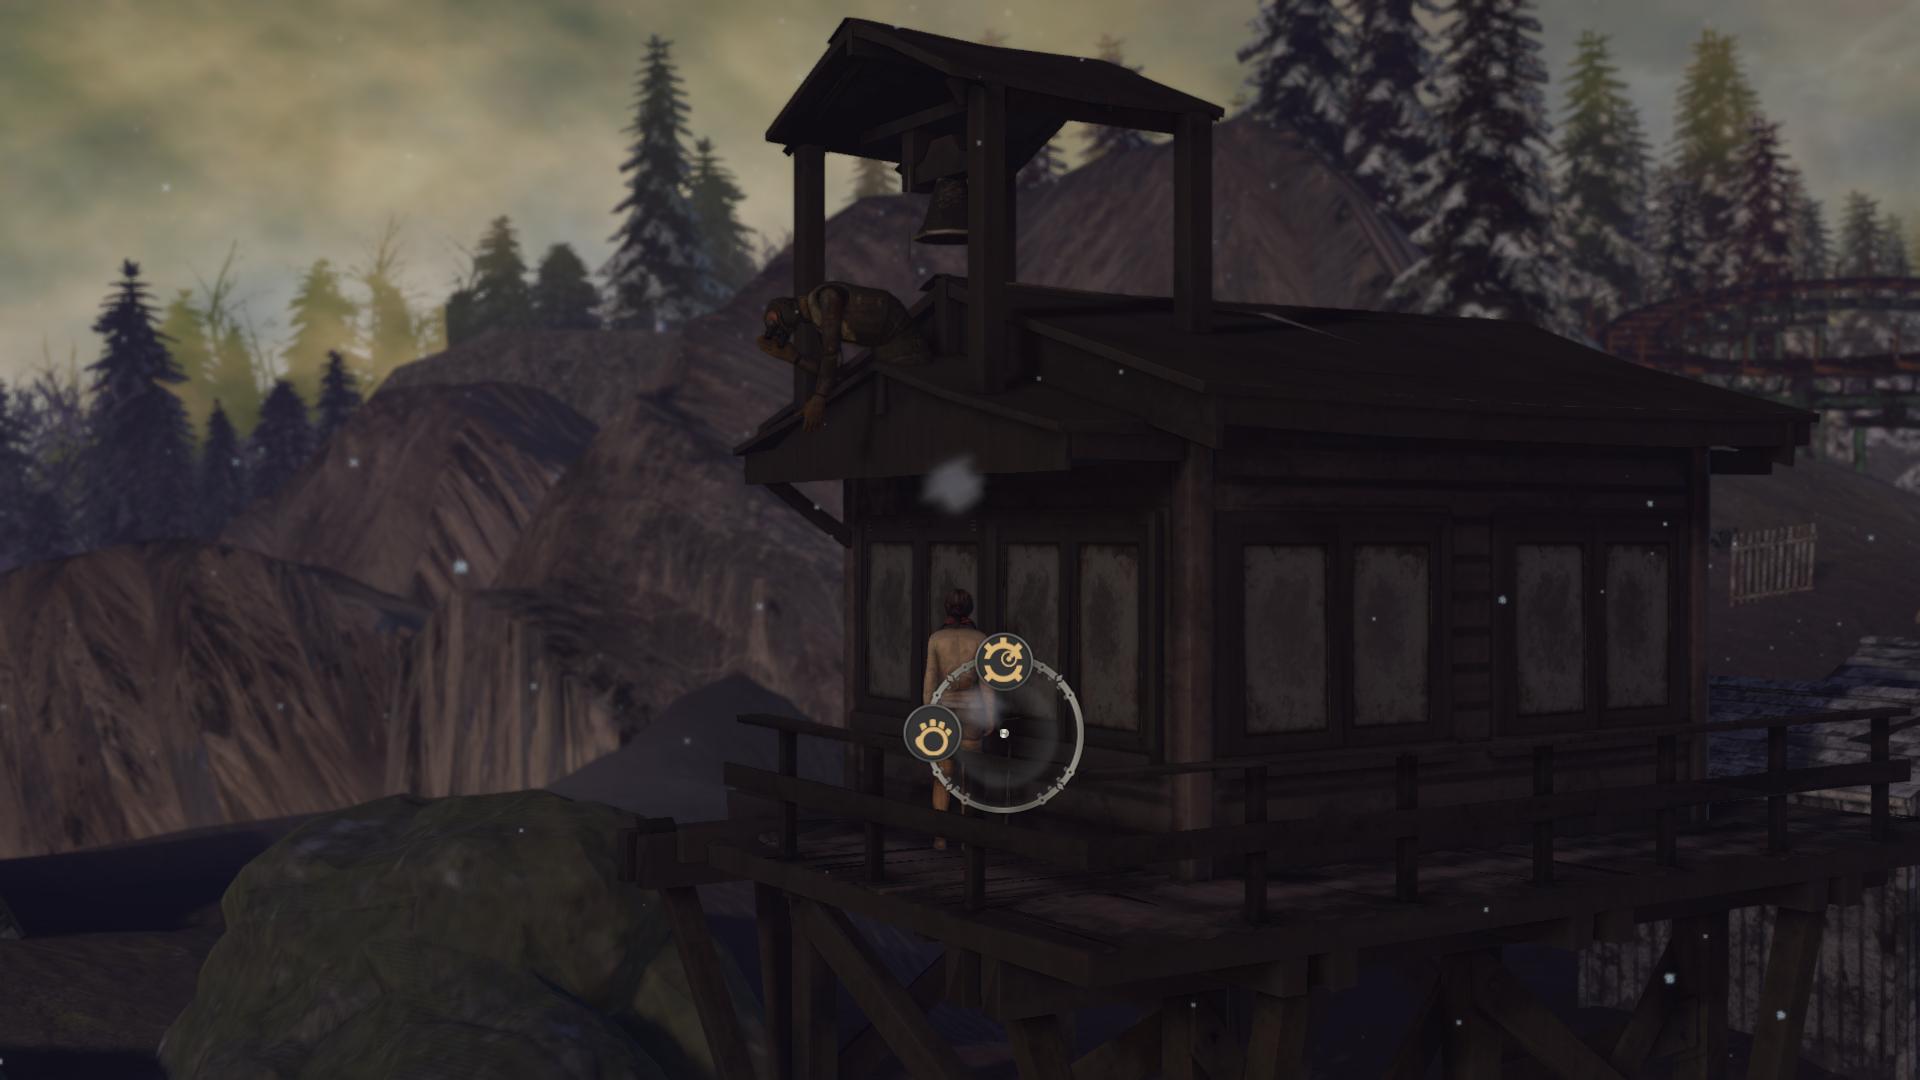
Run to your room where Kurk is. Talk to him. He will offer to send the key to the Yukol camp, to the blacksmith, who will complete the necessary part. During the conversation, you will need to apply a brochure from inventory to Kurk. Having done this, exit to the balcony (to the right of Kurk) and interact with the only act?? an outward point on the window bars. In the distance you will see a tower with an owl on its roof.
Try to lure the owl just by interacting with it. Nothing will come of it. Go back and tell Kurk about it. After talking with him, go out into the corridor and follow to the opposite corner, where the blue grate is located. Follow her. Previously, if you looked around this area, there were two men playing chess. Now there is only one man - Anton, and he fell asleep. Steal the key from his chest.
Follow the elevator and go to the left of it, deep into the screen. Approaching the window, turn left again. Plants make this passage difficult to spot. Use the key on the door to get inside the cage and pick up one of the mechanical birds. Run back to the room, exit to the balcony and interact with the window. Use the mechanical bird on the stand by the grate. By doing this, Kate will be able to give the key to the yukols.
Watch the video and chat with Dr. Olga Efimova. After the conversation, when control returns to you, take the key from the owl and, finally, activate the elevator. Get down to the first floor.
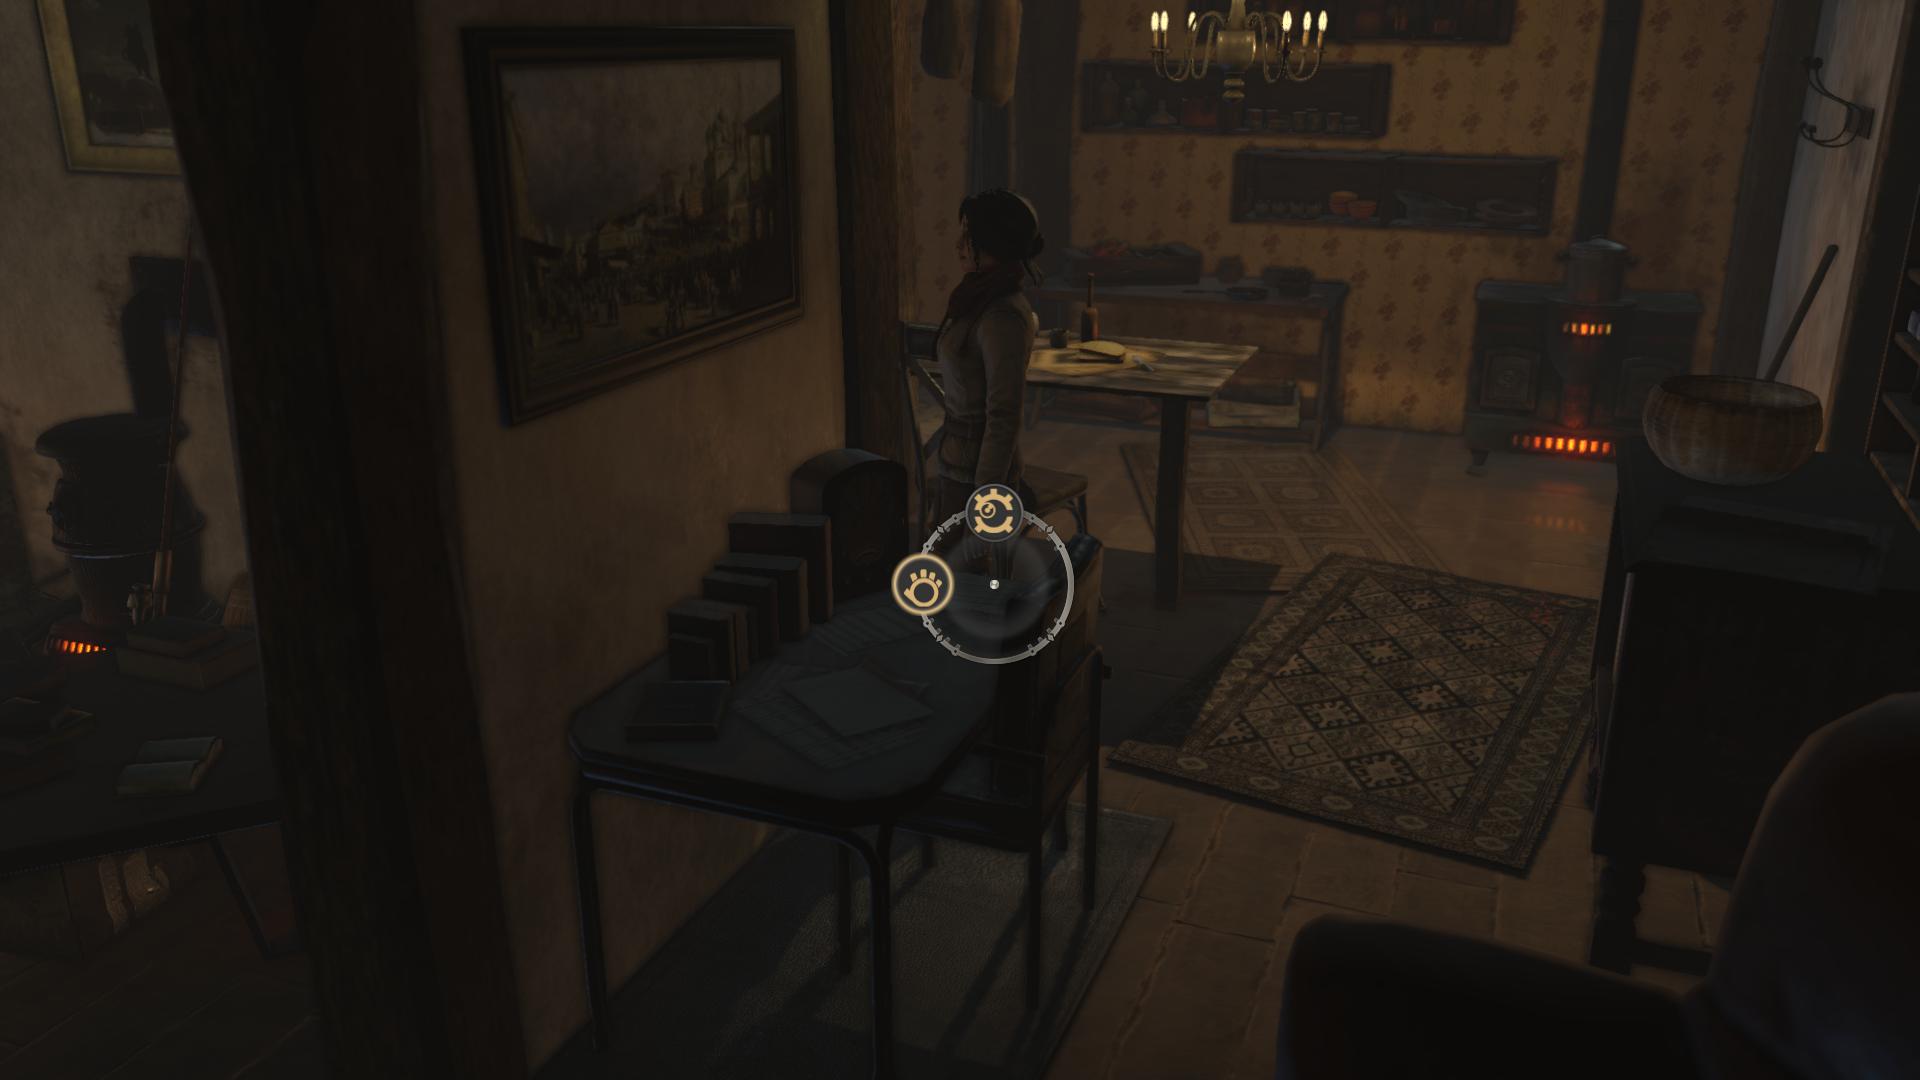
You can go outside through the main door, but you will not be able to leave the territory of the blade. In addition, in accordance with the current assignment, you need to talk with Dr. Zamyakin, head?? this clinic. Surprisingly, the elderly man turns out to be a good person. To find him, go into the corridor opposite the front door and turn left, where two women are standing. Enter the open office using the nearby door. Talk to Zamyakin. After opening the inventory, go to the documents section (J) and examine the book that tells the history of the yukols.
Having done this, go to another part of the corridor and enter Efimova's office by opening the door ajar. Watch the cut-scene.
We need to understand where Efimova has gone. Approach the wall on the right and pull the handle on the chain. You will open the curtain and see a shield with five colored stones. The color can be changed by turning the stones - red, green or blue. But here you can not do without a hint. Examine the sword in the hands of the knight on the right. The handle has three rotating rings with three locks. Move the locks to the left, and then rotate the rings so that you get the next pattern.

When you do this, you will be able to see the correct combination of colored stones at the end of the sword. Put exactly the same on the shield on the left. Enter the elevator and go down below.
After the cutscene, you will need to leave the hospital using the boat. Looking ahead, the boat will be tied to a chain. When control returns to you, then do not rush to go to the other side, but go to the left. Take out the empty canister from the wooden box.
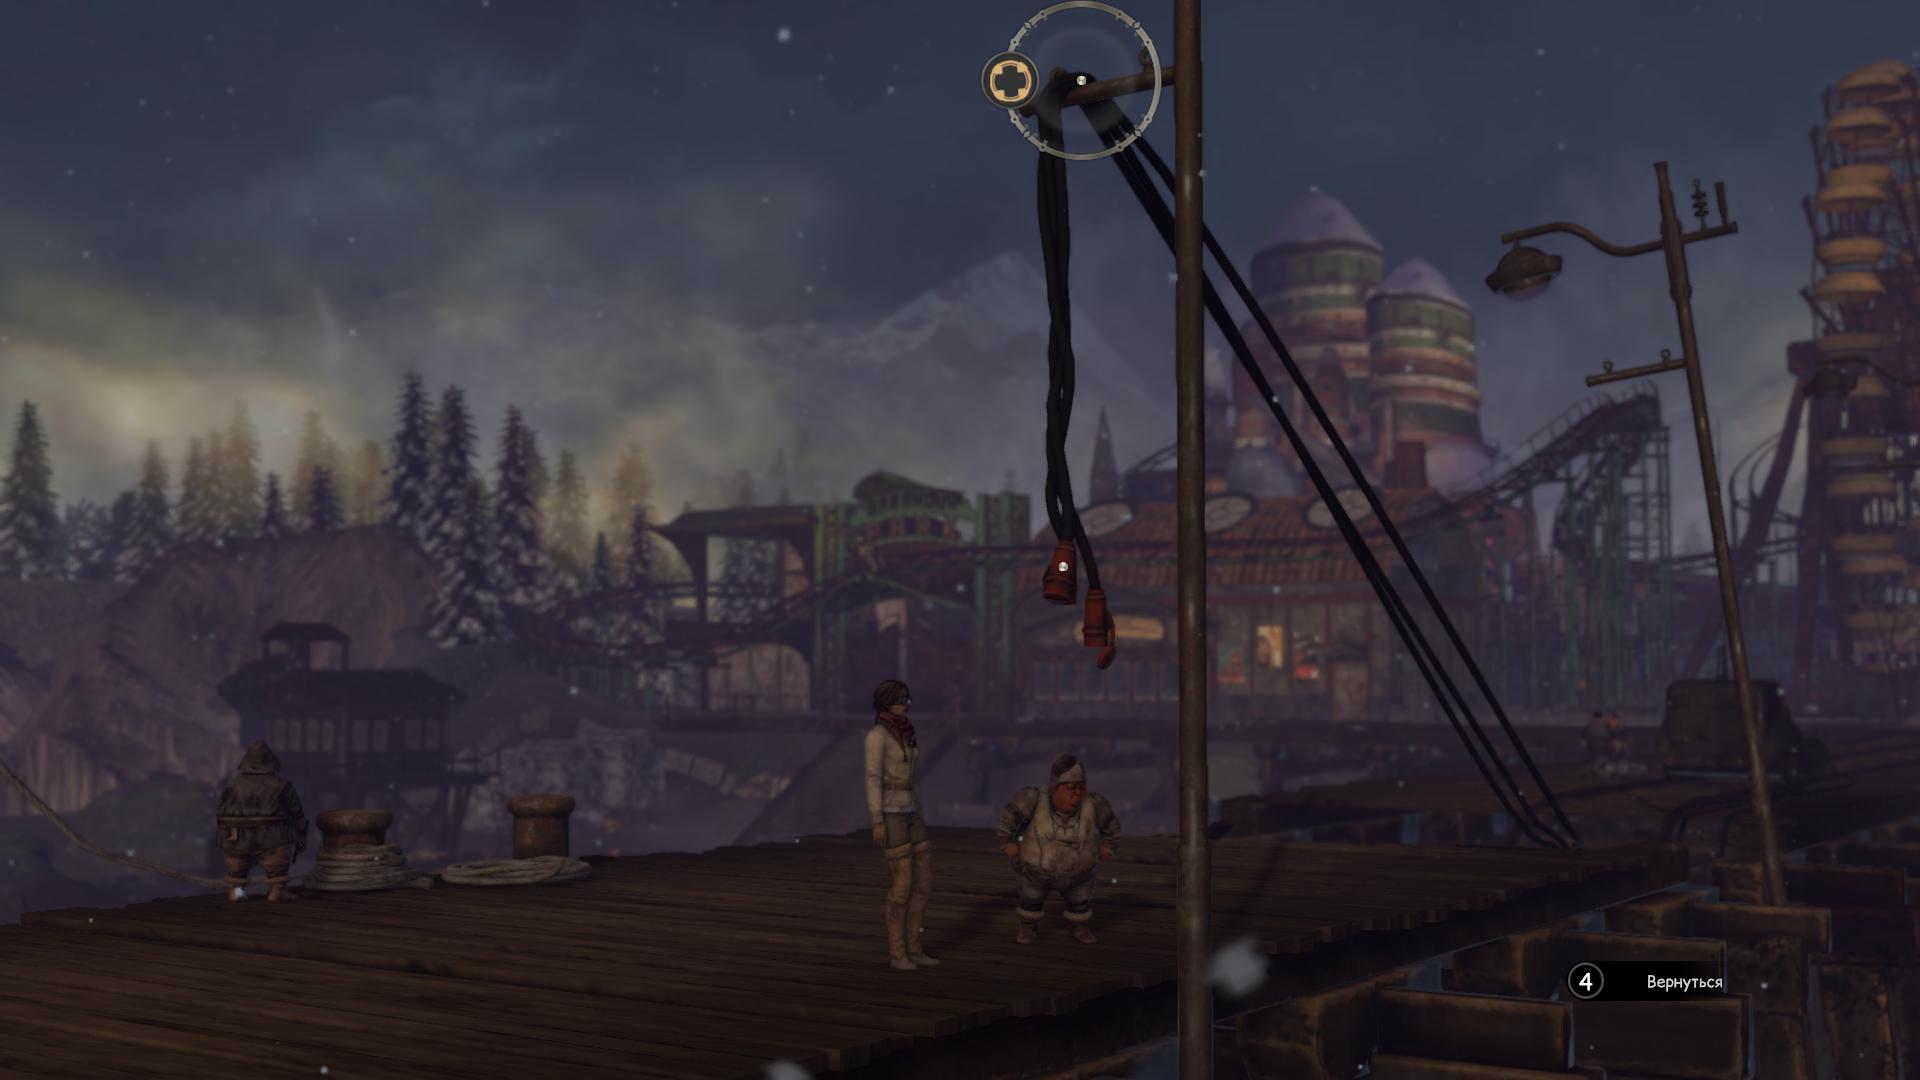
Go to the right side and use the bridge. Once on the other side, examine the massive door. To the right of it you will find a blue barrel. Use the empty canister from inventory on the barrel to fill it with hydrochloric acid. Run to the boat and use the hydrochloric acid canister on the chain. Watch the video.
Talk to the representatives of the yukols, go to the right and chat with the man standing next to the ostrich. After talking with the shaman, go right. Get through the forest to the dam. You need to make sure that the arrow is in the green zone. There are four valves:
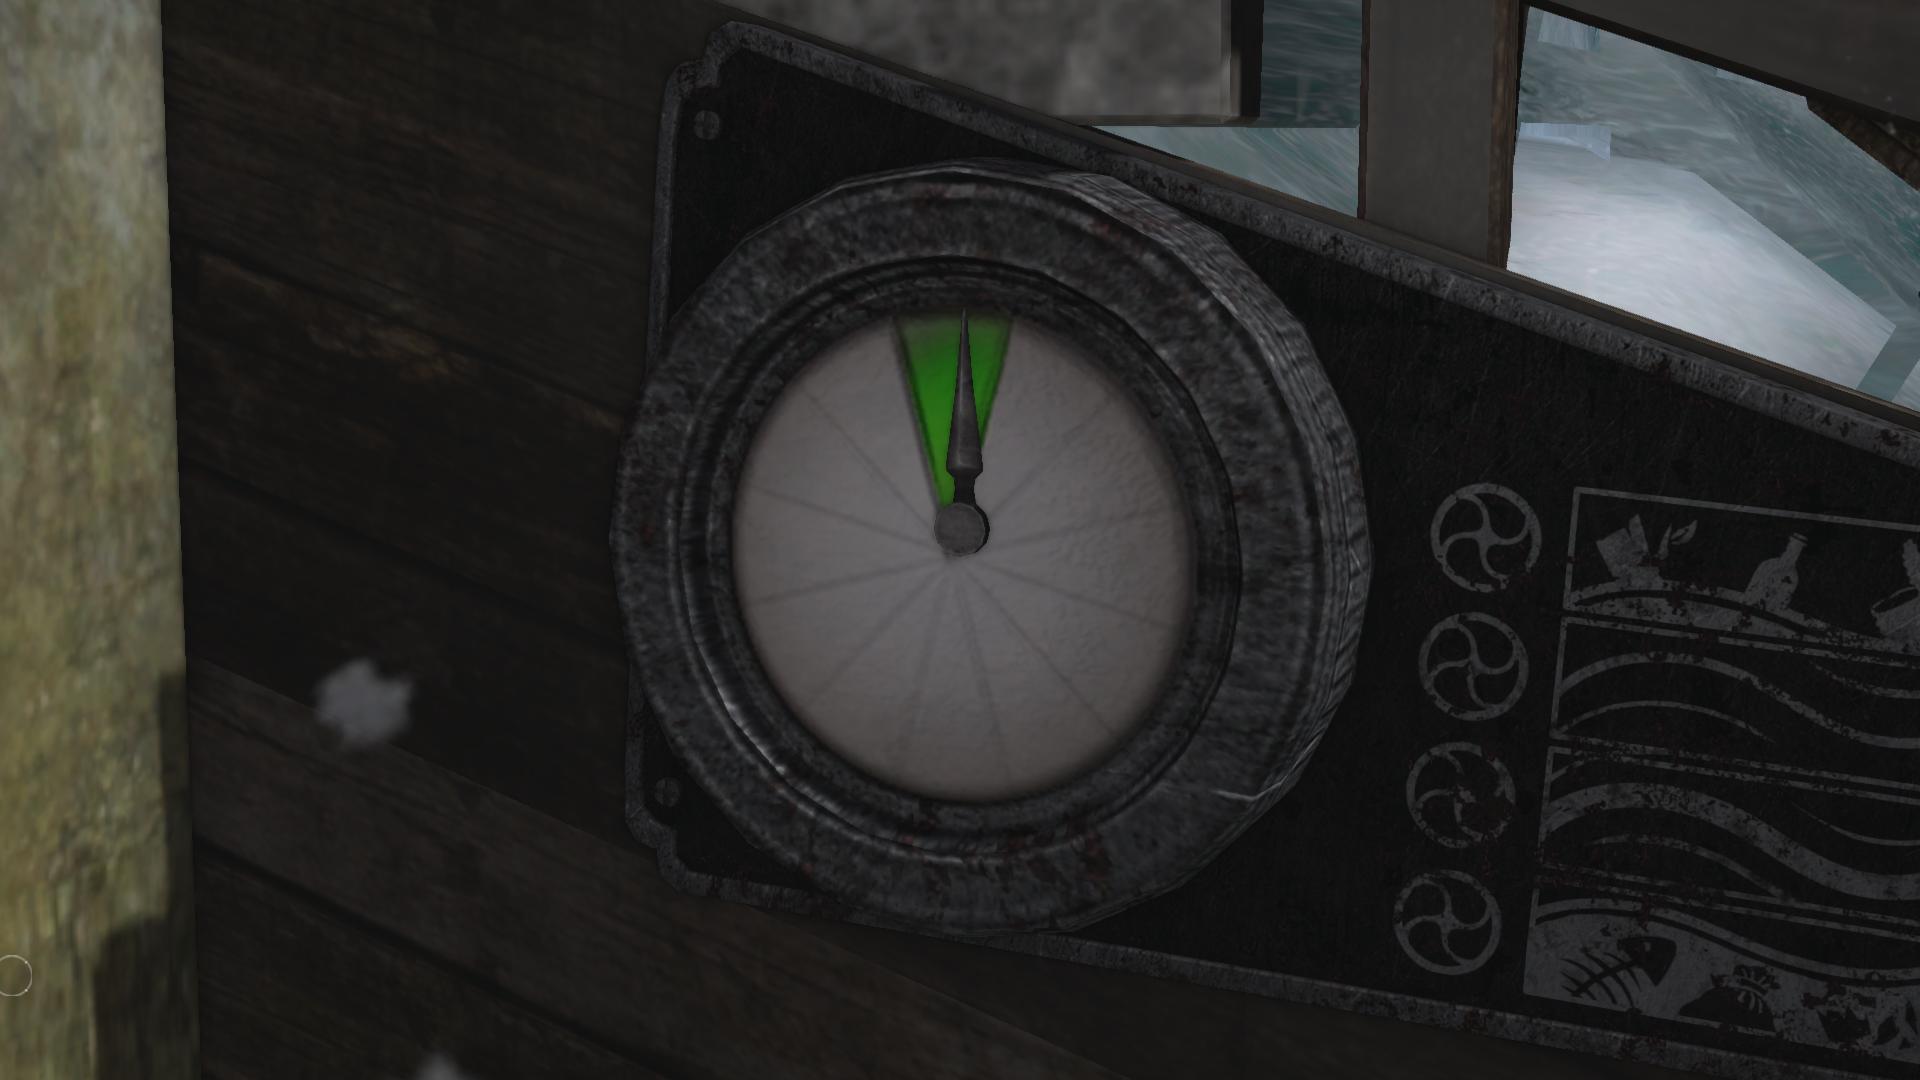
When the arrow is in the green zone, a cut-scene will start. The lower and upper valves should be closed for the reason that on the memo near the window with a green zone and an arrow, polluted water is depicted opposite them.
Go back to the place where you appeared, and then go inside the huge tent. This is the Yukolov Bazaar. Go to the far left corner to find a passage to the Ayahuasca shaman's room. Above the passage will still hang the skull of some animal. Talk to her about everything and find out that you need a pass to go to Valsembor.
Return to the main market hall and go right to find another exit from the tent. Exit, go left and approach the policeman. Talk to him. To leave the camp, you need to show him a pass with the seal of Valsembor. Enter inside the wooden hut on the right and examine the printing press on the table. Study it thoroughly. Take away??blyu sponge from the stand on the left, then move the two levers on the sides and pick up the stand for printing.
In order for the printing press to work again, you will have to soak a sponge in ink and find Valsembor's seal. The print stand you picked up seconds earlier has a sample print design. If you show it to a blacksmith, he will make a seal. Return to the market and note the ostrich-mounted yurt nearby.

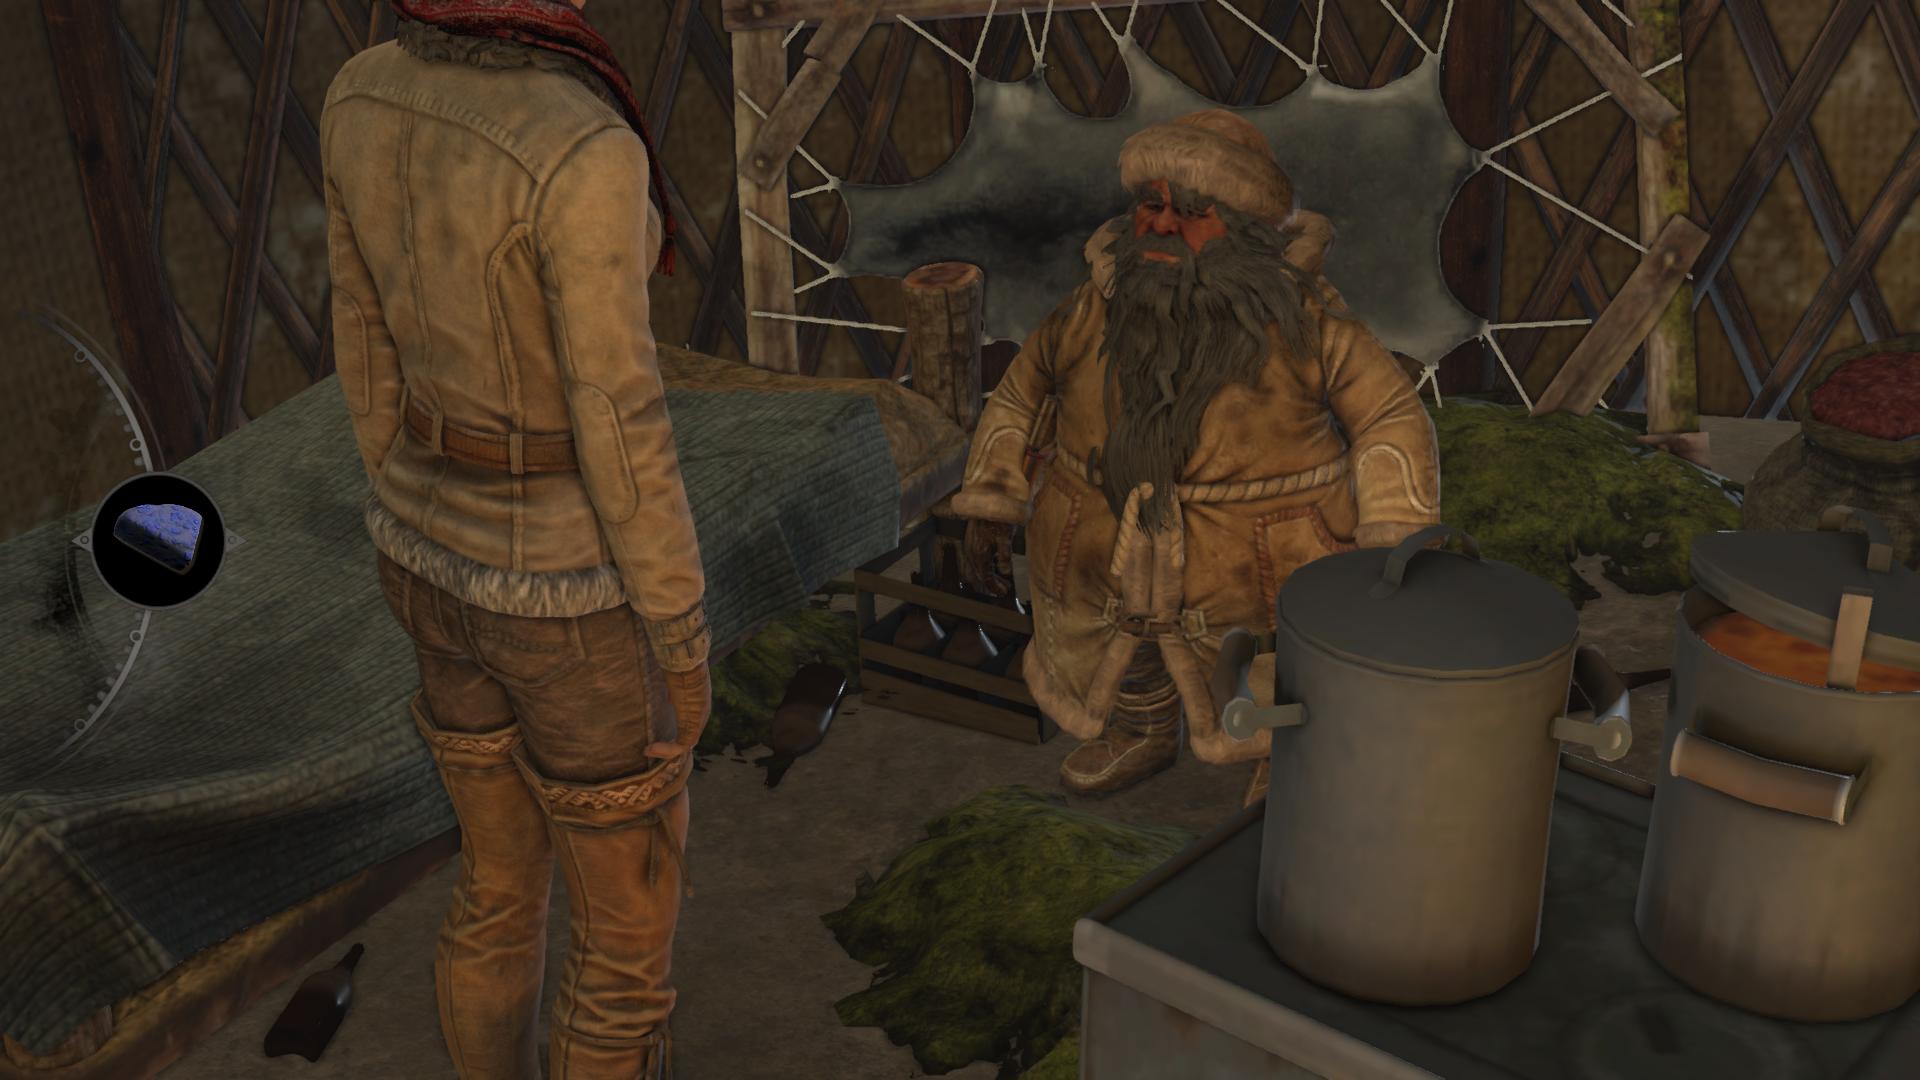
This is the only yurt you can visit. Use the stairs to get inside. Examine the open wooden box next to the passage, drag the items and find the candles.
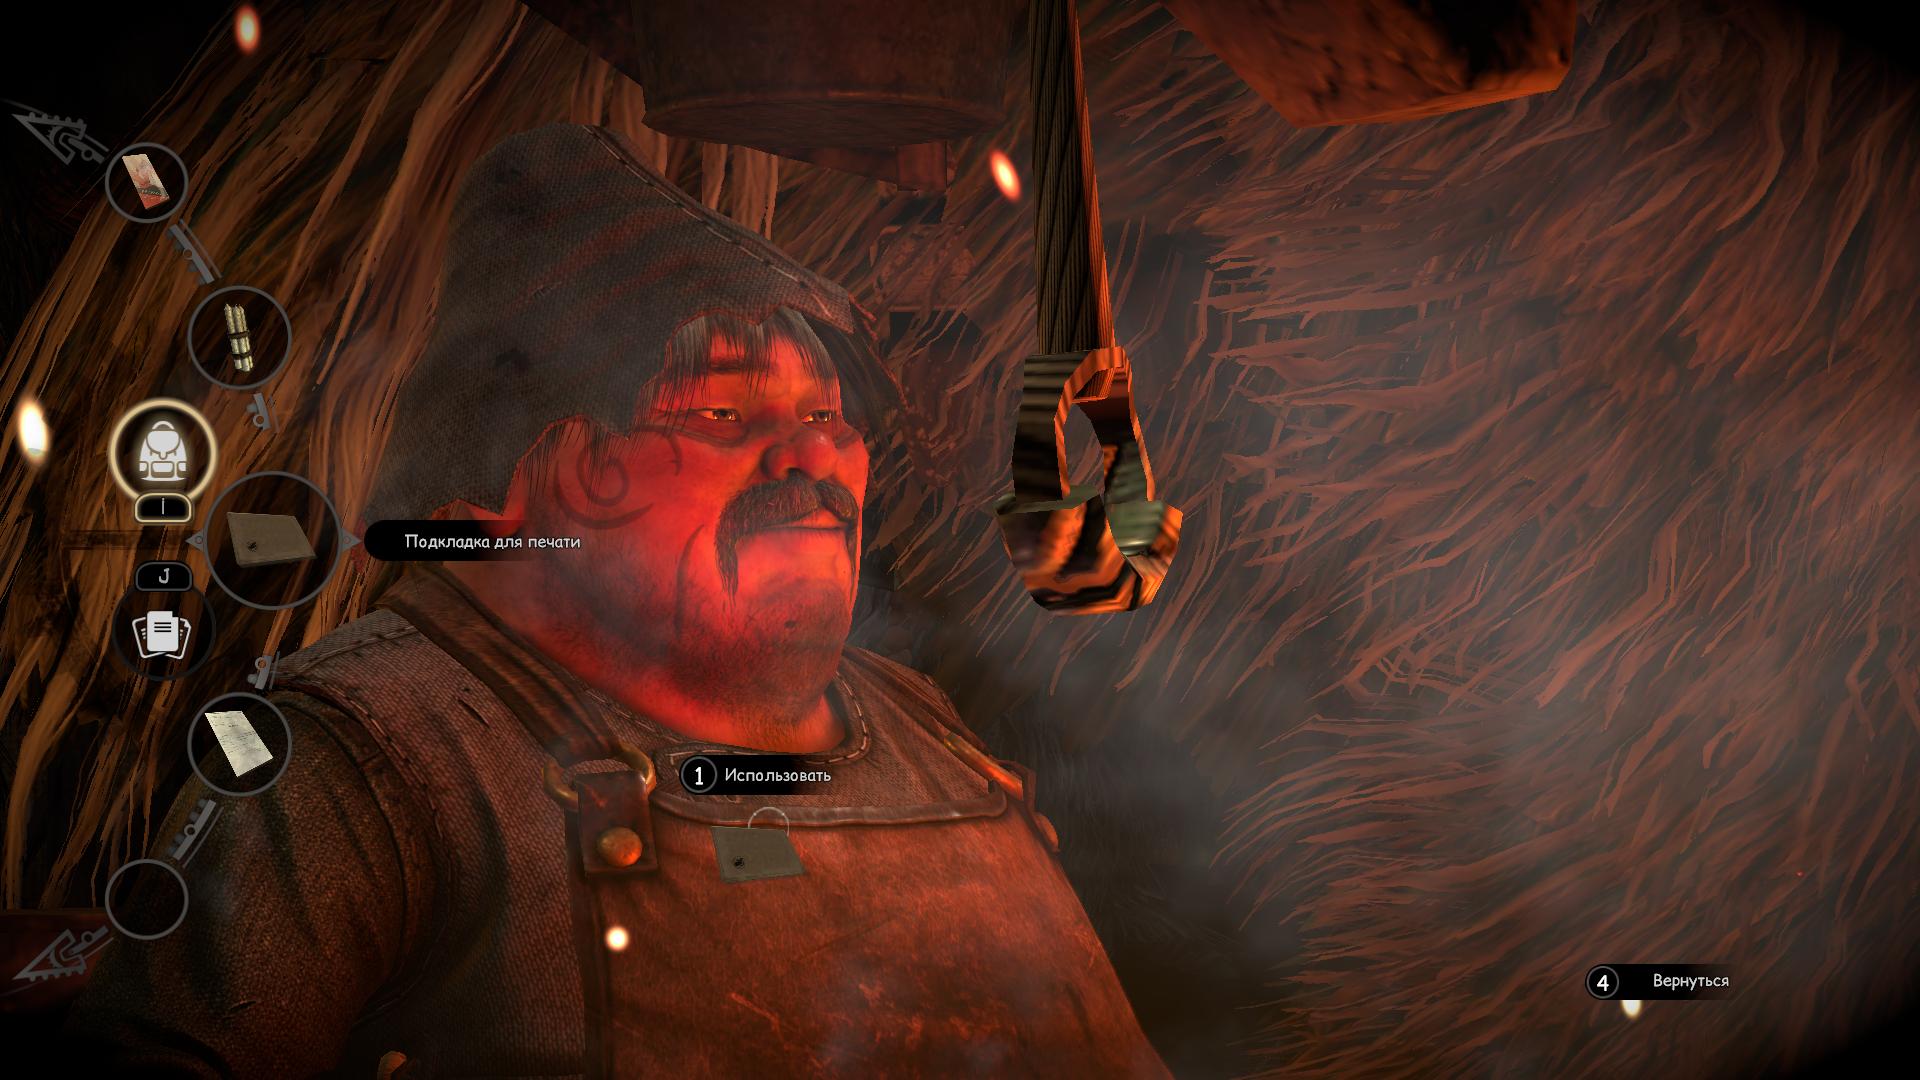
The candles will be needed by the blacksmith as a source of wax to create the seal. Climb down and go a little to the left. Turn towards the blacksmith, moving towards the bottom of the screen. Talk to the blacksmith and give him the print lining. Continue the conversation and pass the candles to the blacksmith. After a few seconds, the seal of Valsembor will be in your hands.
It remains to find a pass. Look around the bazaar and closer to the first exit, moving along the right path, find a man selling vegetables (he is not one of the yukols - he is tall with a black beard). Talk to him about everything and ask for a pass. He will give you a pass without a stamp.

Hurry back to the hut near the policeman and inside, examine the printing press again. The first thing you should do is raise the lever all the way. After that, enlarge the image and do a few things:
Once you've done that, get out of the zoom and push the big lever down to dip the seal into the ink. Raise the lever, move the sponge stand and lower the lever again to stamp the badge. Watch the cut-scene with the appearance of the detective. During the conversation, select the option with deception.
You will need to get out quickly. Click on the bottle on the shelf ahead. Push the cabinet to knock over the bottle. Throw the table lamp off the table to break the bottle. With the help of fragments, cut the plastic collar on your hands, go outside and give a valid pass to the policeman standing at the exit. Watch the cut-scene.
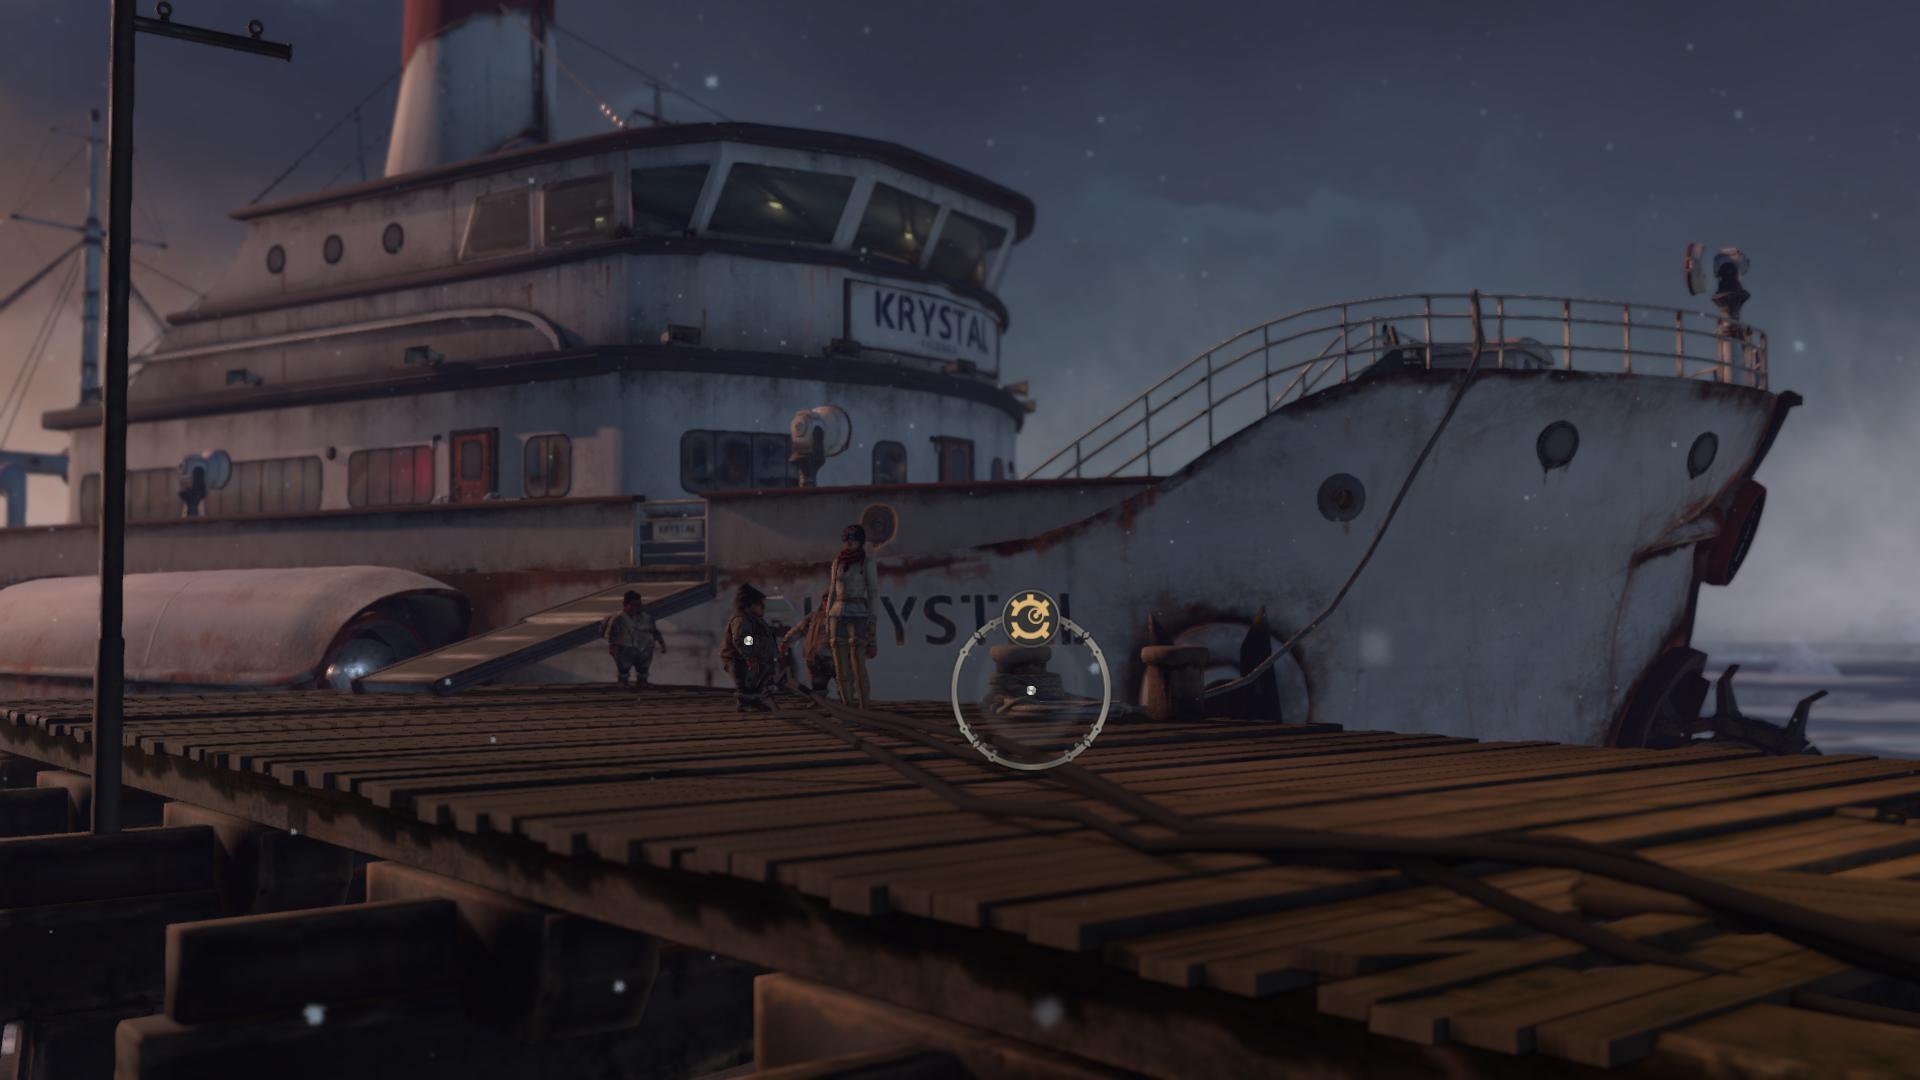
Ahead you see the stern of the huge ferry "Crystal". Go around it on the right side. Along the way, you will meet Captain Obo for the first time. After a short cut-scene go further and you will see a man sleeping on a bench. To the right of it is the entrance to the tavern. Go inside and talk to the waitress - a girl named Sarah. As it turns out, she is the granddaughter of the watchmaker you need to find.
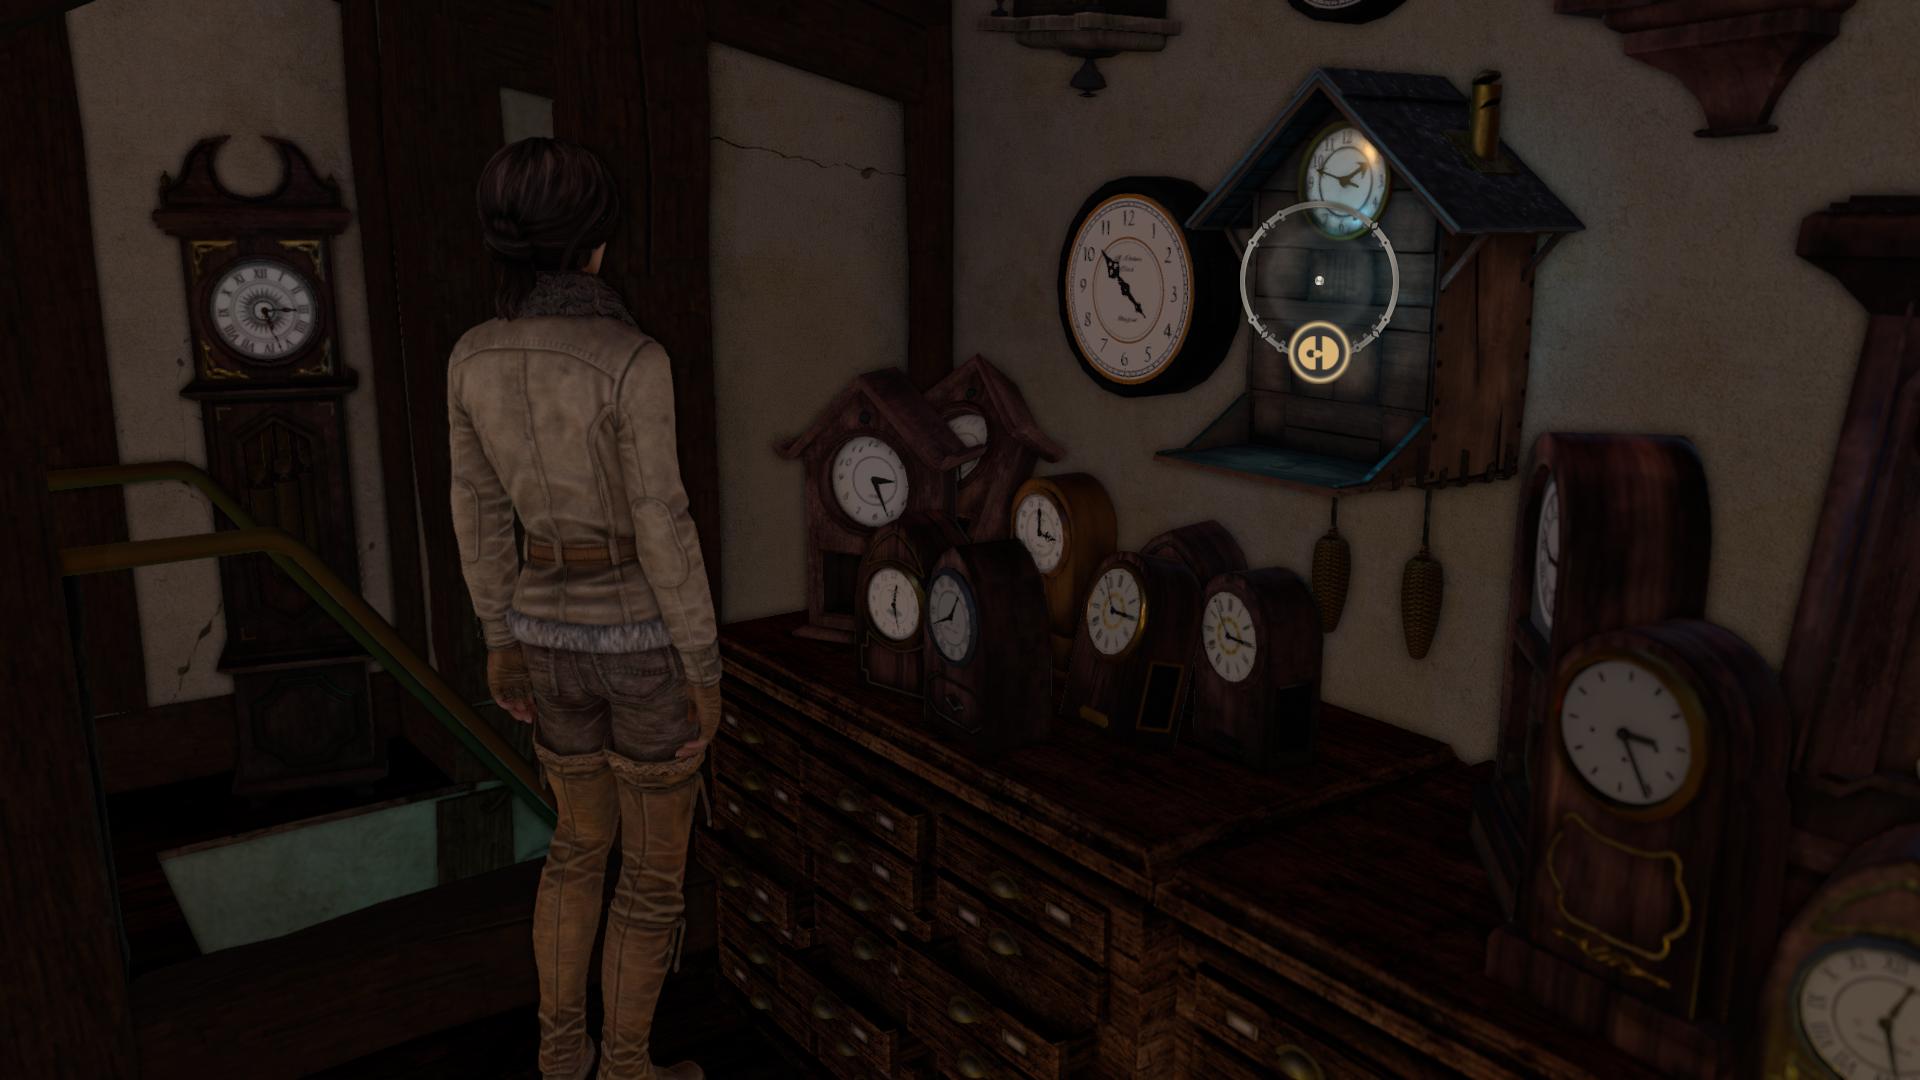
Go outside and go to the right of the bar. Turn left and after a few turns, just behind the steps you will find a watchmaker's shop. Go inside and chat with the man. Keep talking until he gets sick. We need to find a cure. Go to the clock on the right and take the empty cup from the shelf. Climb down if you wish to explore the basement. There is a prosthesis on the table. Examine the prosthesis and, staying close, click on the note hanging on the wall. It says that the watchmaker should drink the medicine 3 hours before dinner.
Climb up and approach the table with the clock to the right of the stairs down. There will be a cuckoo clock that you can interact with. Do this and place the cup on the clock shelf. Change the time to 05:00. Cup automaticand filled with medicine. Pass the medicine cup to the watchmaker. To do this, you will need to click on it, scrolling the mouse wheel to select the desired action.
Talk to the watchmaker, then go down to the basement. Chat with him again. You need to find a reel with a video about Baranur. Return to the stairs leading up and look into the cardboard box on the right. Rake all the trash to find the right reel on the left side. After picking up the item, install it on the projector near the watchmaker, and watch the video about Baranur.
After chat with Sarah and go to the tavern. Here, at the far left table, is a drunken Captain Obo. Talk to him and then to the bartender (the same man who gave you the pass). Go back to the captain and wait for Sarah to bring him a sobering cocktail. Continue the conversation with Obo. Convince him that he should help you transport the yukols across the lake. A man, in the end, must agree.
Go back to the place where you first met the drunk Obo. On the left at the pier, find the passage to the Crystal ferry. After rising, go inside through the side door, and then climb to the very top of the stairs. Talk to the captain to find out the next objective is to fill the ship's bunker with coal. He will give you the password - 0509.
Climb down and find a rotating valve next to the door that opens a bunker with a white metal roof (next to the valve). Then leave the ship.

Go to the gate opposite him and enter the password 0509 on the electronic panel to the left of it, on the wall. Inside, pull the cart out from under the ceiling and push it by the rail switch lever (boom). Turn this lever, because after filling you will still need to drive the cart out of the hangar.
Find on the side, inside the fenced area with the door ajar, a gutter. To the left of this place, find a metal pipe leaning against a wooden box. Taking the pipe, will it knock?? through all green pipes. In one of them, the sound will be muffled - this means that there is coal inside. Move the cart so that it is located opposite the desired pipe. When interacting with any pipe that the minecart is in front of, two options will appear - you need to select the "magnifying glass" icon on the pipe with a muffled sound and apply a chute along which the coal will roll into the minecart. Next, press the button on the side to start the procedure.
You will not be able to push a full cart. Approach the transport located here (it looks like an ATV) and inspect it. Using a knife, pry off the upper left green button and place it on the lower right hole. Having done this, click on the installed button. Watch the cut-scene.
Go to the crane and find the electronic panel on its support on the left side. Enter the same code - 0509. After that, climb to the top of the crane. With the help of small buttons on the monitor, you can switch the image to understand what and how to do. Lever rotating?? in a circle, will allow you to turn the crane boom. In order for the crane boom to turn 90 degrees, it is enough to turn the lever through the same angle.
The lever on the right rotates the platforms clockwise. If there is a crane on these platforms, then you will change the direction in which it will move when using the lever on the left. There is no need to move the crane now. Rotate the boom so that it is above the coal cart. Then click on the top of the two big black buttons. The crane will grab and lift the coal cart. Next, move the crane all the way forward, then use the vertical lever on the right to rotate the platform. Move the crane again using the lever on the left, closer to the ferry. And turn the platform again so that the crane can now be moved one position to the right, towards the bow of the ship.
Rotate the arrow so that it is positioned over the open bunker on the Crystal, and then press the lower of the two black buttons. Ready!
The captain will give you a new task - to take care of the water. Climb the "Crystal" and find the hose next to the bunker. Turn the red lever and then move the hose into the enlarged hole. Turn the red lever back and go down. Climb up to the large water tank and turn the valve to fill it up.steam it.
Go to the captain and talk to him. He lost his key, so you'll have to make a duplicate of it. Run to the watchmaker's workshop, but he won't be there. But Sarah will be here. Talk to her and let her know that you need to inspect the Crystal model in the basement. The girl will give you a handle.
Climb down and use the handle on the hole on the side of the layout. Turn it to remove the protective grid. Turn on the light with the switch to the right of the layout. Now study the information on the plate and remember a few basic numbers - 80 robots, 30 years, 60 meters. You need to put these numbers in the correct order on the device on the left. If you have chosen the correct number, then the anchor will go down. If you make a mistake, it will go up.
And the sequence should be: 30, 80, 60, 90. Pull the fully lowered anchor and pull the key out of the secret compartment on this model. You will have a smaller copy of the ignition key. You have to make the right key. To do this, go to the device located on the table on the left. Look under the table, into the jar to get the workpiece. Inspect the device directly. There are two compartments here. Open the right compartment and place the workpiece in it. Open the left box and place the sample key there. Don't forget to drop ba white toggle switch to pinch the key with needles.
After that, set the desired percentage - 200%. Click on the red toggle switch to start the device and generate the correct key.
Return to Captain Obo and use the key on the hole. The captain will say that you need to get permission to open port locks from the mayor of the city. To find the mayor, go further from the watchmaker's workshop and go up the stairs to the square with the protesters. The mayor stands on the porch of the town hall. Approach him and chat about yukols and castles. You must flatter the mayor, show respect and in no case put pressure on him. In the end, he will give you consent to open port locks.
Run back to Captain Obo and report that the locks must be opened manually. Follow the indicated place - to do this, return to where you first appeared on the location, and from the stern of the "Crystal" go to the left. Follow to the very end, where Obo will be waiting for you. Go inside the barn and take the diving suit hanging on the hanger on the right. To the right of the bottom of the hanger, find the oxygen cylinders.
In the far left part of the room, take the diving helmet from the table, and then inspect the device on the left. First select the pressure by turning the toggle switch to 180 bar, thenclick on the green button. Examine the right side of the device and install the cylinders here. Lower the metal bar, then fill both cylinders in turn using the two red tumblers.
Everything is ready - enter the room and interact with the active point to change clothes.
In this part of our walkthrough, we will consider several game locations at once. You will learn how to open underwater locks, save Kurk from the hospital and deal with the monster.
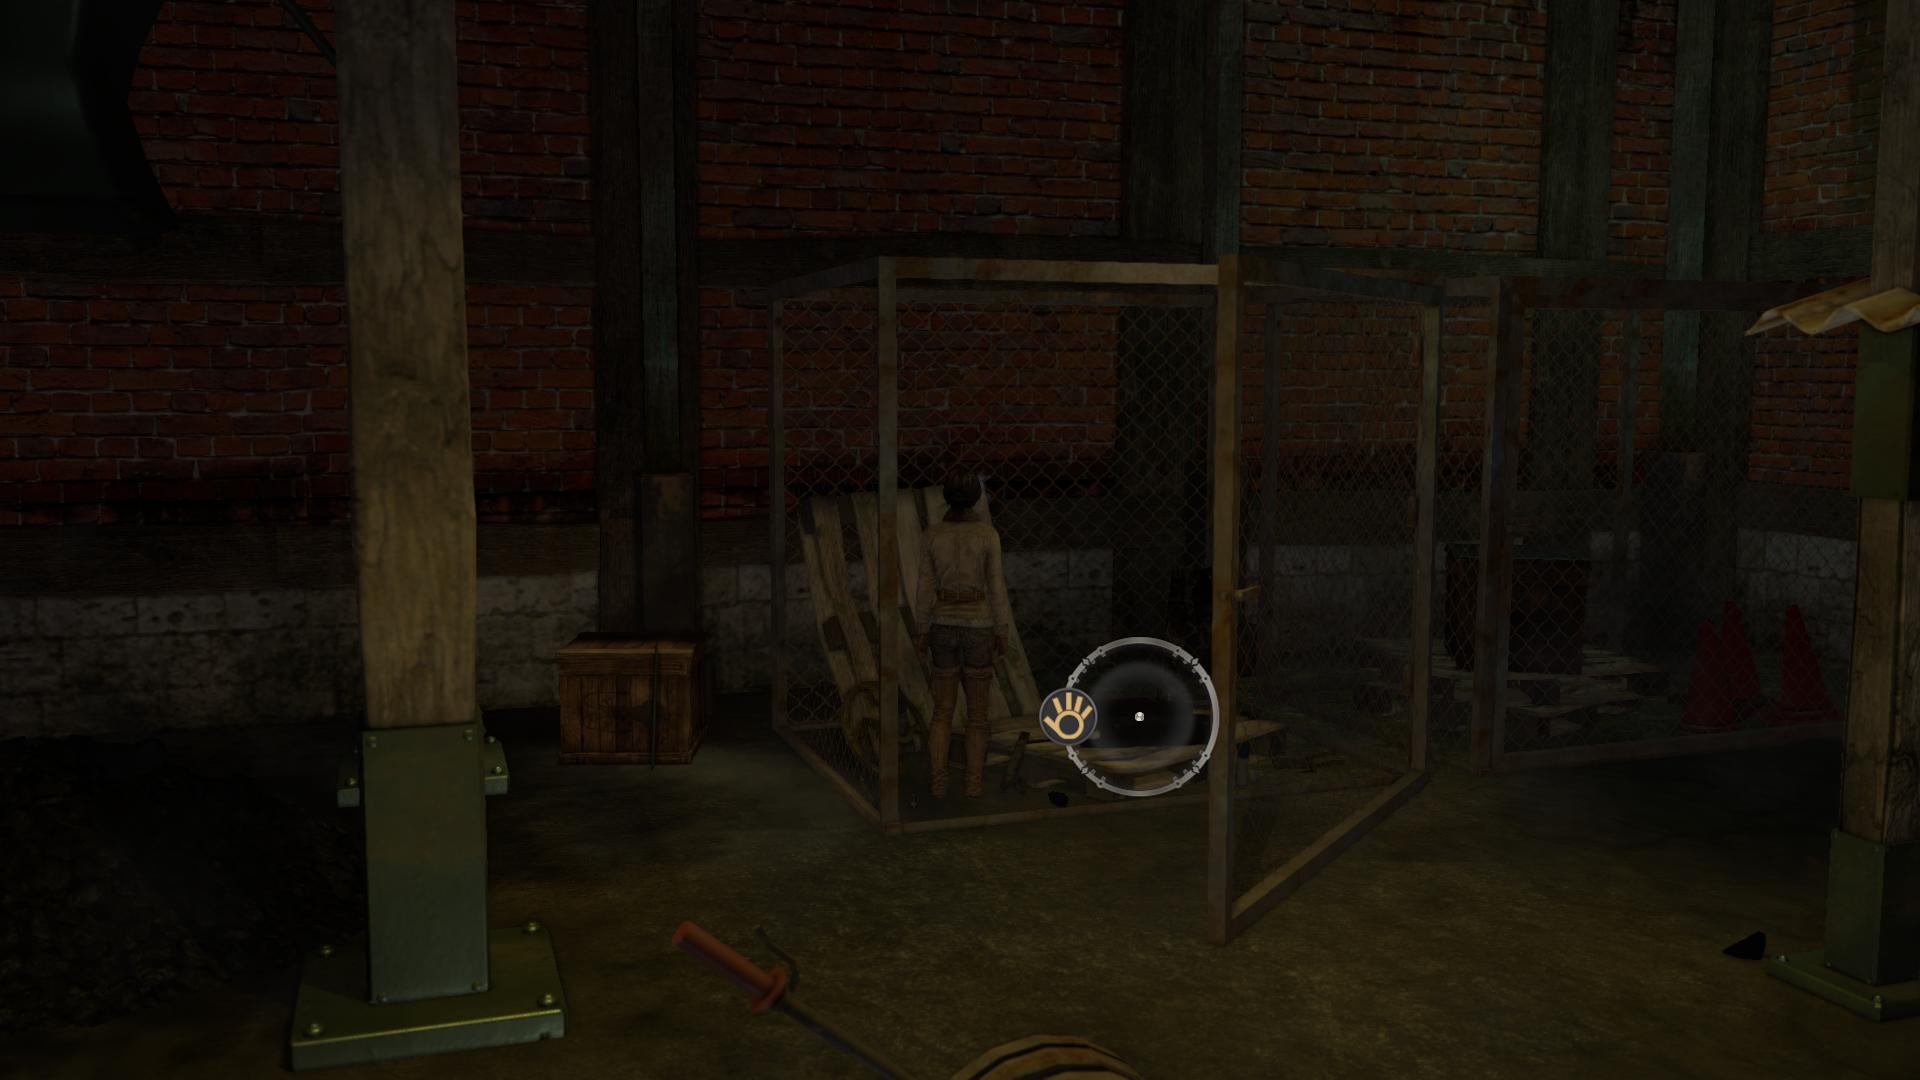
After you change into a diver suit in the last chapter, you will automatically find yourself under water. There are two locks here that you must open. First, go right and stop near the first castle. Pick up a large gear from the ground. Just to the right of the red valve, pick up the square key.
Together with this key, move to the right, along the wall, to find the second underwater castle. Insert the key into the hole and turn clockwise. Having done this, open the huge door to see the mechanism. Turn the red valve counterclockwise until it stops. Next, lower the lever on the left to open the first airlock.
If you were careful and looked aroundmechanism of the first lock, you could notice the missing gears and chain. The gears are next to the lock itself, but the chain is in a different place. As soon as you open the far lock, then go in the opposite direction and turn left to go beyond the port waters. Find a sunken ship there. There is a chain in the middle of it - take it.

Go back and inspect the mechanism of the first lock. Pick up the stepped and regular gears from the floor. There are three stocks. Install a large gear on the upper left rod, a regular gear on the upper right rod, and a stepped gear on the lower rod. Find the interaction point on the side of the red valve and attach the chain to it. Turn the valve fully clockwise and then lower the lever. Both port locks are open!
After talking with Captain Obo in the camp, talk to the shaman Aiyavaska, who is still in the same place. Returning to the location and after talking with Sarah, go to Steiner's workshop. go faraway from it, to the right, and you will see a staircase leading up to the square in front of the town hall. There is a railing to the left of the stairs. Now the door is open here - go there and get a wedge from under the cart. You need to get a total of 3 wedges - pick up the missing ones.

Climb up the same step ladder and go forward to the funicular house. The door inside is closed. Examine its lower part to find points of interaction. You can put wedges under the door. You have three wedges - one small and two large. Proceed as follows:
After these manipulations, the door should fall.
Go inside and turn left towards the bottom of the screen. on stOn the right, find the electrical panel. Open it with a knife, and then lower the knife switch. Call the funicular and go inside it. Interact with the control panel in the front.
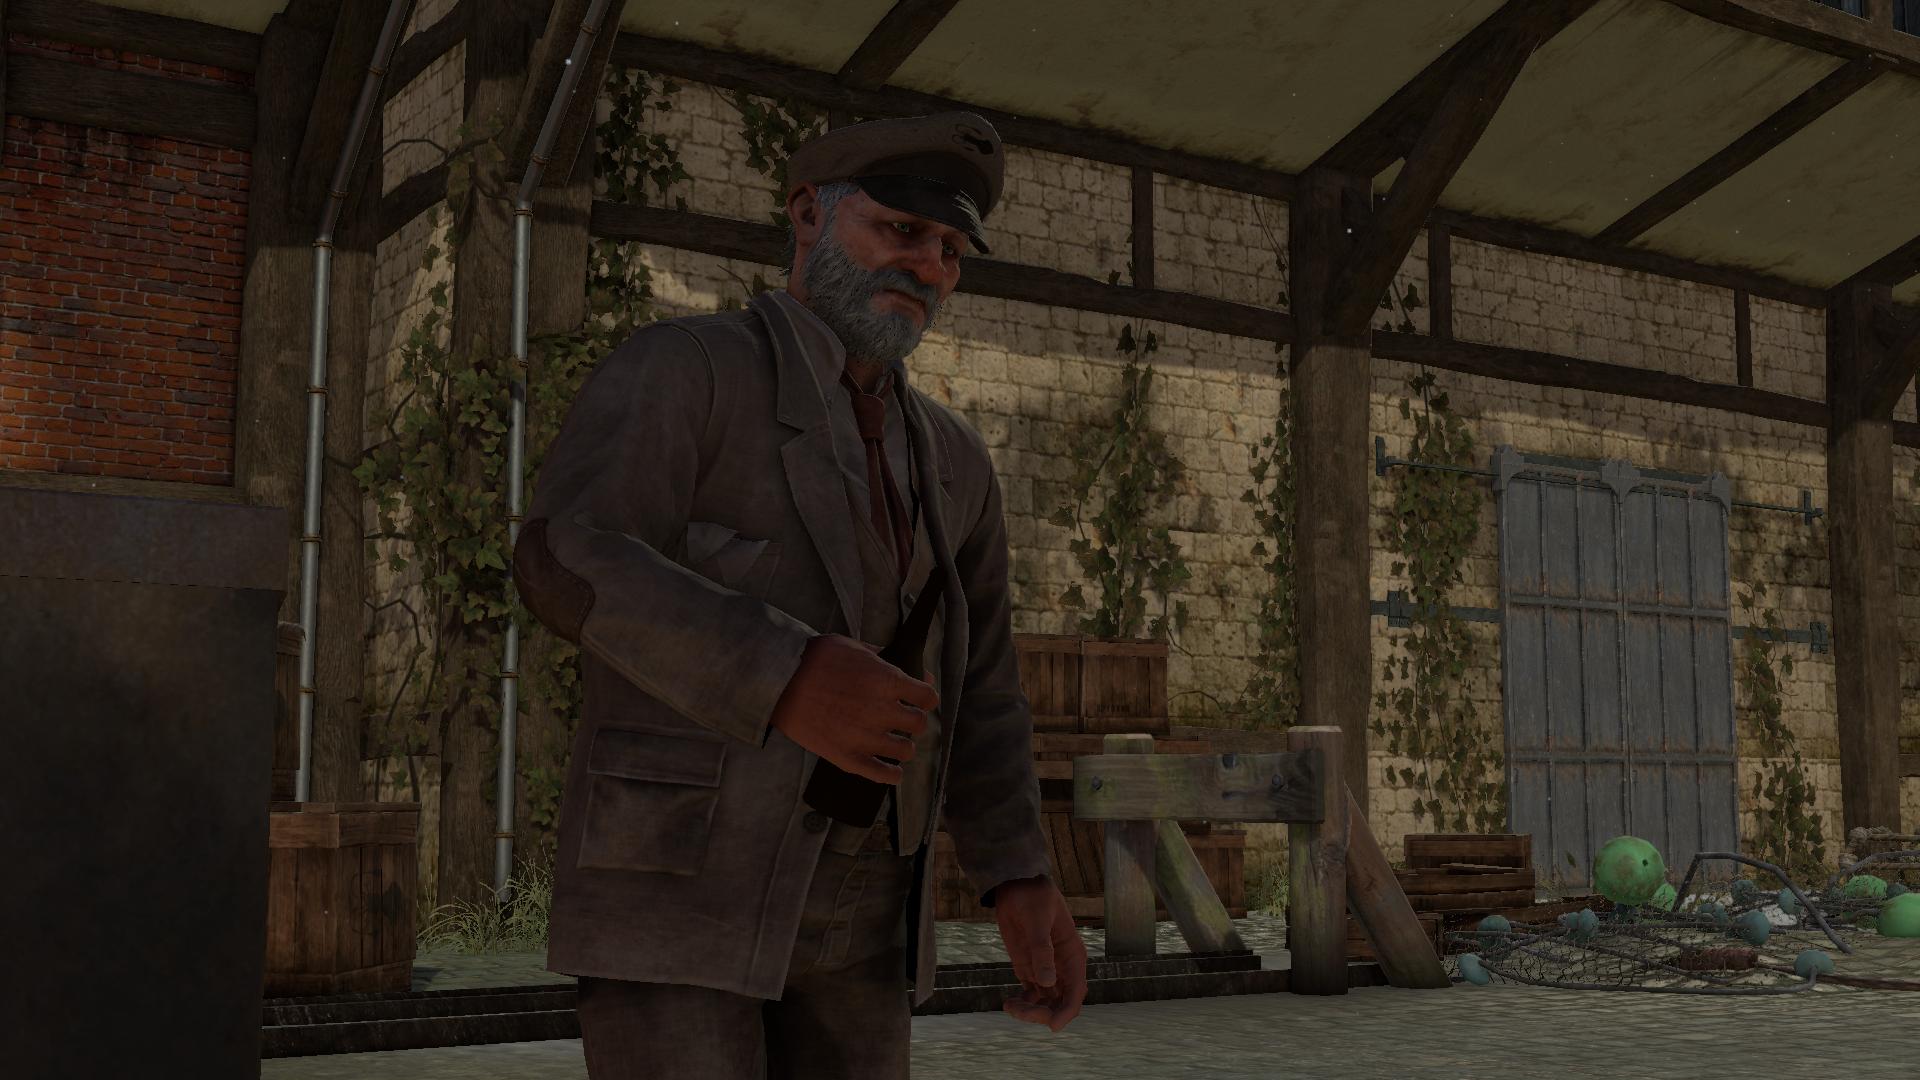
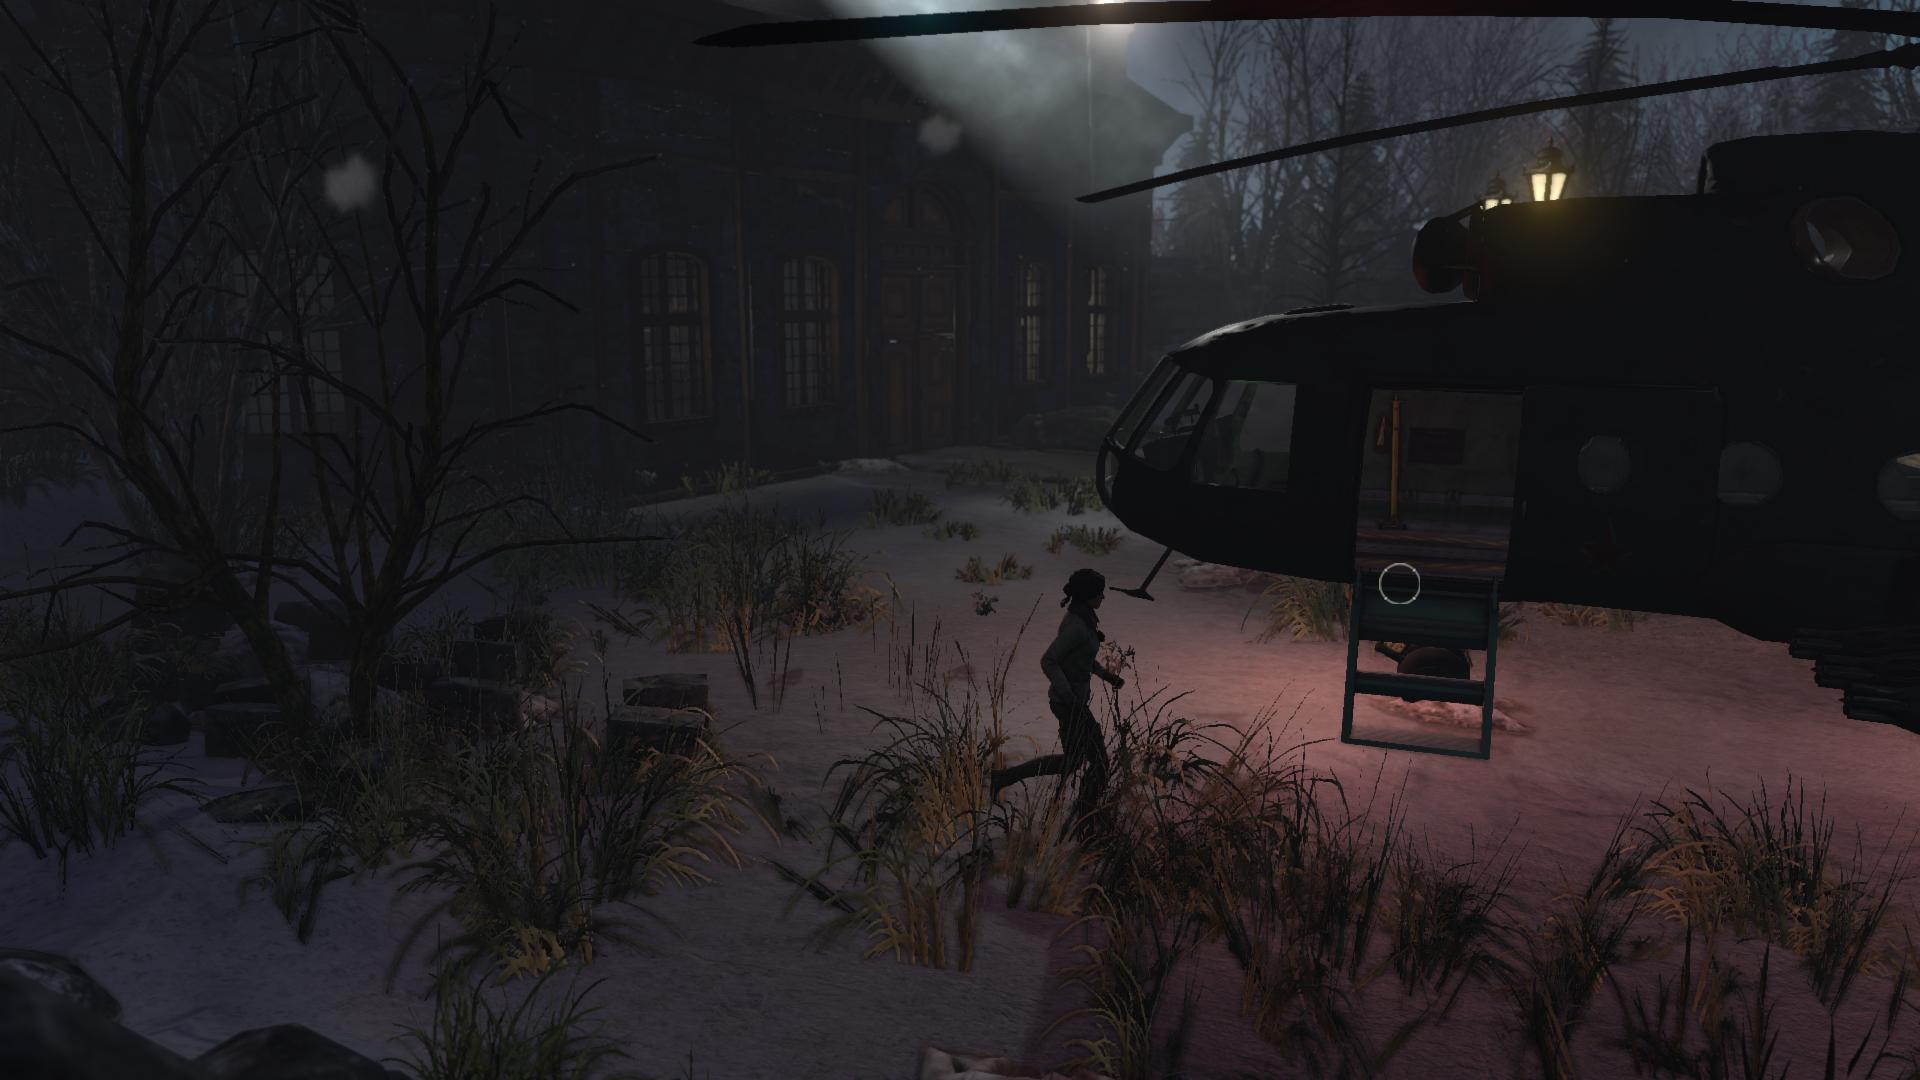
Go through the front door and see the colonel and his soldiers. It is impossible to get further while they are standing in the hall. Go outside and pay attention to the helicopter on the left side. Go around it in a circle and climb inside. Search the box in the far part and take the walkie-talkie. Go back inside the hospital and use this walkie-talkie on the colonel. That's how you distract him.
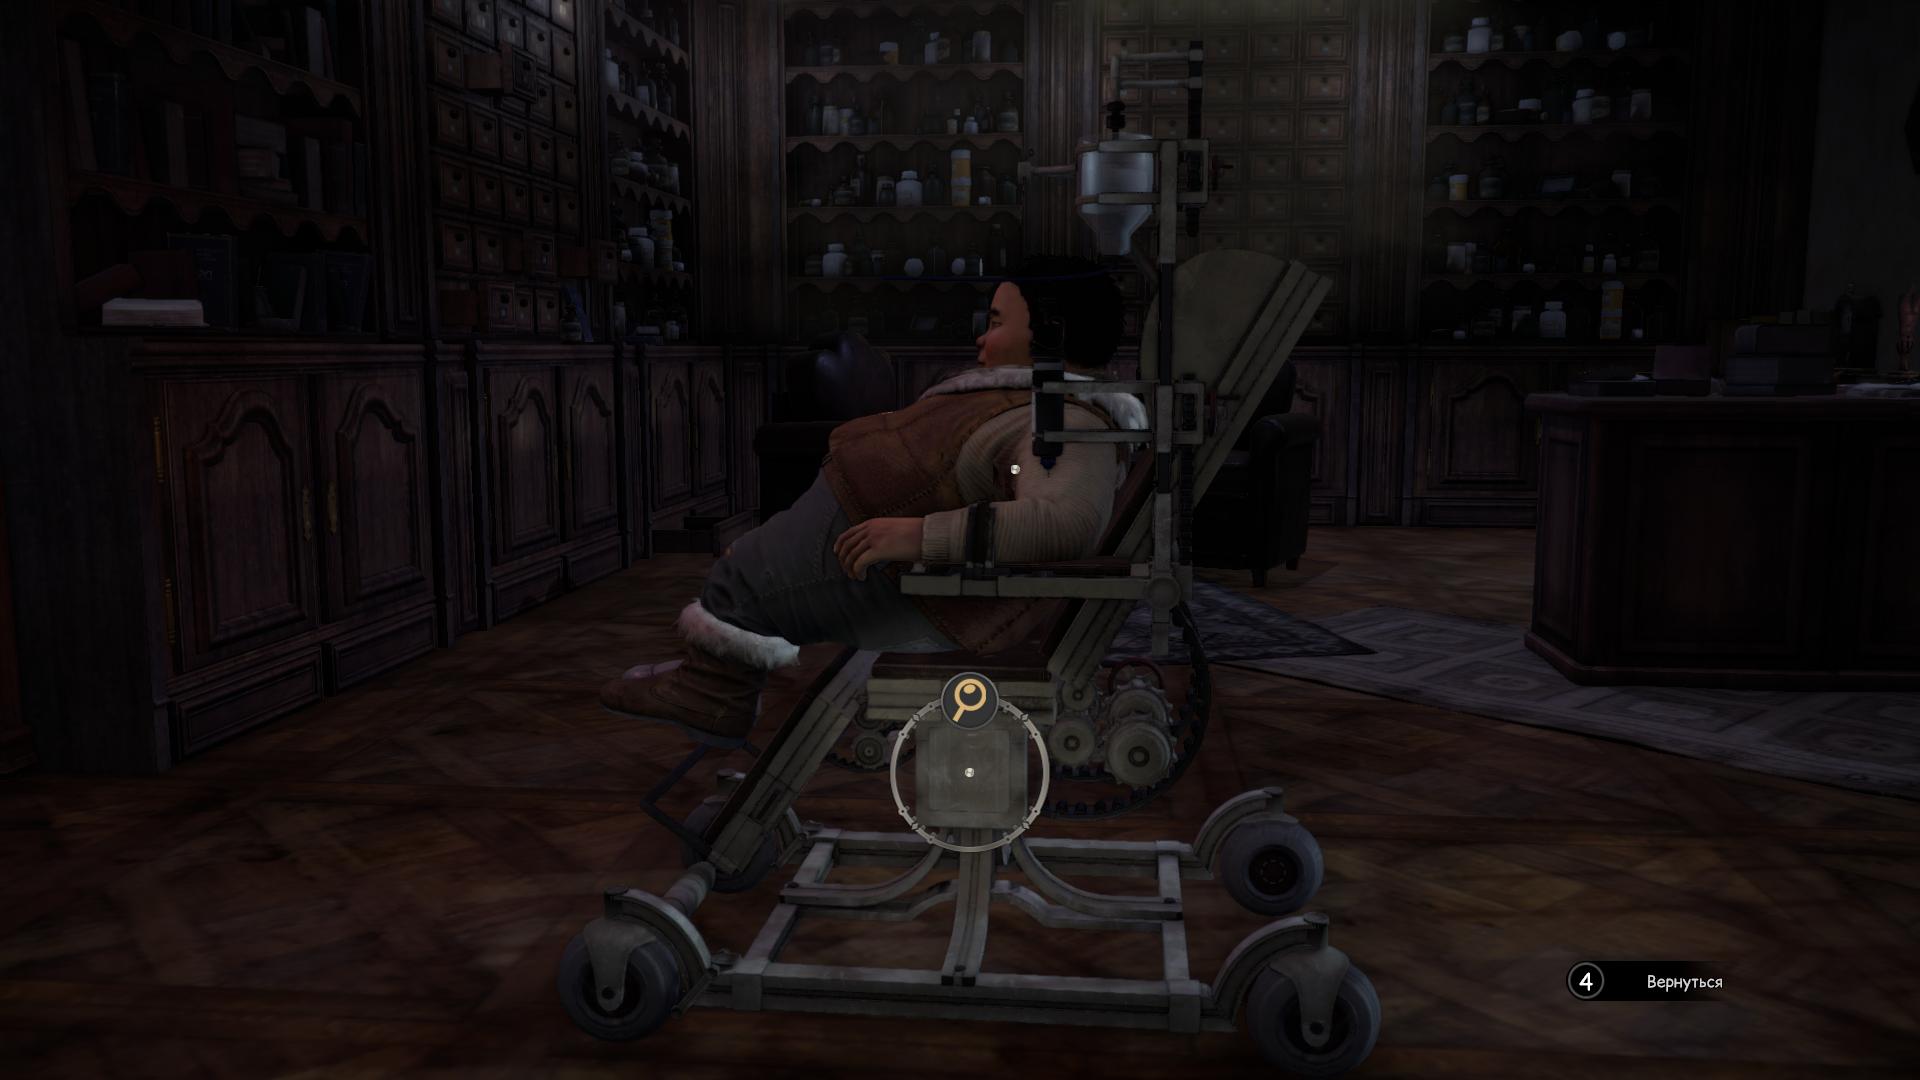
Follow the corridor, where there are doors leading to the office of Zamyatin and Efimova. Zamyatin will automatically call you. Talk to him and Steiner, and then go out into the corridor. Go to Olga Efimova's office and find a zombified Kurk on a chair. We need to save the guy!
Check out the chair first. Take a look at its back to find outdonut. Move it from top to bottom and you will see a working mechanism. If it were possible to somehow compress the strings, then the device would cease to function. Continue to inspect the chair and pay attention to the note located on the left side. Examine the note to pick up a paper clip from the upper left corner. Use this clip on the mechanism in the back of the chair. The pendulum will stop moving.
That's not all! Examine the syringe located above Kurk's left arm. Move the needle to the side so that the contents flow down. Put the needle back in place and open the cover at the top. Pour the potion through the hole from the flask given to you by the Ayahuasca shaman. Lower the syringe to inject Kurk with the potion. He wakes up.
Now you need to free the trigger hands, but it just won't work. On the right side there is a dial for entering the code. Go to the left side of the office and read the note from the table - Efimova tore off the part where the password should have been. On the same table, find the statuette of Olga. Go back to the chair and smash et??th statuette dial. This is how you free Kurk. Watch the cut-scene.
Watch the cut-scene, as a result of which the "Crystal" will collide with ice floes. To go further, you need to activate the icebreakers. Get down downward, into the engine room, and iditol to the right. Climb up the small steps to find the icebreaker control panel. You need to do the following:
After a few seconds, a huge monster will appear. After the cut-scene, you will have to break the spotlights on the deck. There is a total6 searchlights - two on the side of the cabins, one aft and one in the bow. First go to the port side and move the wooden box to the first spotlight. Now you can climb up to the spotlight, but Kate will not break it with her bare hands.
Go to the starboard side and find a crowbar with a red handle leaning on a small box. As soon as it is in your hands, then return to the searchlight with a box, climb onto the box and break the lamp. Go a little further, to the next spotlight, and lower it down with the handle. Break in the same way as the previous one.
The two spotlights on the starboard side will be broken differently - one of them will be broken by the octopus itself when you get close to the lamp, and the other - lower it with the handle and use the crowbar. Go to the bow of the ship, climb the stairs and break the penultimate spotlight by lowering it with the handle.
The last searchlight remains - go aft and try to get closer to it. The octopus won't let you do that. Need todistract him somehow! Go inside the room where the benches and yukols are located. Under one of the benches on the left, where there is a descent to the engine room, look for a box. Open it and find the emergency flashlight (burgundy) inside. Return to the deck and use this flashlight on the spotlight so that Kate will distract the monster. Break the last lamp and watch the cut-scene.

The monster will return, trying to sink the ship. You need to turn off the engine. Go down to the engine room and go to the icebreaker control panel. To his right, on the wall, find the switch - lower it to turn off the ship's engine.
Return upstairs and find that the monster is not going to retreat. Approach the starboard side, where the lifeboat with the captain is located. Talk to him. He figured out how to distract the octopus. You need to get a lamp.
The first thing you should do is go back to the yukal room (any door off the deck) and pick up the homemade matches from the floor next to one of the benches, right??alek from the stairs leading up.
When you have matches, then go upstairs to the captain's cabin. Do not rush to follow even higher, where the steering wheel is, but go left. Near the globe, books are scattered on the floor. Examine them, double-click on the far one to find a bottle of vodka.
With a bottle of vodka and matches, go down to the engine room. Go left, down to find a kerosene lamp on the table. Connect both parts of the lamp and apply a bottle of vodka to the active point in the middle. So you fill the lamp with alcohol. Set it on fire using homemade matches. With a burning lamp, go upstairs and approach the boat with the captain. Watch the cut-scene.
Your journey across the lake will take the Yukols and Kate Walker to Baranur Park, shrouded in radiation. Looking ahead, we note that there will be no radiation on the territory of the park itself.
The first thing you need to dob, is to find a device for measuring radiation. To do this, go up to the steering wheel inside the ship, where the captain used to be. Remember that hole you put the key in? Now you need to pull out the key from it, to the left of the steering wheel. Go down and on the deck go to the bow.
Here, climb the stairs to the place where the broken spotlight is located. Opposite the searchlight is a special device that gives out glasses for measuring radiation. Examine the device and find the keyhole on the left side. Use the key found in the wheelhouse and turn it. After that, lower the lever 90 degrees, and then remove the glasses from the drawer below.
You will make sure that there is no dangerous radiation in Baranur Park. Now all that needs to be done is trying to get the Crystal ship out of the water. Only in this way will it be possible to free the ostriches and continue the sacred passage.
Leave the ship and look around. There is a descent down - on wooden boards. Climb down and go to the main entrance to the park. Don't rush up the stairs. On the left side of them is a wooden building. Climb up the stairs to it and go to the very end to the left. Take the telescopic rod from here. Run aboutback to the ferry entrance. Nearby there is a pole with hanging wires. See them? Examine the wires closer, and then use the telescopic rod on the top of the wire - on top of the pole that holds the cables.
Having done this, talk to the nearby yukol named Buruk. Keith will automatically ask him to connect the wires to the Crystal ferry. To return electricity to the park, you will need to turn on the engine on the ferry. To do this, go down to the engine room and lower the lever on the wall to the right of the icebreaker control panel. You used this lever earlier when you tried to get rid of the lake monster. Thus, the electricity in the park has been restored.
Go to the stupankam leading to the entrance to the park. To the right of them, you will find an automaton sitting on a bench. Examine it. Kate will say that it's time to try to resurrect Oscar. Unfortunately, this is not possible right now because you don't have the tools.
Climb the metal stairs and go to the park.
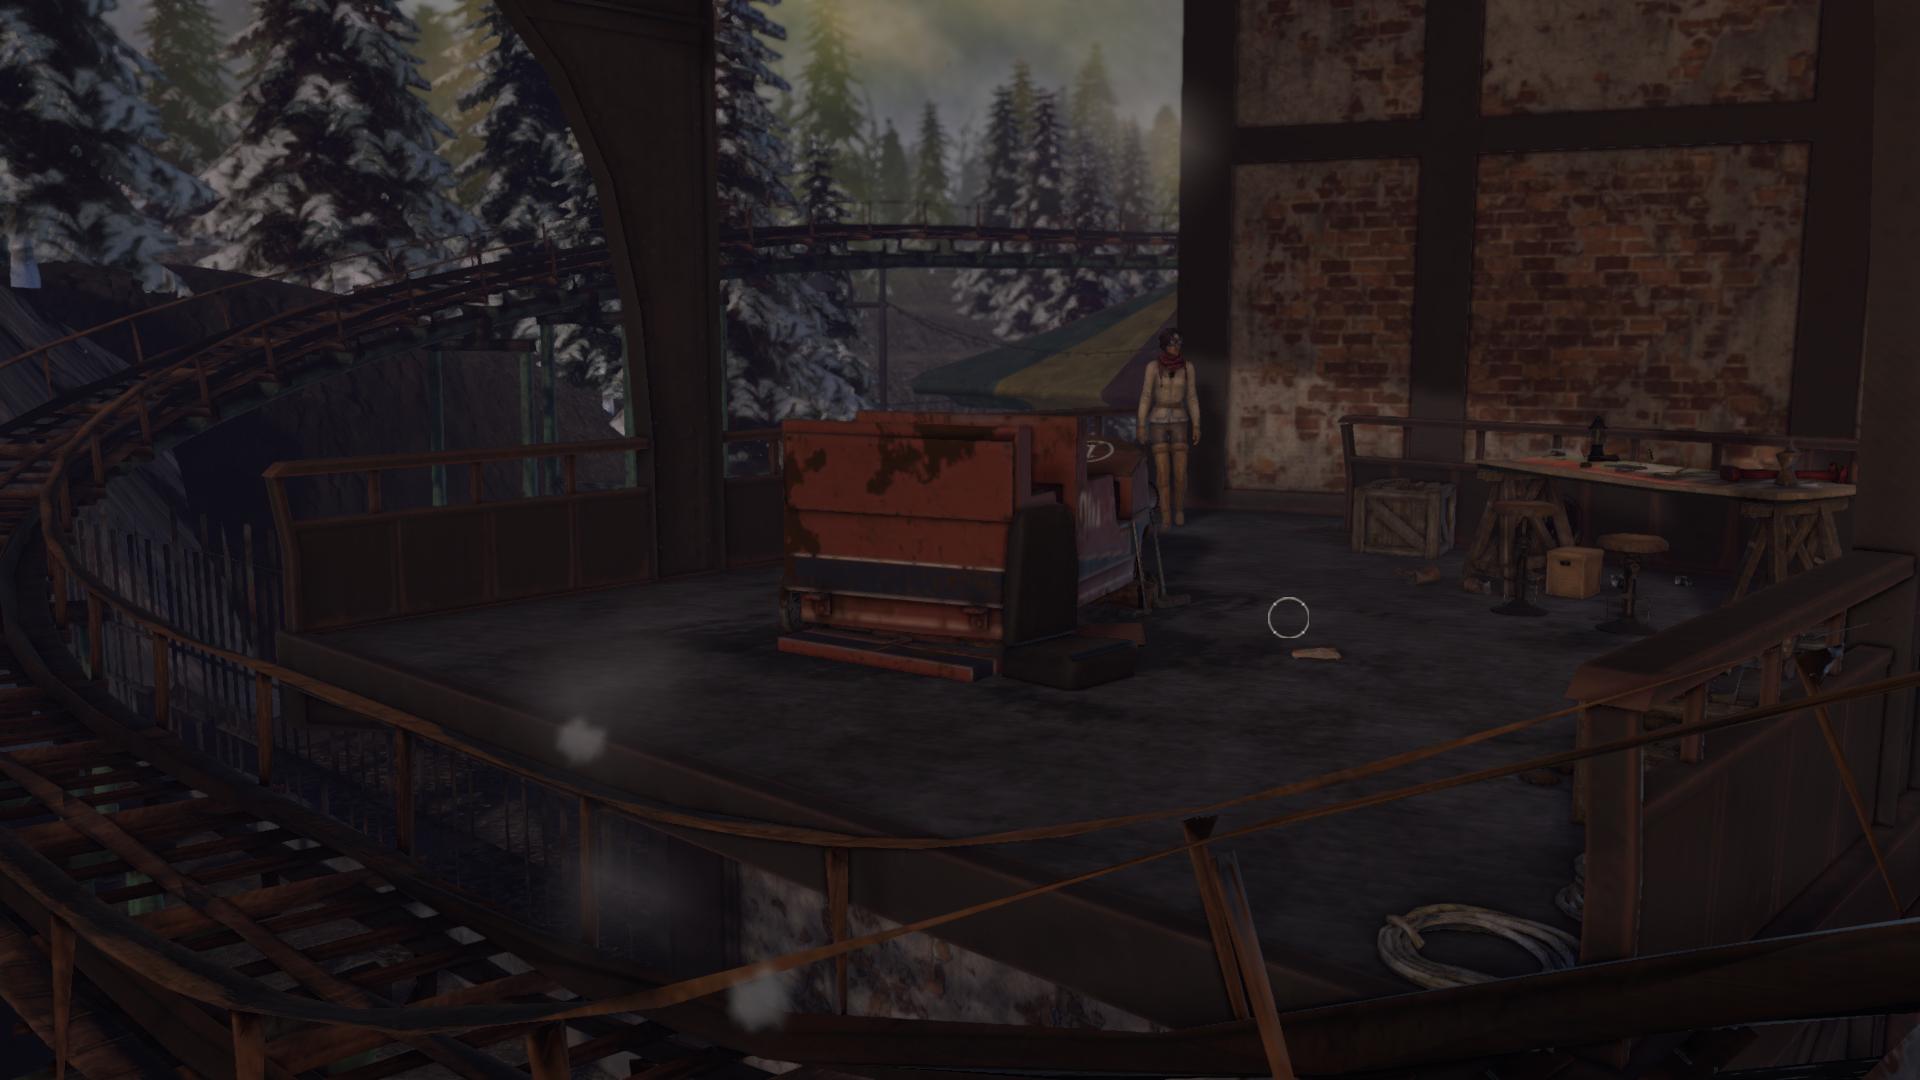
Once in the park, go to the right of the door, under the archway where the steps are. Follow them up and you will find yourself in a relatively small location - there are rails from the roller coaster nearby. Pick up a crumpled note from the floor, to the right of the overturned trolley.
Examine this note in your inventory using the J key. You will be able to see the calculations associated with two objects, conventionally marked with Roman numerals I and III. What are these objects? We'll find out very soon!
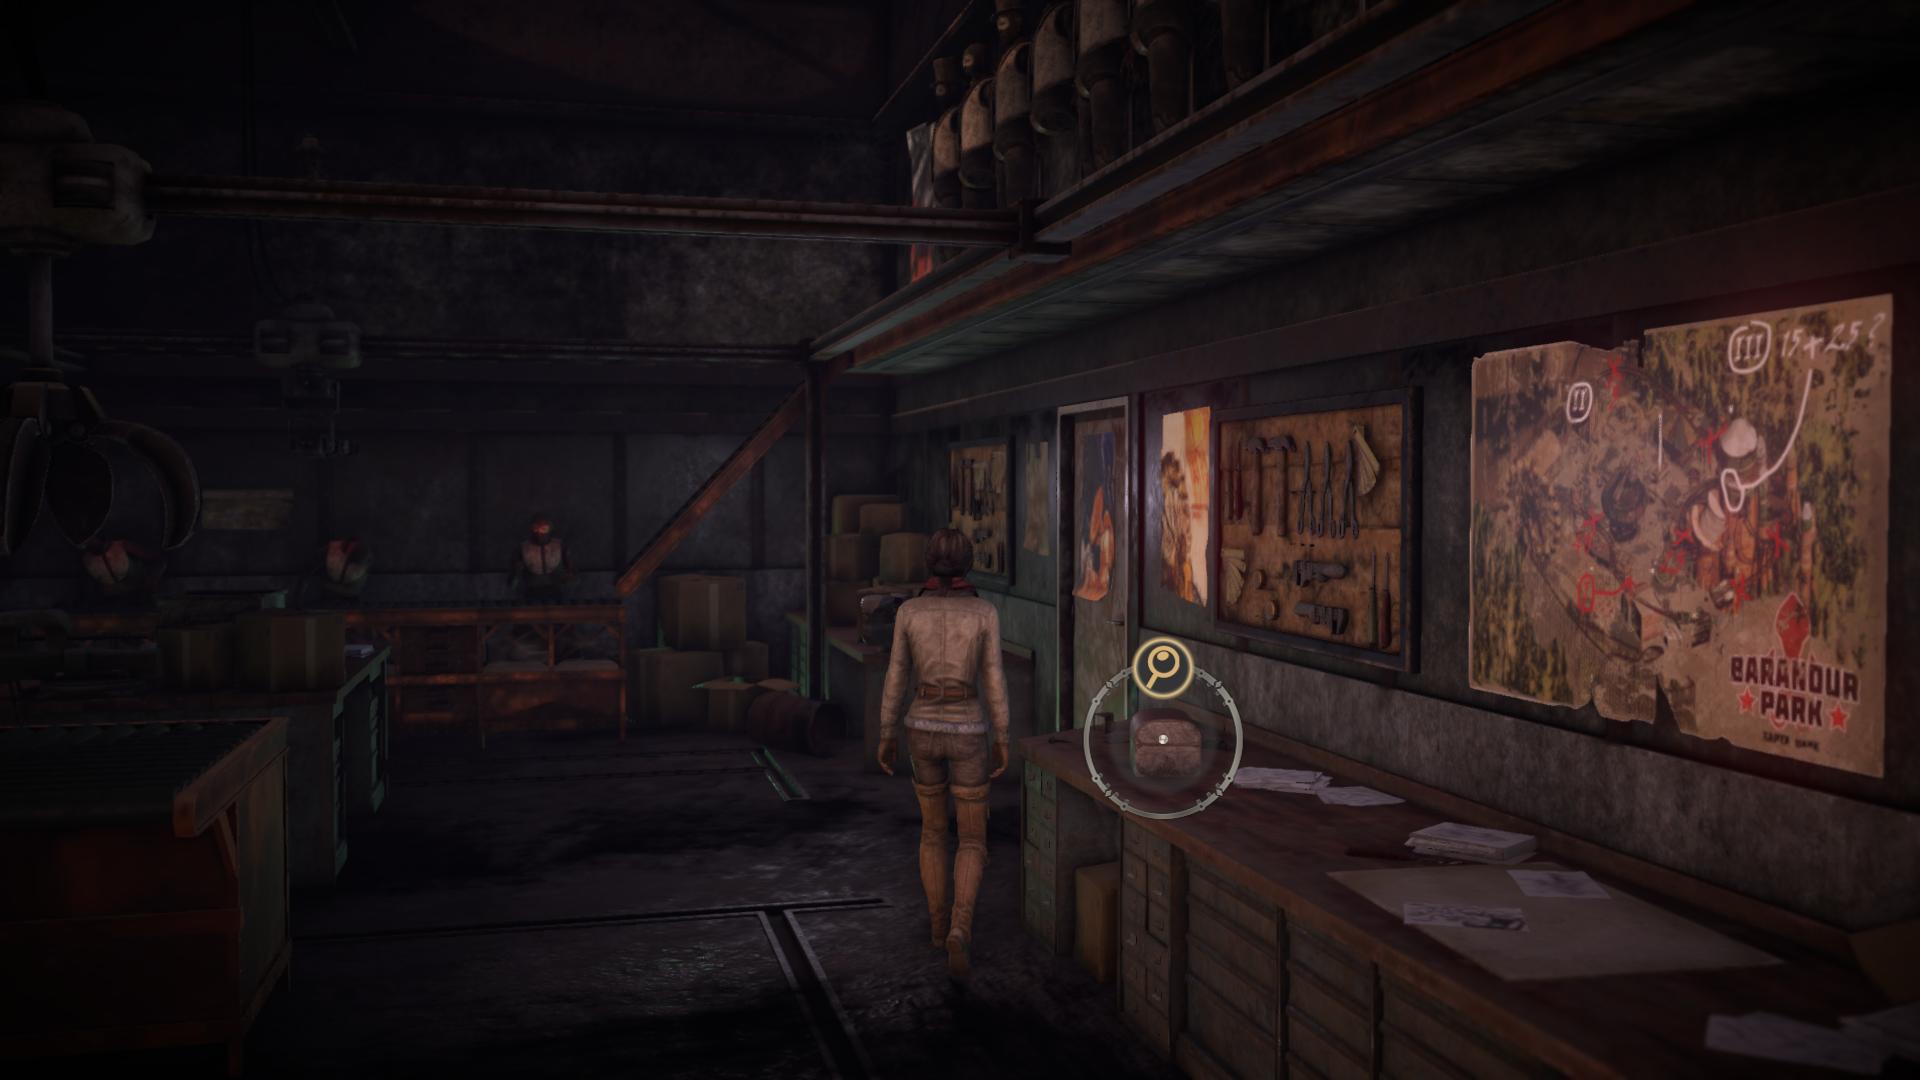
Return to the main entrance and go left. You can’t go further because of the metal fence, but there are twor - go inside. Immediately inspect the box on the tables opposite the door to get a gear out of it. On the table next to the door is Voralberg's chest. To open it, you need a special key. There is also a map hanging on the wall, on which the same points I and III are marked. It turns out that the calculations on the crumpled note indicate the correct combination of speed. We'll deal with them very soon!
Go through the door in the far corner of the room to be on the other side of the building. Walk along the rails to the right. Turn right. At this turn you will see two cars - inspect them and click on the connector. This will tip both wagons out of the way. Approach the tractor (for some reason this device is called that way) and study it. Examine the towing device on the back so that Kate concludes that this tractor can be used to pull the Crystal ferry out of the water.
Keith will throw a damaged automaton off the tractor. Examine the body and take the Voralberg Key from its hand. B?Go back to the room where the chest is located and open it with the key. Take two tools from the chest - the Voralberg key and the wrench.
After taking both items, return to the shore, to the bench on which the automaton is located. Examine his chest. Start opening the robot. Use the Voralberg key on the cruciform hole, turn it, and then move the lid on the automaton's chest. Pull out the corrupted heart, and in its place install Oscar's heart. Push back the two valves on the heart by holding and holding LMB while moving the front sight clockwise or counterclockwise in parallel.
Connect both wires to the holes on the heart. It may seem like a difficult task, but you will be able to judge the correctness of the action if the wires do not fall down.
After that, use the wrench on the bolt above the golden cap on the heart. Turn the wrench, and then slide this cover aside. There will be another cross-shaped hole. It is used to activate the automaton, but you do not have a special key.
Return to the park. When you go inside, you will see how someone arrived on a roller coaster trolley.
DO NOT HURRY! In the future, you will need two metal rods at once. To find?? the first of them, go deep into the park and turn left behind the attraction with revolving chairs tied to a chain. On the left you will see a huge red and white, fairly rusted rocket. Next to it, on the left side is a bench, under which the first metal bar is lying.
Go back to the front door and go up the stairs on the right to get to the place where you found the crumpled note. After doing this, you will see a trolley on rails. Get into the trolley, but do not rush to inspect the dashboard. Turn your head to the right and examine the adjacent seat, its lower part. Take the second metal bar.
Study the dashboard. Here you need to use the calculations from the leaf. And in accordance with them, first scroll the handle on the left side so that the arrow on the scale points to the maximum value - “50”. If you look at the crumpled note, you will see the correct formula - "25 + 15". Install one metal rod in the hole opposite the number "25", and the other rod?? - opposite the number "15". Having done this, pull the lever on the right to start the cart.

When the attraction stops, pull out the metal rod from the hole at the number "25". Wait for the cart to stop. You will get to the right place where you can leave the trolley by clicking on the active point on the left. Climb down through the hole in the floor. From here, move down the stairs, opposite the transition. Follow the carriages and go into the open carriage on the right.
If you want to get an achievement, then examine all the photos in the album, which you will find in the far part of the room, on the cabinet on the left. You are interested in the last photo, which indicates that Catherine won second place in the Miss Beauty pageant in 1976.
Next, you need to try to leave the car, so that the same Ekaterina stops you. Talk to her, introduce yourself. If you have studied the photo album, as mentioned above, then use this knowledge. For this you will receive an achievement!
Sootherwise, Ekaterina will give you the Voralberg activation key. With it, you can now launch the automaton and reunite with Oscar.
You will also learn from Ekaterina that there is no radiation in the subway. Kate will come to the conclusion that it is through the subway that the yukols should move.
Go back to the cart and pull out the metal bar near the number "15" to go down. Having done this, run to the automaton on the street and use the activation key received from Catherine on the cross-shaped hole inside the heart. Turn the key to bring Oscar back to life.
After a short conversation, Oscar will say that he will not do anything until you find clothes for him. Go to the territory of the park and go deep into it. A little further than the running rides, you should see a door. Open it and you will see that the yukols have already cleared the blockage that blocked the passage to the subway. Go down to Catherine's car. Inside the car, talk to the yukols. Start a conversation with Catherine. First, return the key to her, and then ask for Oscar's clothes. She will give you another key. Use it to open the blue wardrobe closet on the opposite side of the car. Oscar will automatically appear, who will find clothes for himself.
Follow back to the tractor (wag?? net on which the towing device is installed). Talk to Oscar, then walk along the boards to the entrance to the ferry "Crystal". Examine the rope tied to the pier.
Kate will say that it is perfect for a tugboat. Talk to the two yukols standing nearby so that they tie the rope to the cable on the tractor. Go to Oscar and tell him to move forward.
Wait. After talking with Oscar, examine the towing device on the back of the tractor. To loosen the cable, you must use a wrench on the nut and loosen it, and after that turn the lever. Once done, tell Oscar to keep moving forward. It will go straight, provided that you have already pushed two cars down from the track.
When Oscar gets to the very end, then go to the tractor and inspect the cable. Talk to the two yukols who are standing nearby. They will tie a cable to the Ferris wheel in the background. Go to the wheel, go around it on the side to find a ladder, and climb it up. Winstall the asterenka, which was found in the room to the left of the main entrance to the park, into the stand on the right. After that, turn the lever to make sure the mechanism is working. Next, click on the red button. If the cable is tied to a Ferris wheel, then you will pull the Crystal ferry ashore.
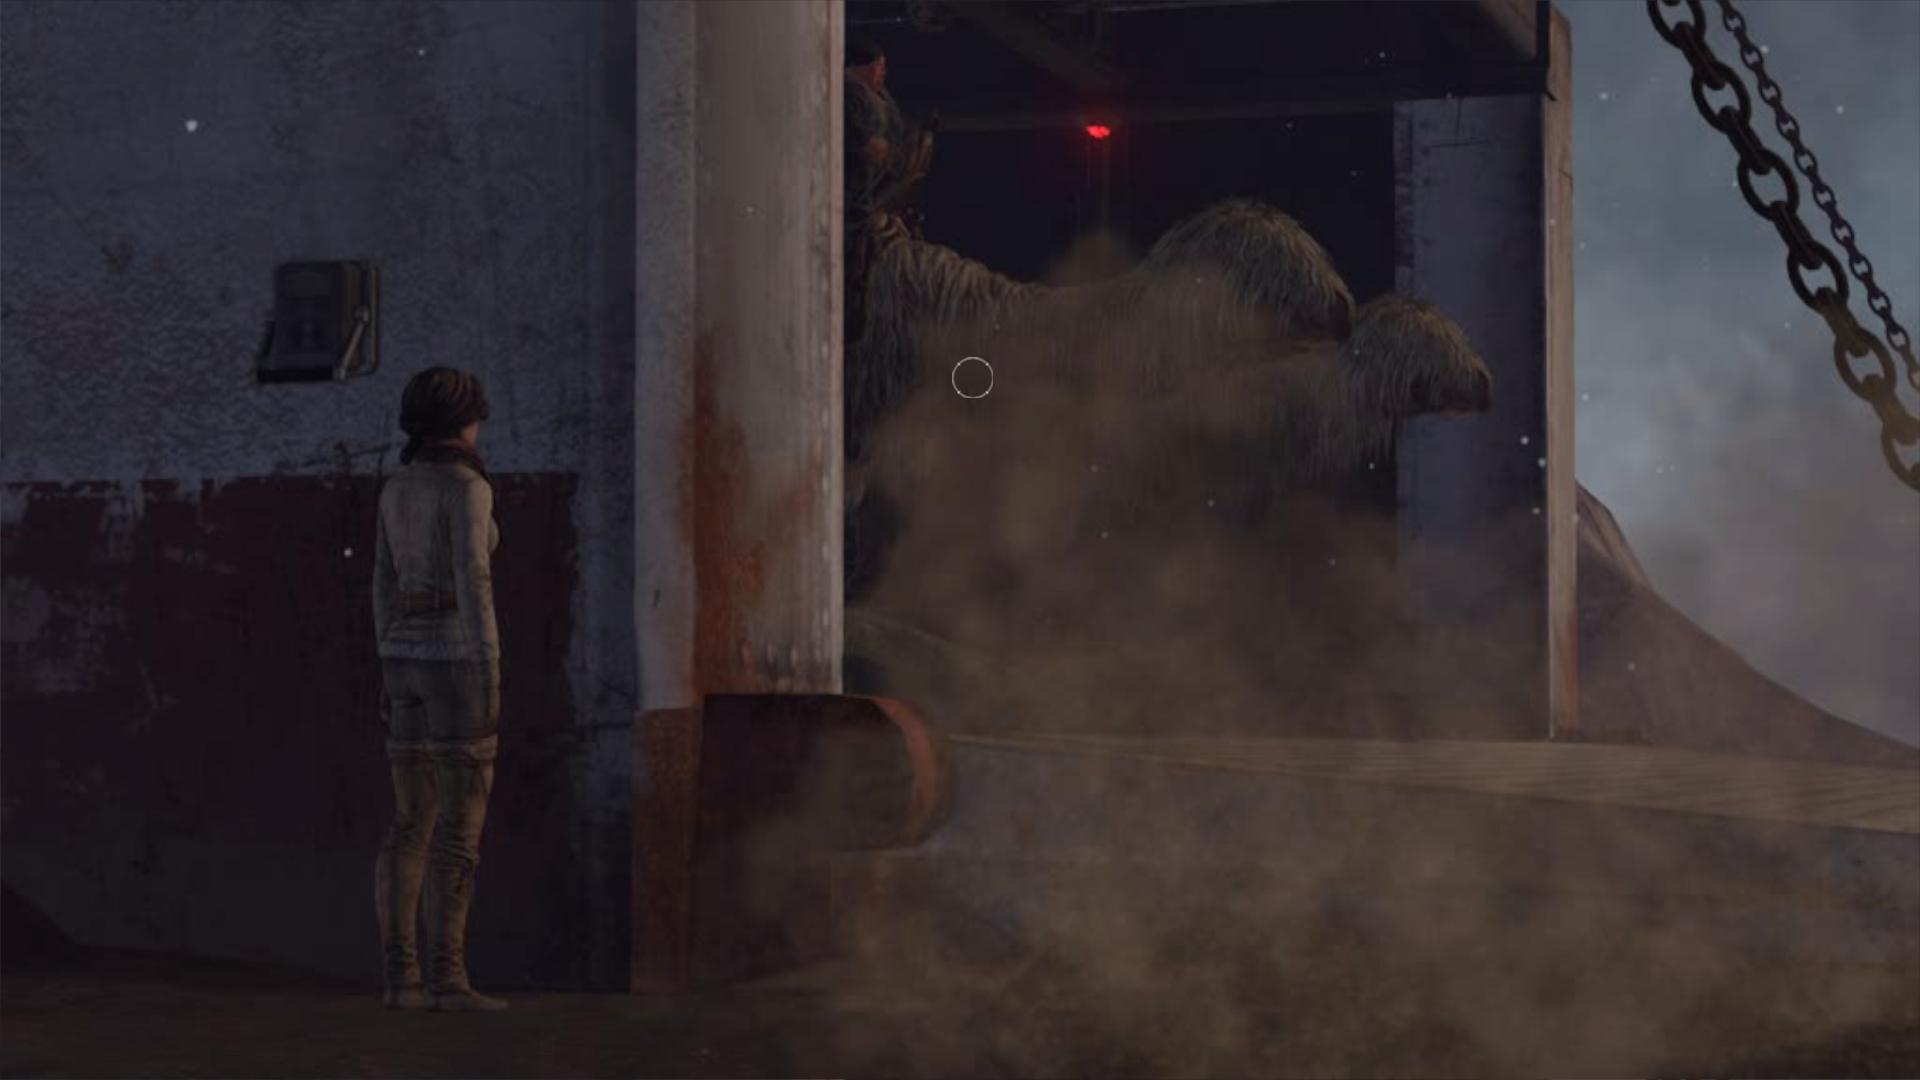
Go down and go to the ferry. You will need to go through the building where the gear was. Exit through the front gate and go down to the ship. Talk to the yukols, go to the far side of the ship and find the lever that opens the hold at the stern of the ship.
Watch a video summarizing the mission.
The way forward will be blocked by a dark tunnel teeming with bats. Kate Walker must take care of them and find a way to drive the creatures away.
First, climb up to the ledge on the right (or use the steps) and descend??s down the stairs. From here, go deep into the corridor and find another staircase leading down. Go to the left side along the tunnel with water and find algae near the grate. Walk in the opposite direction to meet a carpenter who will give you a wooden stick.
With these items, return to the main hall and go in the opposite direction from the tunnels with bats to find a few more ostriches. On the yurt of one of them, find and take away a piece of rag. With a rag and a wooden stick in hand, climb the ledge on the right and approach the table on the right side of the stairs leading down. Take the vial of gasoline and flint from the table. Insert a wooden stick into the hole of this table, wind a rag around its top and pour gasoline from a bottle. Light it up using a fire starter.
Taking a burning torch in your hands, go to the bats in the tunnel. Keith will try to scare them away, but the bats won't be able to leave the tunnel due to the bars on the top of the windows.
From the main hall, go left - climb the ledge and follow up the stairs. Here, talk to Oscar. He will say that there is strong radiation outside the gateway, which he will not be afraid of. Automatically called to go outside.
From now on, you control Oscar. Pick up?Go up the stairs and go outside. Follow right until you see a fire engine.

Get behind the wheel of the car, open the glove compartment on the right and find the key among other rubbish. Insert the ignition key into the hole next to the steering wheel, then turn it 90 degrees clockwise. Pull down the lever on the steering wheel to drive forward.
After stopping, go to the back of the car and climb up the ladder. Climb even higher up another ladder. With the help of two valves and a lever, adjust the crane boom so that you can get close to the grate. We are talking about the lattice, if you turn the boom to which a right angle is formed (between the boom and the fire engine). As soon as you set up the arrow correctly, the remote control for its control will automatically cease to be available. Climb up the arrow to the grate and inspect it. Unfortunately, it will not be possible to remove it with bare hands, because the welded edges interfere.
We need to get rid of mechanical dogs. Go down to the bottom of the fire truck where the water gun is located. Remove the yellow key from the hose reel (red). Remove the plug from the hole on the front of the gun, under the muzzle. Now turn the hose on the reel to connect it to the gun, and then turn the valve just above the hole where the hose will be connected. Click on the cannon to get rid of the dogs.
Return back to the subway and go through the gateway. Click on the red button on the right to start the disinfection process. It will be suspended due to the fact that the device has run out of iodine. You will be switched to Kate Walker. Insert the seaweed you found downstairs into the tunnels with poisoned water, into the slot to the right of the door. Wait.
After talking with Oscar, return to the table where the steel is and click on this item. Watch the cut-scene.
In the next part of the passage of the game, you will find yourself at the Olympia sports complex. First, go right, towards the bottom of the screen, to be in the territory of the Yukol camp. Approach the fire and talk with Kurk and Ayahuasca (you will be offered your own yurt along the way).
After talking with them, you will understand that you need to look for the Temple of the Red Moon. Return to the high walls of the stadium and go all the way to the right. There will be an ajar gate leading inside.
Follow straight ahead, in the direction where a couple of yukols are looking. In the end, you will reach several wooden houses. Only one of them will be intact - knock on the door and watch the cut-scene. Talk about everything with Dunyasha, the daughter of the former spiritual leader who hid the Temple of the Red Moon. You will be able to convince her of the correctness of your words. The girl will give the diary.
Do not rush to go far - there is a small cave to the left of the house. This is a kind of altar. Examine the green lens and then read the inscription on the stone slab. After that, you will be able to pick up the Yukolov lens 01.
Now return to the very beginning, to the fire, where you need to talk with Kurk. He will give you the translated book after a few seconds. Go back to the escalator and go upstairs. In the middle of the red carpet corridor, there is a left turn leading to a double door. Go through this door to enter the reward room. Immediately to the right of the door, examine the crate with the glass door to find a red lens behind it. Use the scarf from inventory on the glass so that Kate can break it. Take the Yukol lens 03.
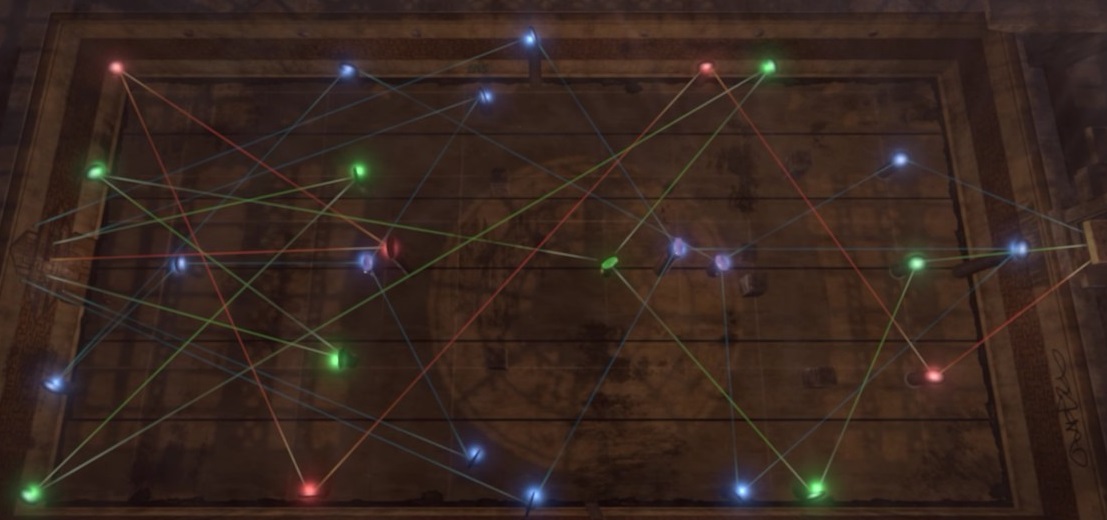
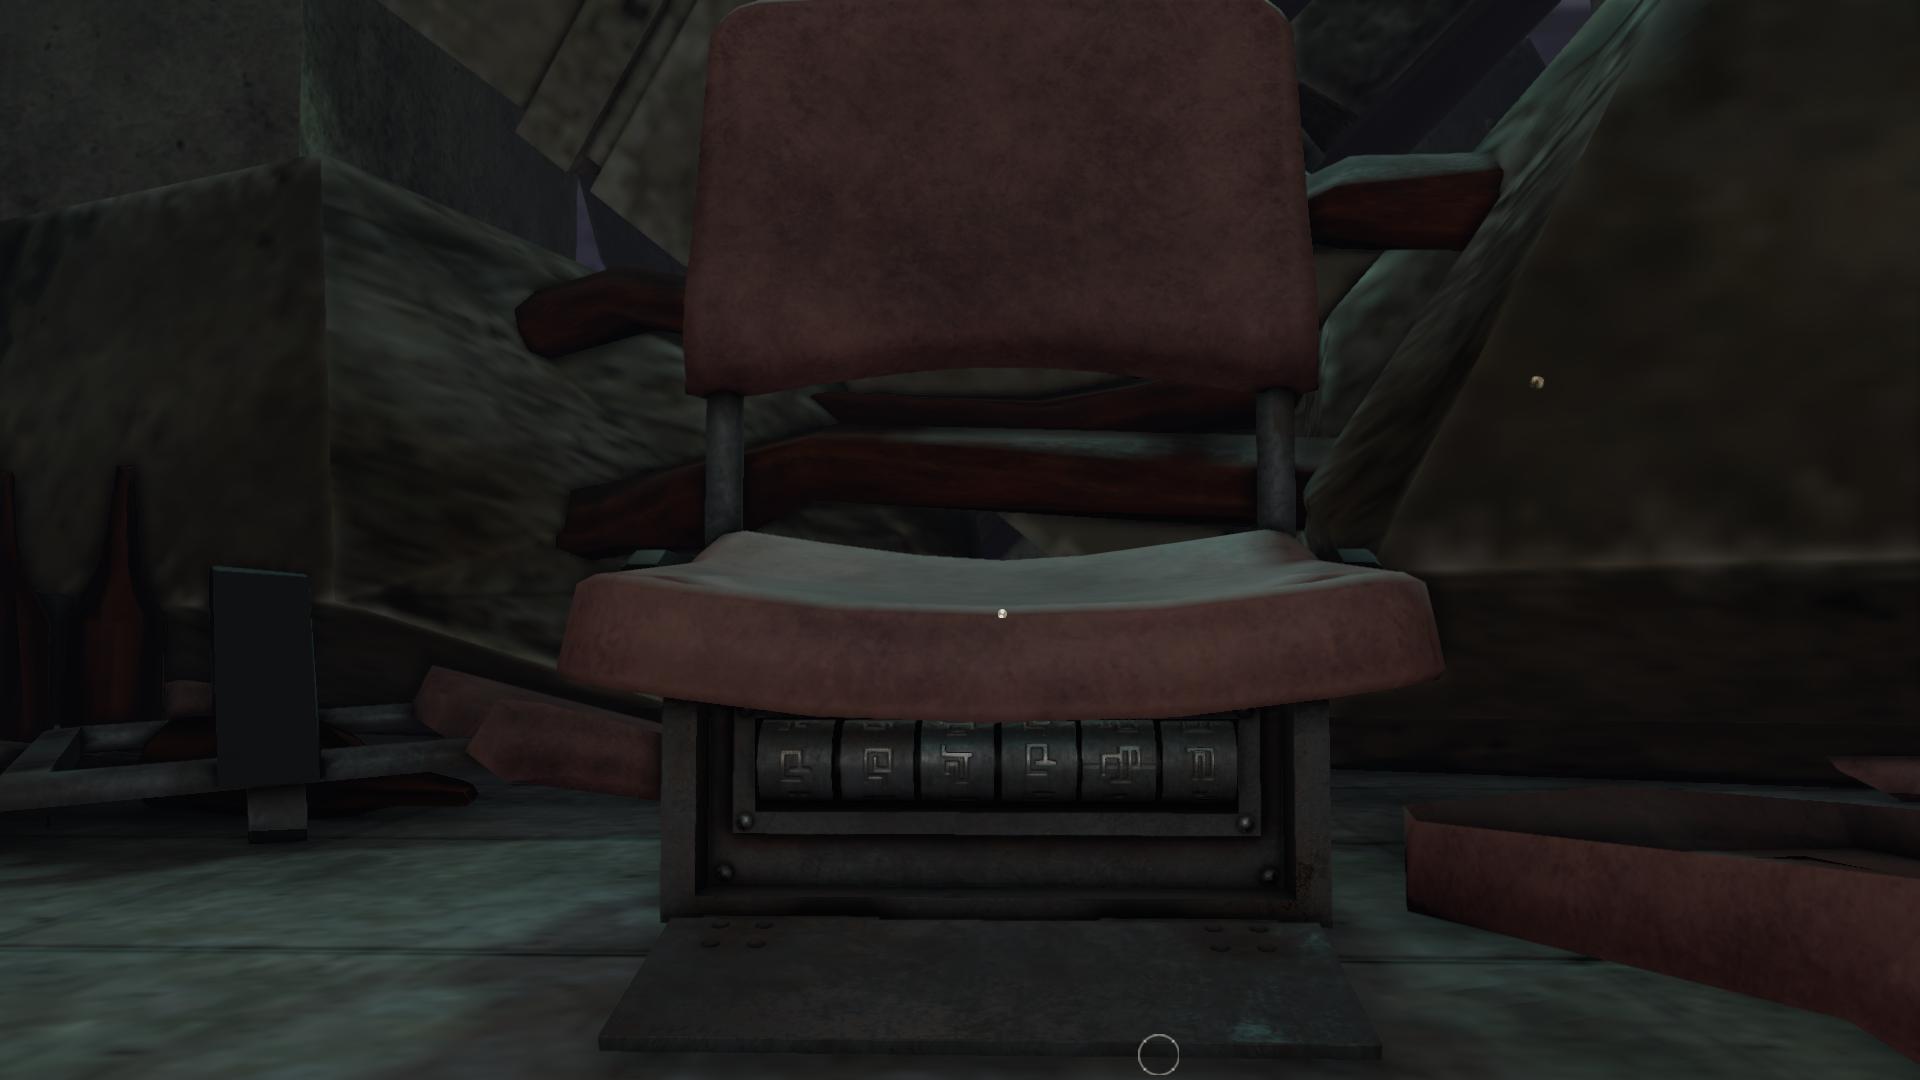
Finally, follow the red carpet corridor to the end and go down the narrow stairs. Do not rush from here to follow even lower (on a wider one), but linger - in the middle you should notice a red chair. Examine it and find the interaction point at the bottom. Move the lid down and you will find a puzzle. You need to arrange six different characters in the correct order.
_holder media_container with_legend">
And the clue to solving the riddle lies in the translated diary of the Yukols, which you received from Dunyasha and translated from Kurk. You need to find the meanings of the correct symbols and, according to the story, arrange them in sequence: death, sacrifice, sorrow, death, pain, madness.
Having done this, open the seat and take the 02 yukol lens (blue). Run back to the camp where the fire is burning. But do not turn towards it, but keep walking along the walls of the stadium. On the left there will be a turn leading to high doors - open them to get into the hall with the pool. Climb up the tower with a springboard and at the very edge you will see three holes. Insert three yukol lenses into them and solve the puzzle as shown in the picture (turn the mirrors).
Go down into the pool and go inside the temple. Watch the long video.
After Kate Walker wakes up and is outside, go back to the yurt. From the box, get the two necessary items - a flint and a knife.
Go outside and go towards the bridge. You must find Kurk. It is located to the right of the bridge, if you stand facing it. There is also a stone platform with a stove of four chimneys. Talk to Kurk about everything, and then go to the house by the bridge. Find a ladder leading down here. Go down and look for another ladder to be at the very bottom. There is a lever in this place - pull it to activate the bridge.
Go back upstairs and go to the bridge. Knock on the window through which the customs officer is visible. Talk to him about everything to convince him. He will let you through - cross the bridge and enter the Guardian's tent. More often?You are with a man who will ask you to bring him vodka. You also need to read a prayer.
Come back. The customs officer gets scared and leaves on a motorcycle. Go to the place where the two-wheeled "horse" was located, and find a brick on the ground.

Go around the customs officer's house and break the glass on the back door to get inside. There is a basket on the table in front of the window - take a flask of vodka from it. Go to the back room and take the papers of the customs officer from the table.
Go down the stairs, but one tier (the floor with the lever will be even lower, but you don't go there). Go through the doorway to enter a room with stone walls. Find the red button on the beam. Click on it to summon the cart. Place a flask of vodka inside it, and then press the red button again. After a while, the Guardian will give you sawdust - take the bag of sawdust.
Go outside and go to the ostriches. In the yurt next to Oscar, talk to the shaman Ayahuaska. She will inform you that reading a prayer involves the filing of certain smoke signals. Take out the wand from the chest located on the right side of Ayahuasca.
Run to the place where Kurk is. This is where the oven is. You must search it and find some useful items - one red, one blue and two yellow resin quarters, as well as one blue resin semi-circle. In addition, here you will find a log and four funnels. Three funnels, as well as a log, are located in the largest compartment of the oven. The fourth funnel is inserted into one of the chimneys - just when inspecting the stove, turn the screen so that you can see the back of it.

Get out of the approach and go to the stump located opposite the furnace. Place a semi-circle of blue resin on the stump, then cut it with a knife. You will receive a quarter of blue resin.
Now start arranging all the items in the furnace:
As soon as you solve the puzzle correctly, a long cut-scene will start, summing up the game.

All materials on showgamer.com are protected by copyright. Partial copying is permitted with an open (for search engines) link. ShowGamer (2015)