")
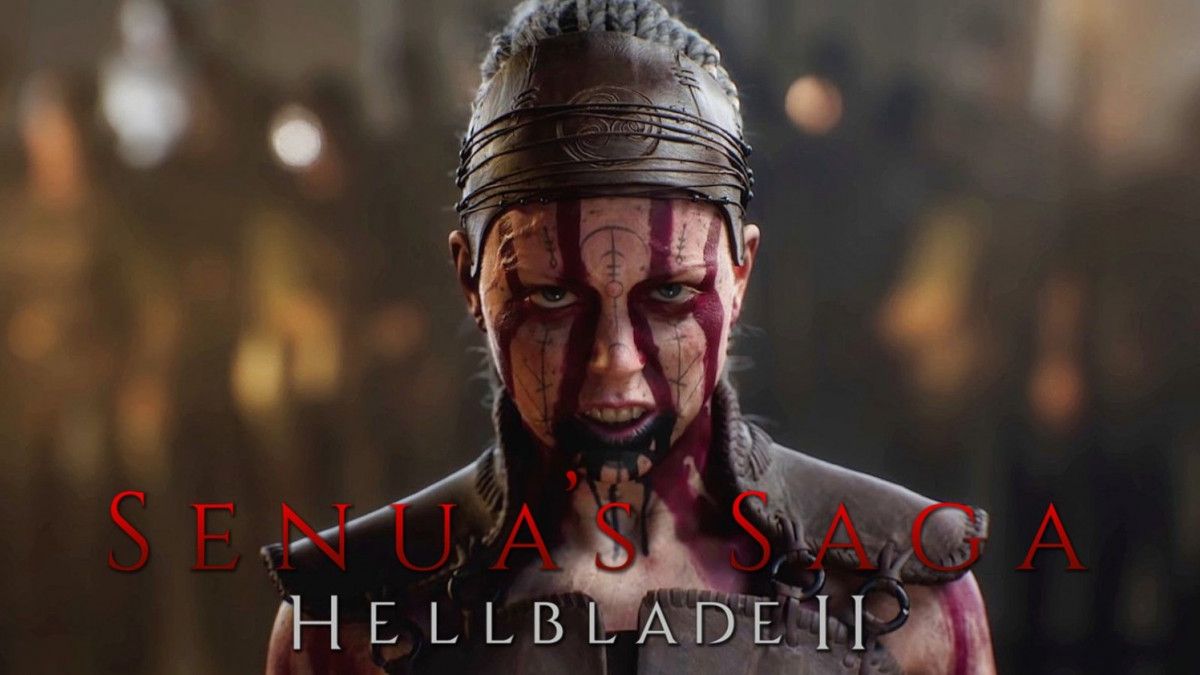
Senua's Saga: Hellblade 2 is the sequel to the brilliant Hellblade: Senua's Sacrifice from Ninja Theory Studios. By taking advantage of the power of the Xbox Series console and PC, the developers were able to create a more cinematic experience, with photorealistic graphics and exceptional soundtrack. Like the original, the second installment contains puzzles and a few collectibles that you may be missing out on. This guide presents the solution to each puzzle and the location of all collectibles.
Move forward and climb up the mountain. Keep walking forward, jump off the ledge, go lower until you reach an open area. Head off to the right side. When you reach the cliff, move along the edge. In the next area, go through the gap near the flag. On the right side is a tall knowledge pillar. This is your first collectible of this type. Each knowledge pillar contains a segment of the Tales of Midgard story (1/18). Focus on it by holding down the E key. Keep moving, following the unknown figure. After the fight between the slave and the warrior, move through the ruined building and then down the hill. Eventually you will reach a rocky cliff. Walk forward and turn to the right. A little later, turn left. Once you reach a dead end, focus on the symbol.
To open the path further, you need to find the exact same symbol. Turn around and find a small stone hill in the center of the location. Stand on it and look up to align the parts floating in the air and get the same symbol. Focus on it by holding down the E key. Squeeze through the gap, move along the coast, get through another gap and fight the enemies. Try to block with CTRL just before you hit to parry enemy attacks and throw enemies off balance. After jumping over the barrier, defeat another northerner. Follow on, kill more enemies and crawl under the boat. Press the F key to get various objects out of the way. Once you get out from under the boat, defeat the enemy, go further, turn right and deal with a new enemy. This will be a lengthy battle that concludes the first chapter.
Go forward, reach the first houses and walk between them (across the courtyard) to find the second knowledge pillar at the far fence (Tales of Midgard 2/18). Return to the main road and follow Torgester. Eventually you will reach the entrance to the village. Rip out the plank and make your way inside. You can explore all the houses. Eventually you will reach a bridge, but the way forward will be blocked by another symbol. It consists of three parts. First go to the left of the barrier at the bridge and enter the building. Go up the stairs and move to the right. While on the “balcony”, you will be able to focus on the first symbol. Jump off, go back to the barrier. Turn around and go back down the main road. Enter the second building on the left. You should reach the backyard. Go through another building on the left to go up the hill. Jump off the ledge and find a point where you can see the second symbol (you'll generally realize there's the right symbol nearby when you see the red signs floating in the air). Move to the end of the main road and look for the last symbol.
Go back to the bridge, but Senua will suddenly find himself in a new location. Enter the house and take the mirror from the table. You will be attacked by enemies. Proceed as before, but as soon as you see the mirror shining, press the E key. This way you will slow down the time and will be able to attack the enemies without hindrance. After winning, move forward and view the cutscene. Back in the real world, walk across the bridge. Follow through the building. When you get to the other side, turn left and get under the barrier. On your right hand will be the third pillar of knowledge (Tales of Midgard 3/18). Jump back over the planks and move towards the torch in the distance. Look at the building on the right side to reveal a stone face (Glimpses of the Gods 1/17). Focus on it to reveal a secret path that leads to a tree. Focus on it to bring the tree to life and hear part of another story.
Leave the building and follow the path to the left. Follow the wooden path. After the cutscene with the draugar, keep going until another cutscene starts. You will see a man tied to a pole. Go up the hill, crawl further and go lower. There will be a ladder on your left hand. Climb it to find the fourth pillar of knowledge (Tales of Midgard 4/18).
Go back down and go to the left. Crawl through the gap between the rocks, crawl under the wooden platform and try to rescue the stranger. Fight the draugars. Some of them use fire — in this case try to jump back. Don't forget the mirror (key E)! You can reduce the difficulty level if you wish. After the fight, follow Fargrimr, jump off the ledge and reach the destroyed bridge. The man will walk off to the right, but you'll turn left to find a hidden face (Glimpses of the Gods 2/17). Concentrate on him and afterwards revive the tree. Go back and continue following Fargrimr. When you reach the fork with the dry stick (not too far away), turn left. At the end of the path, look for the fifth pillar of knowledge (Tales of Midgard 5/18). Return to Fargrimr and follow the trail. Together with him, go back to the beginning of the village where you left Torgester.
Reach the ruined village. Turn to the right of the village entrance, walk along the rocks and find the hidden face (Glimpses of the Gods 3/17) in the dead end on your left hand. Return to the village entrance, but take your time. This time, turn around and go in the opposite direction. There will be another hidden stone face ahead (Glimpses of the Gods 4/17) and to the right of it is the sixth pillar of knowledge (Tales of Midgard 6/18). Enter the village and catch up with your companions. After the cutscene, run along the path, dodging obstacles and jumping over barriers. Eventually, you will find yourself in a dark forest. Just keep going forward. At the fork, turn right (the path to the left is blocked). Pick up the torch, go back to the fork and this time go to the left side (the passage is now open). At the next fork, turn right. If you see a red light at the end of any path, don't go there or Senua will die. Jump off the ledge and fight the enemies. Pick up the torch and choose a passage without a red light. Squeeze through the gap. The torch should go out. Go to the fire source ahead and light the torch.
Defeat all the enemies and pick up the torch. Find the only passage without red light (the other two lead to death). Set the wooden structure on fire. After the cutscene, turn around and turn left to find the seventh pillar of knowledge (Tales of Midgard 7/18). Jump off the nearest ledge, walk down the slope and reach the fork. Turn left to find a hidden face (Glimpses of the Gods 5/17) and a tree behind it. Go back and take the other path. Descending the ledge will take you to another area.
Turn left and take the stone ball. The environment will change. Go back and place the orb on the stand. Round drops will appear in the air. Focus on one of these drops to open a new path. Climb the ledge and find the second stone ball. Turn around, jump to the pedestal and put the orb back in place. You will return to the real world. The path forward will be unlocked. Continue forward, but don't be in a hurry: there will be a hidden face on the right (Glimpses of the Gods 6/17). Focus on it to unlock the path to the tree.
Keep moving. There is a tunnel on the right side. Do not rush into it, but find the ledge on the left. Once you're up there, go between the stones and find the knowledge pillar (Tales of Midgard 8/18). Jump off the ledge and go through the archway on the right. Move between the stones and jump down below. There will be a second puzzle with stone gars here. Climb the hill on the right and take the orb. Jump back down and set it into the pedestal. Focus on the water droplets that will appear ahead. Climb up the ledge that appears. Focus on the drop again so that a new pedestal with a stone ball appears. Pick up the second ball, step back and focus on the drop again to descend to the center of the area. Focus on the drop next to where you took the first orb to create a bridge. Climb the hill on the right and go over the bridge. Focus on the drop behind the bridge so that a pedestal with a ball appears nearby. Go back to the center area and focus on the blob again so that the bridge disappears. Get between the stones and pick up the third stone ball. Place it on the central pedestal to complete the puzzle and unlock the exit.
Move on, jump off a few ledges and go forward. There will be ledges on the right side that you can climb up to find the hidden face (Glimpses of the Gods 7/17). Just after you pass two small pools on the left and right, turn left and make your way between the rocks. Climb the ledge and find the next pillar of knowledge (Tales of Midgard 9/18).
Jump off the ledge to return to the main path. There are two passages ahead, one on the left and one on the right. First, go through the archway on the right side to find the Pillar of Knowledge (Tales of Midgard 10/18). Then turn into the tunnel on the left (you'll need to jump into a cave). Once outside, you will find a new puzzle with stone balls. Go to the right side to find the first stone ball. Take it and place it on the pedestal in the center. Move to the left and focus on the water drop to extend the rock. Climb the ledge to access this rock, then focus on the next drop of water. This is how you will remove the obstacle on the next ledge. You will be attacked by enemies. After defeating them, climb back down and focus on the very first drop. Climb up the ledge and reach the second stone ball. On the left side of it, there is a knowledge pillar on the ceiling (Tales of Midgard 11/18). Make sure to focus on it! Take the second stone ball, jump off the ledge and place it in the center. Focus on the drop of water closer to the center pedestal. A new platform should appear on the right side. Climb it and pick up the third stone ball. Place it in the center to complete the puzzle. When the water is gone, go down to the new cave. Before entering it, Senua will take a torch.
Move through the cave. After jumping down and going through the cave, find the hidden face on the left side of the cave (Glimpses of the Gods 8/17). Jump off three more ledges and go to the right side. Climb the ledge and find the pillar of knowledge (Tales of Midgard 12/18). Go back and make your way between the rocks at the opposite end of the cave. Move to the left, climb the ledge and use the torch on the square pedestal. Drop down the rock on the right and take the new climb to go further. Turn right and go through the tunnel. At the end of the tunnel, go lower and find another passage on your right hand. Follow the path to the left and interact with the square lamp. Before jumping off the cliff, turn around and find the hidden face (Glimpses of the Gods 9/17).
Drop down from the platform next to the lamp and go through the opened door. Turn to the left to find another tunnel. There will be a large hole at the end of it. Jump into it to find yourself in the water. Turn around and find the hidden face (Glimpses of the Gods 10/17). Move on, find the ledge on your right hand and get out of the water. Follow to the right and pass between the rocks. Go to the left side and light the square lamp. Descend the rock on the right and move forward. Turn left and light the tall lamp located in the hole.
Jump down from the rock on the left, extinguish the square lamp you lit earlier. Jump to the right of this lamp and move under the waterfall (you couldn't pass through earlier because you created a wall). Move to the left and light the torch using the previously lit lamp in the hole. Use the torch to activate the nearest square lamp. You can cross over the bridge. Move through the tunnel ahead. Constantly look to the right to find a ledge from which you can jump to the knowledge pillar (Tales of Midgard 13/18). Continue along the only route.
Extinguish the square lamp, return to the water and go further. Climb out of the water. When the torch goes out, turn to the left. Soon you will be able to light the torch. Follow the path, go down a couple of ledges and go through a body of water. Move through another waterfall, causing the torch to go out. Turn left and go through another waterfall. Go further through the arch in the wall and find the torchlight. Light the torch. Go back through the tunnel and climb the ledge on the left to find another lamp. Light it, go under the waterfall and go down into the water. Stick to the parts of the waterfall that are illuminated.
At the far end of the room, you will be able to light the torch using the lamp on the small platform on the right. Keep moving until the torch goes out under the waterfall. Quickly run to the next ledge to get out of the water. Find another torch and make your way outside. Climb the small hill on the left side and light the square lamp/altar. A bridge will appear on the right. Walk across it, descend the cliff ahead and follow the path to a new square lamp. Extinguish it, go through the resulting passage and extinguish the third square lamp. Go back to the previous lamp, light it and walk again to the third lamp. Light it to form a ridge that you can walk through next. Interact with the strange window portal on the right to leave a torch. An unknown figure will light the lamp at the other end, creating a bridge for you.
Jump off the cliff on the left, cross the bridge. Extinguish the new torch and go through the small tunnel ahead. At the end of the path you will see the mysterious figure again, who will return the torch to you. Go back through the tunnel and light the nearest lamp. Turn back around. This time you will be able to go higher up. Go to the left and light the lamp. Go down the cliff to the left and return to the area you were in when you came out of the cave. Extinguish the lamp and go through the opening ahead. Soon you will find another window where you need to place the torch .Wait a bit for the unknown character to light the lamp. Go further, move through the cave and defeat the enemies.
Get through the gap between the rocks. Senua will give you his sword. Go down the cliff. There will be a long section where you have to choose lighted areas. It's actually quite simple here. Eventually, you'll see daylight. Walk along the ledges to get to a light colored cave. When you reach a fork with rocks floating in the air, first turn left and find a hidden face (Glimpses of the Gods 11/17). Continue in the other direction. When you reach a dead end before turning into the tunnel on the left, go a little further and turn right to find a pillar of knowledge (Tales of Midgard 14/18). Follow through another passage and find another puzzle. Jump off the ledge, turn left and focus on the water drop. Turn around, focus on the large drop in the center to create a new platform. Walk along the platform and focus on the large ball again so that the rocks blocking the path disappear. At the top of the path, focus on the large water ball again to extend the ledge and focus on the far drop. This will open the exit from the cave.
Turn around and jump off the ledge on the left to return to the center area. Focus on the large water ball to remove the rocks and return to the beginning. You'll need to focus on this ball once more along the way. Crawl through the narrow tunnel to find the hidden people. After the cutscene, keep going to learn the story of the local giant. At the end, a lengthy battle will begin. When the wow ends, leave the cave and follow Fargrimr until you encounter the giant. Move through the location, hiding behind rocks. When you reach the chain, attack it with your sword. You need to destroy all the chains to free the giant.
Head down the hill. When your companions disappear, move on and pass behind a small waterfall to find a hidden face (Glimpses of the Gods 12/17). Go up from the waterfall and immediately turn right. Go forward over the small waterfall to find the pillar of knowledge (Tales of Midgard 15/18). Return to the main path and continue on to reunite with your friends. Follow the new acquaintance to the manhole between the rocks. Take your time and look to the right to find a hidden face (Glimpses of the Gods 13/17). Make your way between the rocks, follow Astridr until you jump over a rock and find yourself in the open. Turn right and go through the tunnel to find a pillar of knowledge (Tales of Midgard 16/18). Return and continue following Astridr.
Fight the draugars. When the fight is over, keep moving until you reach a barrier. You need to find the symbols. Turn around and focus on the drop of water near the rock. Three passages will open up behind you. Stand in front of the barrier and go to the right. You will find the first moss symbol on the rocks. Keep going, focus on the drop on the left side and move to the very end. Once at the ruined house, look left to find the second symbol on the rocks. Focus on the water drop again and go back to the main area. Focus on the nearest drop and climb the hill opposite the barrier to find the last symbol. Go through the resulting passage. In the next area, on the right side, look for a hidden face (Glimpses of the Gods 14/17). Back on the main path, follow the shore until you come to a new barrier. Once again, you will need to find three symbols.
Go back and climb up the ledge. Turn left and focus on the water drop. Now that the path forward is unlocked, move forward and look left to find the first symbol made of rubble and rocks. Turn right, jump off the ledge and scramble between the stones at the other end of the area to find another collectible, the Pillar of Knowledge (Tales of Midgard 17/18). Turn around and look into the cave through which you came here. There is a hidden face inside it (Glimpses of the Gods 15/17). Go back and climb up the ledge on the left. Climb the other ledge ahead and focus on the drop on the right to fill the gap and go further. When you hit the obstacle, focus on the water balloon above the sea. Climb the ledge on the right. Once in the ruined hut, look through the hole on the left to find the second symbol. Go back to the very beginning by activating the same water drops. Go to the barrier and look to the right to see a water balloon. Focus on it and go behind the boat at the side of the barrier (right). Once again focus on that balloon so that protrusions appear. Go higher and find another water balloon. This will open a passage to the place from where you will see the third symbol (above the shipwreck in the sea).
Enter the cave and focus on the water balloon. Listen to the story of the second giant. Go up the hill, follow through the village. Somewhere in the middle will be a pillar with bells. Turn right and find a hidden face behind the hut (Glimpses of the Gods 16/17). Return to the main path, go a little further to the fork and turn left to find the last pillar of knowledge (Tales of Midgard 18/18). Behind the nearest house on the right side (you need to go around it) look for the last hidden face (Glimpses of the Gods 17/17). Descend from the rock near the house, move on and meet Astridr.
After winning a long fight, move through the cave. When the giant chases you, periodically throw your spear at him (just press LKM). Eventually, you will need to reach the eye of the storm. Hold on to the rings on the rocks. A little later you will need to hold on to the rings on the wooden structures, but after the first collision with the wave they will be destroyed. At the very end, run forward and watch your step — avoid the shadows where huge barrels will fall.
Go forward to reunite with your companions. Head down the hill. Continue through the forest until you meet Astridr. Move forward and talk to Fargrimr. Choose who you want to approach. Don't worry, as you will save both characters anyway. It won't affect anything!
Eventually, you will meet Torgester. Keep going, make your way through the settlement and watch the cutscene. Fight a lot of enemies. At the very end you'll have to defeat Godi. The mirror will only be available at certain points in the fight. Godi has a lot of unblockable attacks, so it's best to dodge with the Spacebar and then land no more than one light punch. Be patient, then watch the final video that completes the Hellblade 2 walkthrough.
An incredible success for the studio's debut project.
In short, the company is aware of the problem and is solving it.
It will be an animated prequel series.
A free drone piloting simulator designed for schoolchildren and teachers. The game develops drone piloting skills in a safe virtual environment and is available on Steam.
All materials on showgamer.com are protected by copyright. Partial copying is permitted with an open (for search engines) link. ShowGamer (2015)


 Our YouTube channel
 Our VK group

.jpg)
