
First, let's talk about how this game is played. You must communicate with each other. Using microphone on computer/laptop or chats. If you communicate via Discord, then we recommend opening the settings and muting the session. Otherwise, you won't be able to move at the start of the game.
This is a translation of an English article. Please, if you encounter errors, report them in the comments. Thank you!
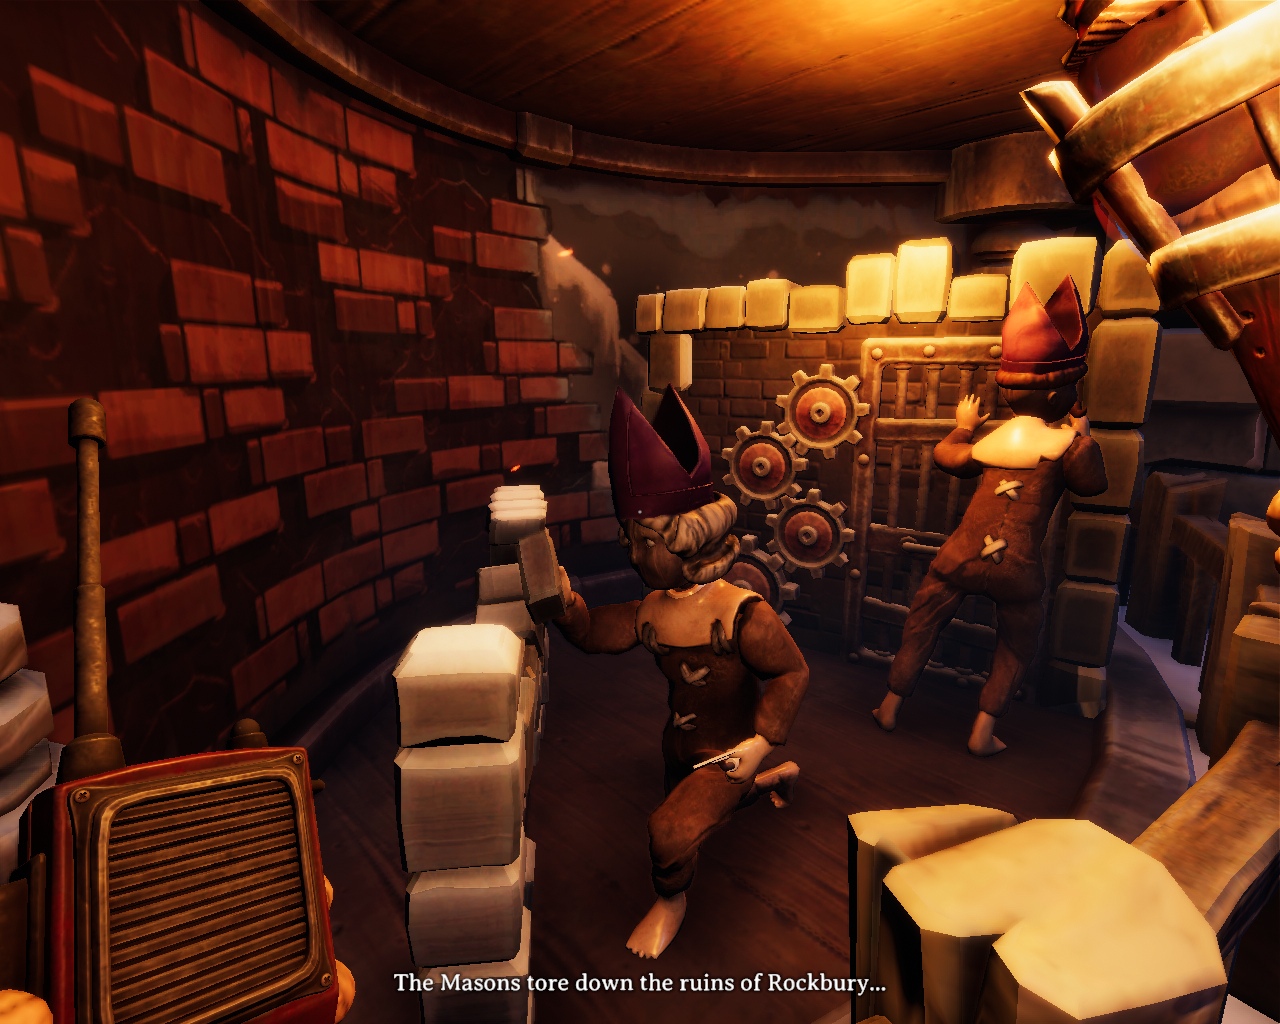
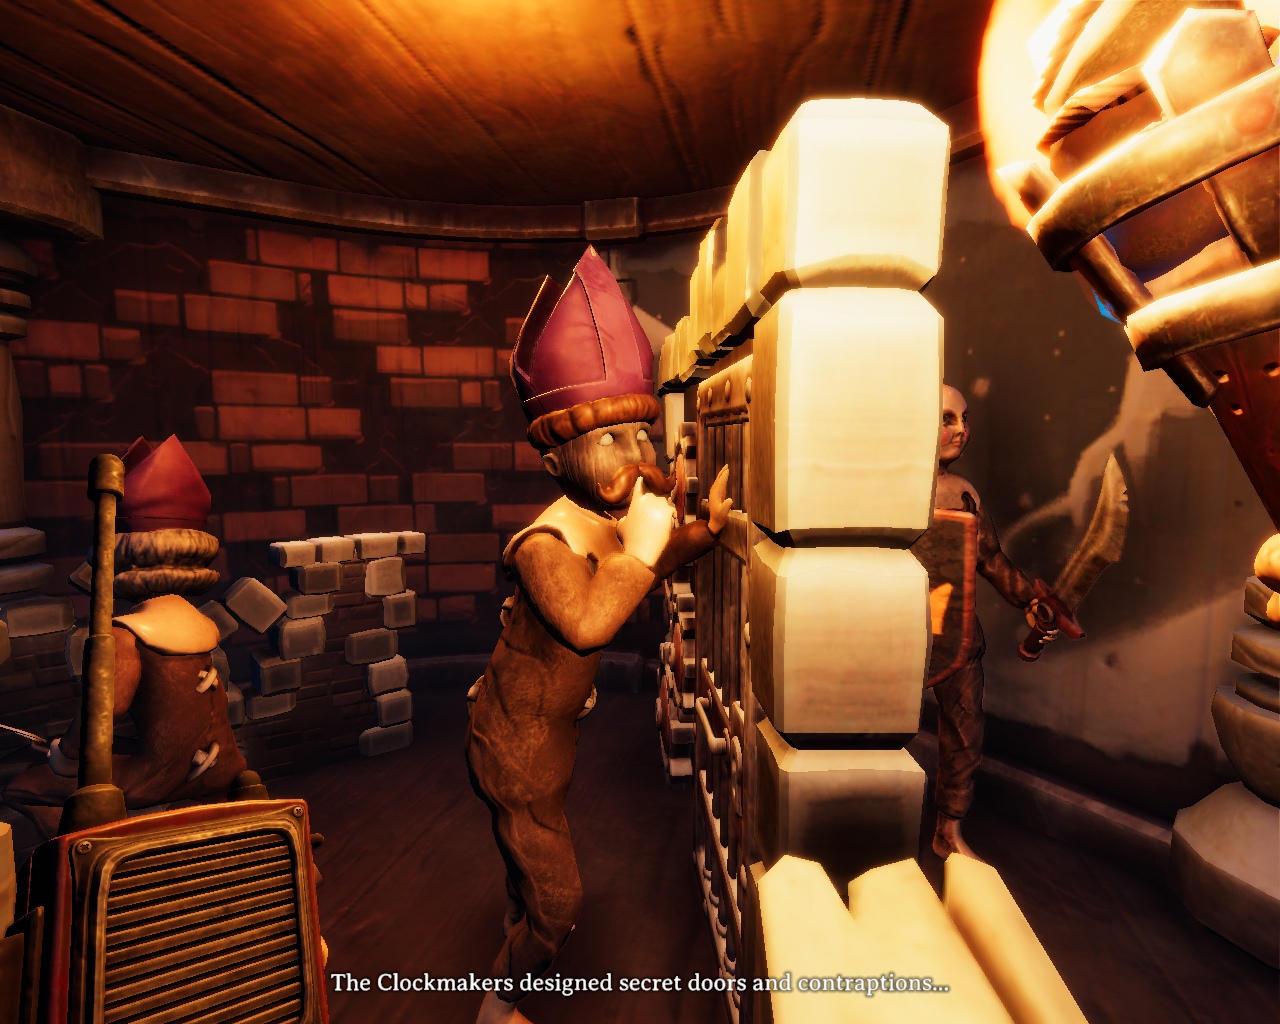
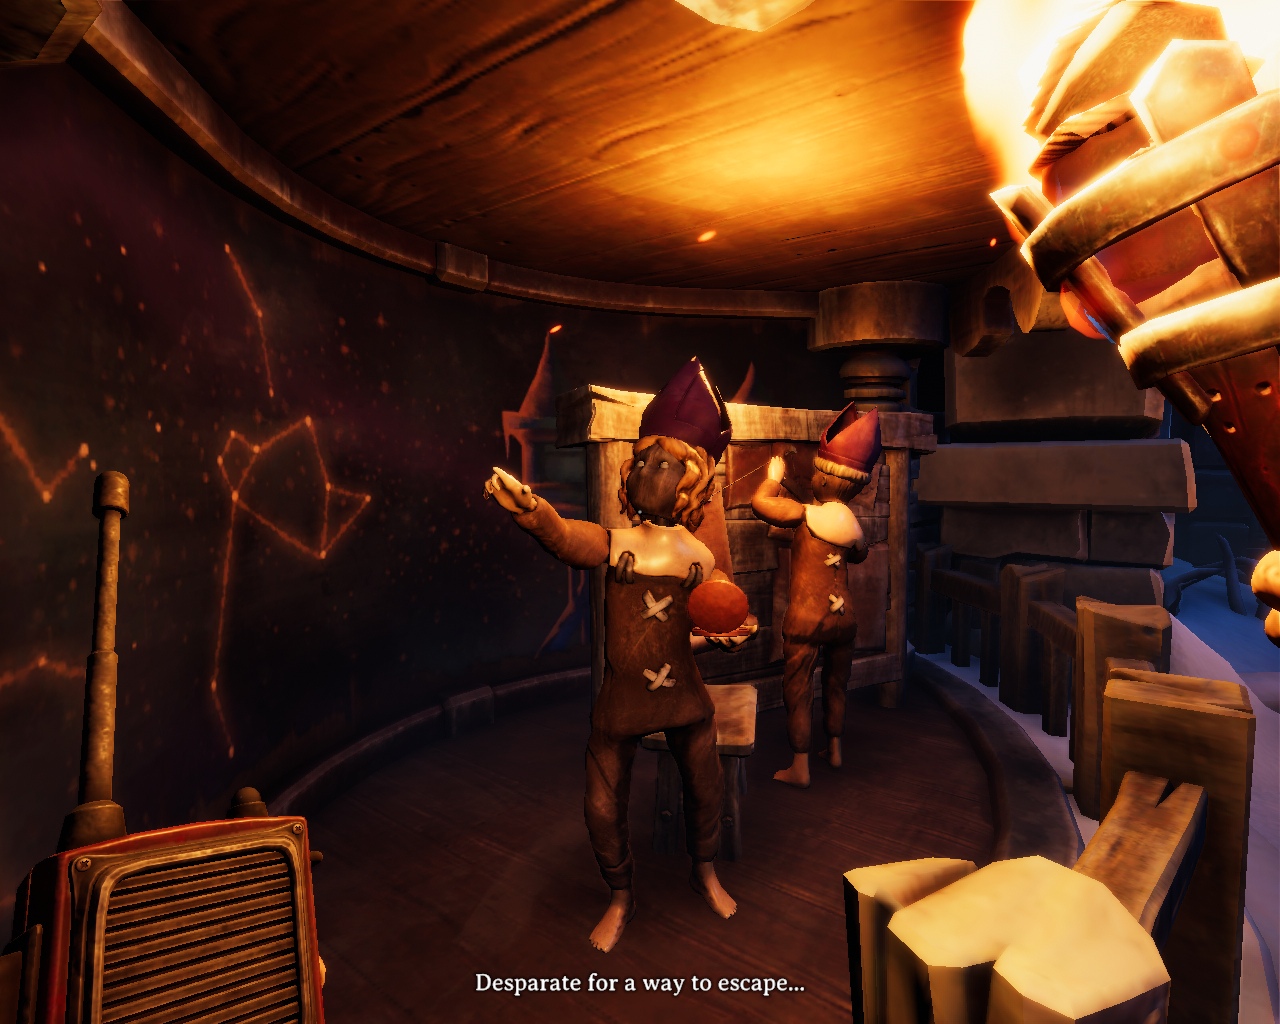
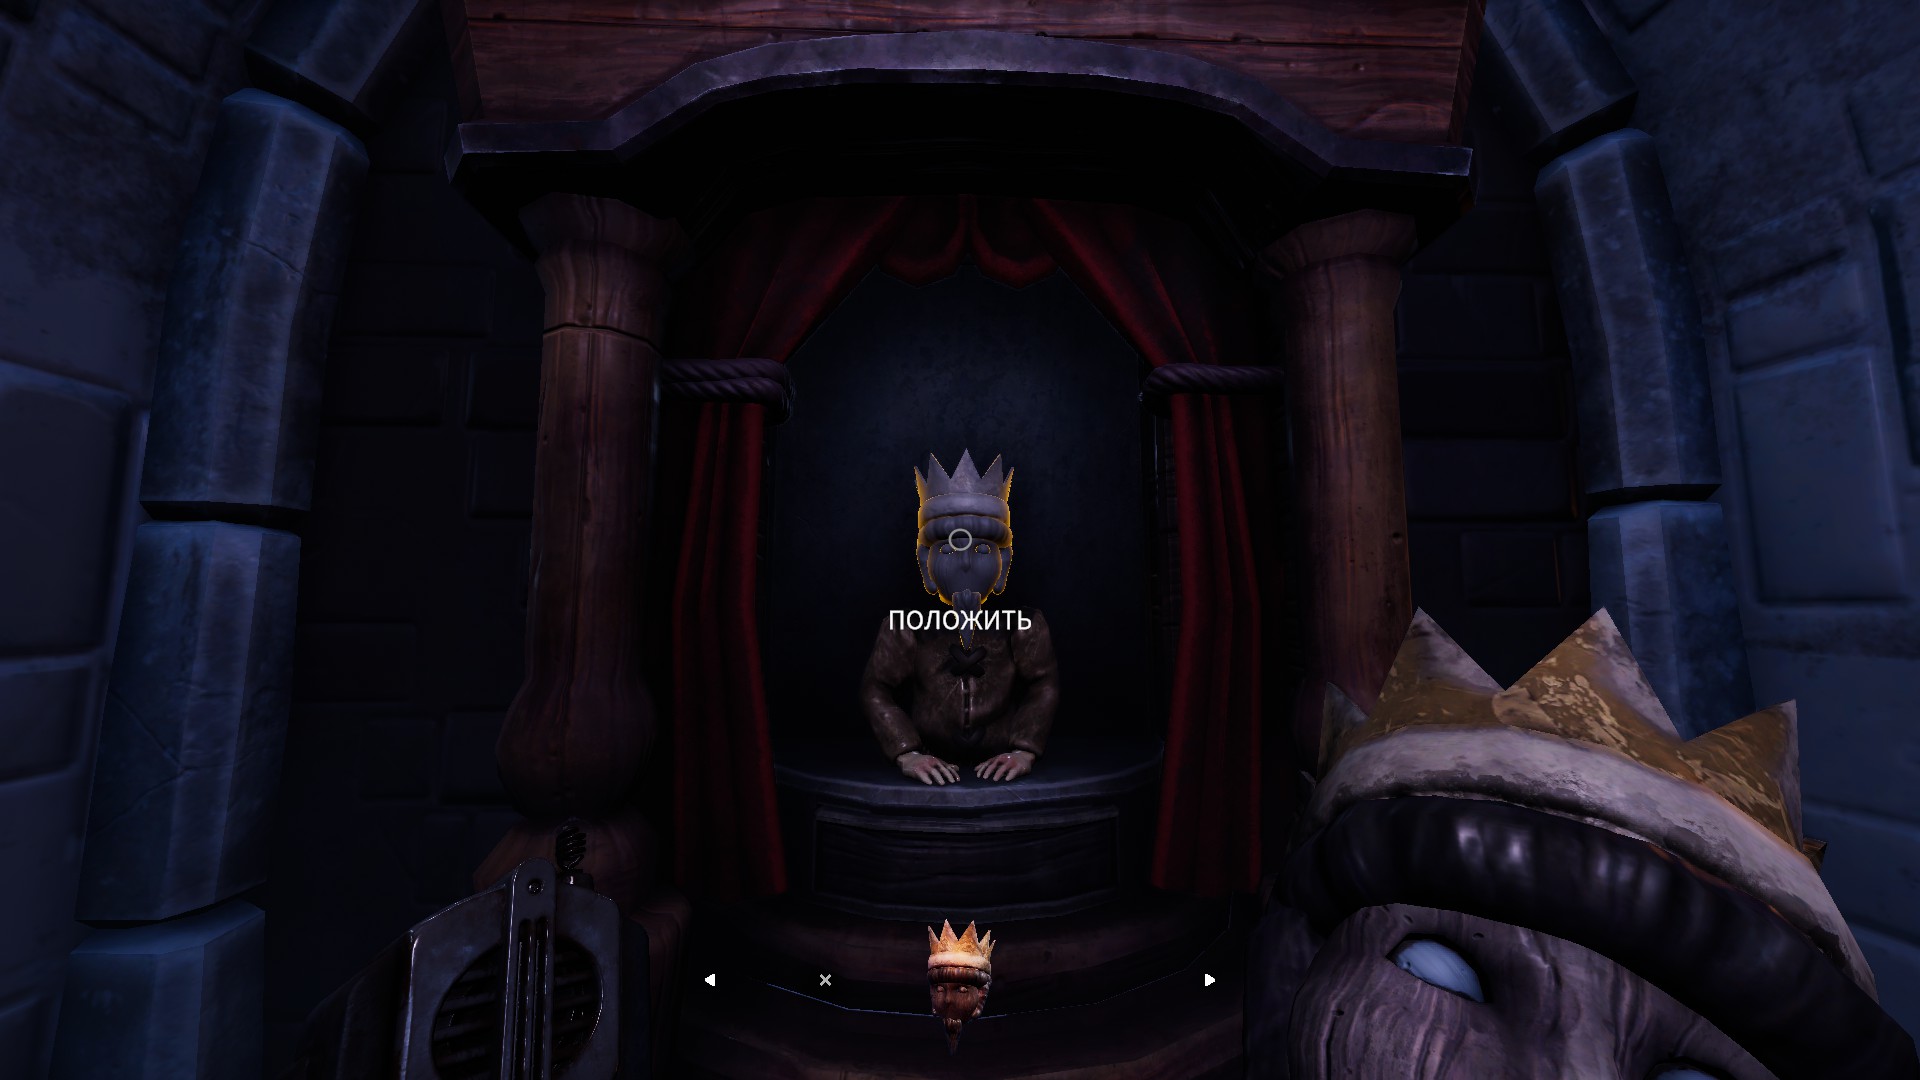
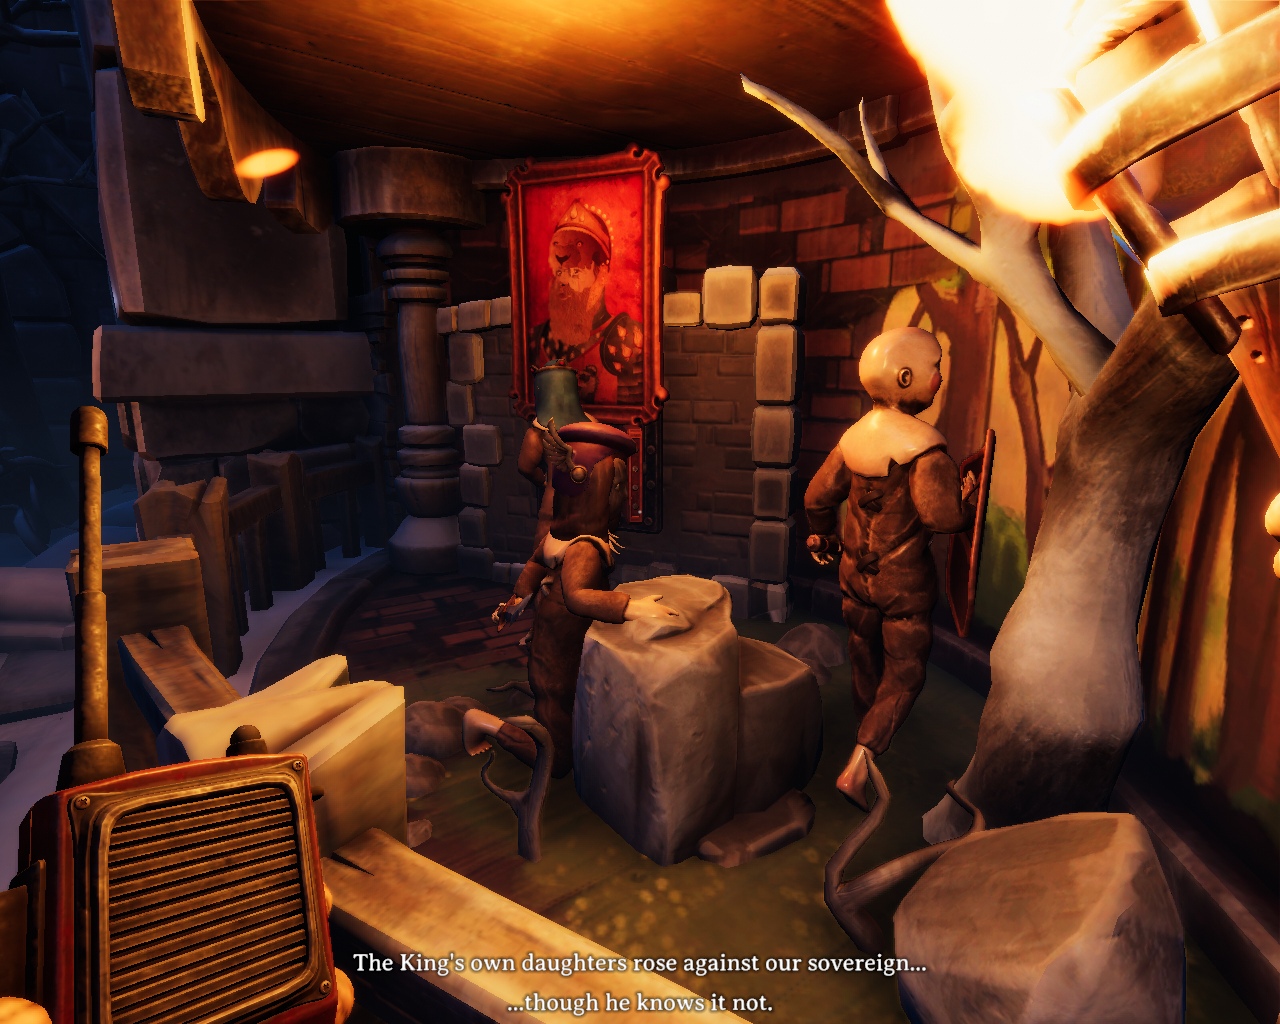
After teleporting to the real world, you run to the castle, which will make you go through the history of the inhabitants of the kingdom with a riddle. The riddle is simple. One of the players clicks on a small owl in the wall and goes into another room, in which he will pass the puppet heads through the mechanism to the other player, which must be placed on the scene outside. There are 4 scenes in total. Each has two heads.
Here are screenshots of scenes with finished heads. Just look for the same ones and pass them to the player on the street.
A15D9E39E9568D40A9A7BEE46FB9DEB6/"data-modal-content-popup-url="https://steamcommunity.com/sharedfiles/displayimageformodaldialog/?imageurl=https%3A%2F%2Fsteamuserimages-a.akamaihd.net%2Fugc%2F180876960 4177344454%2F920D144BA15D9E39E9568D40A9A7BEE46FB9DEB6%2F "> 

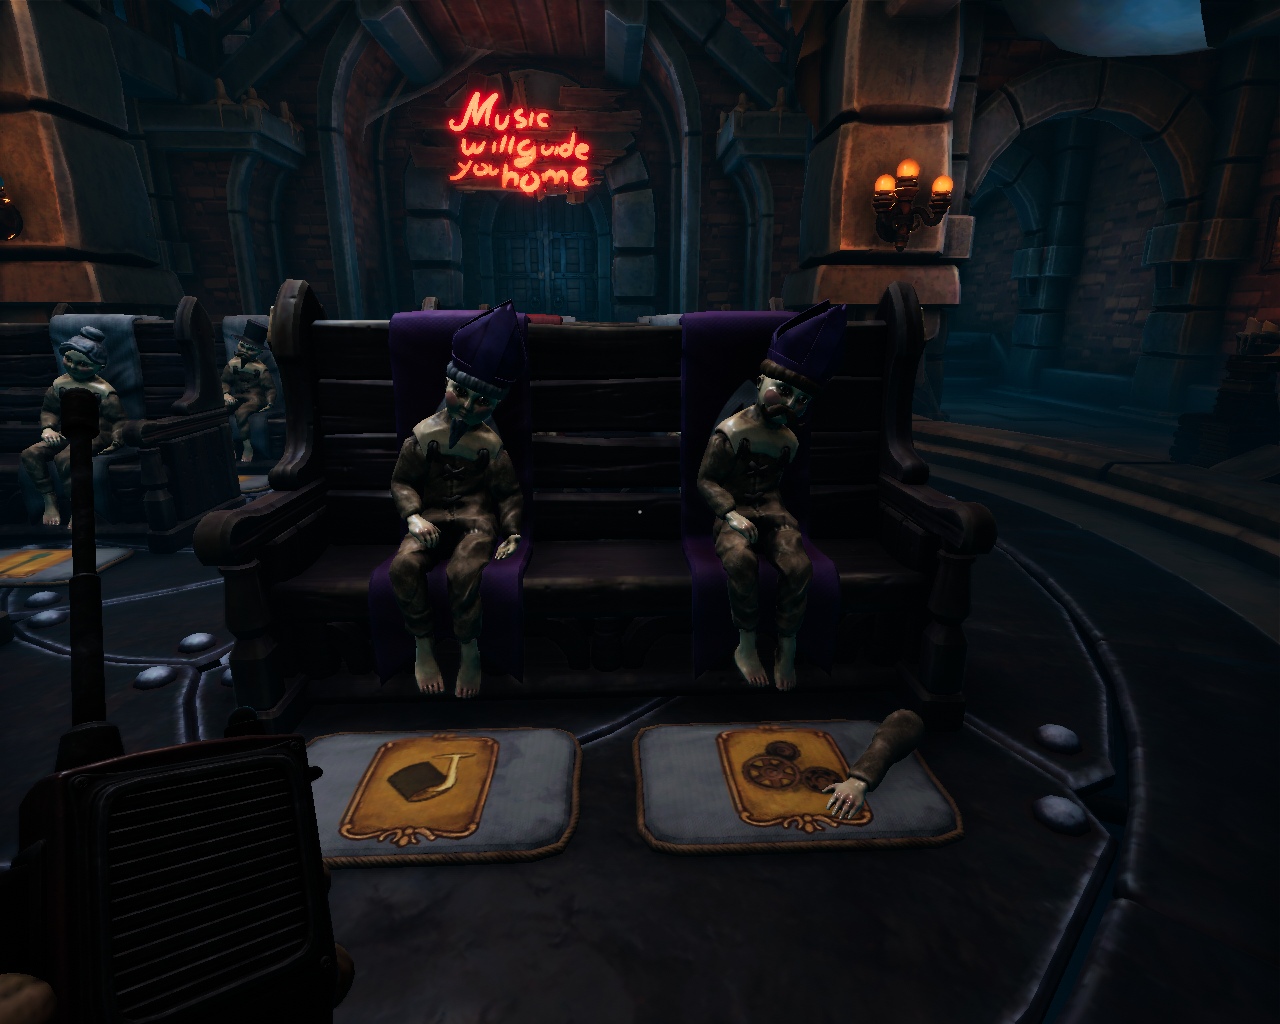
After all the scenes, a secret passage through a large statue of an owl will open. There will be a confessional. Players sit in them and after a bit of loading the game skips them to the next puzzle.
One player climbs the elevator, and the second one lifts it.
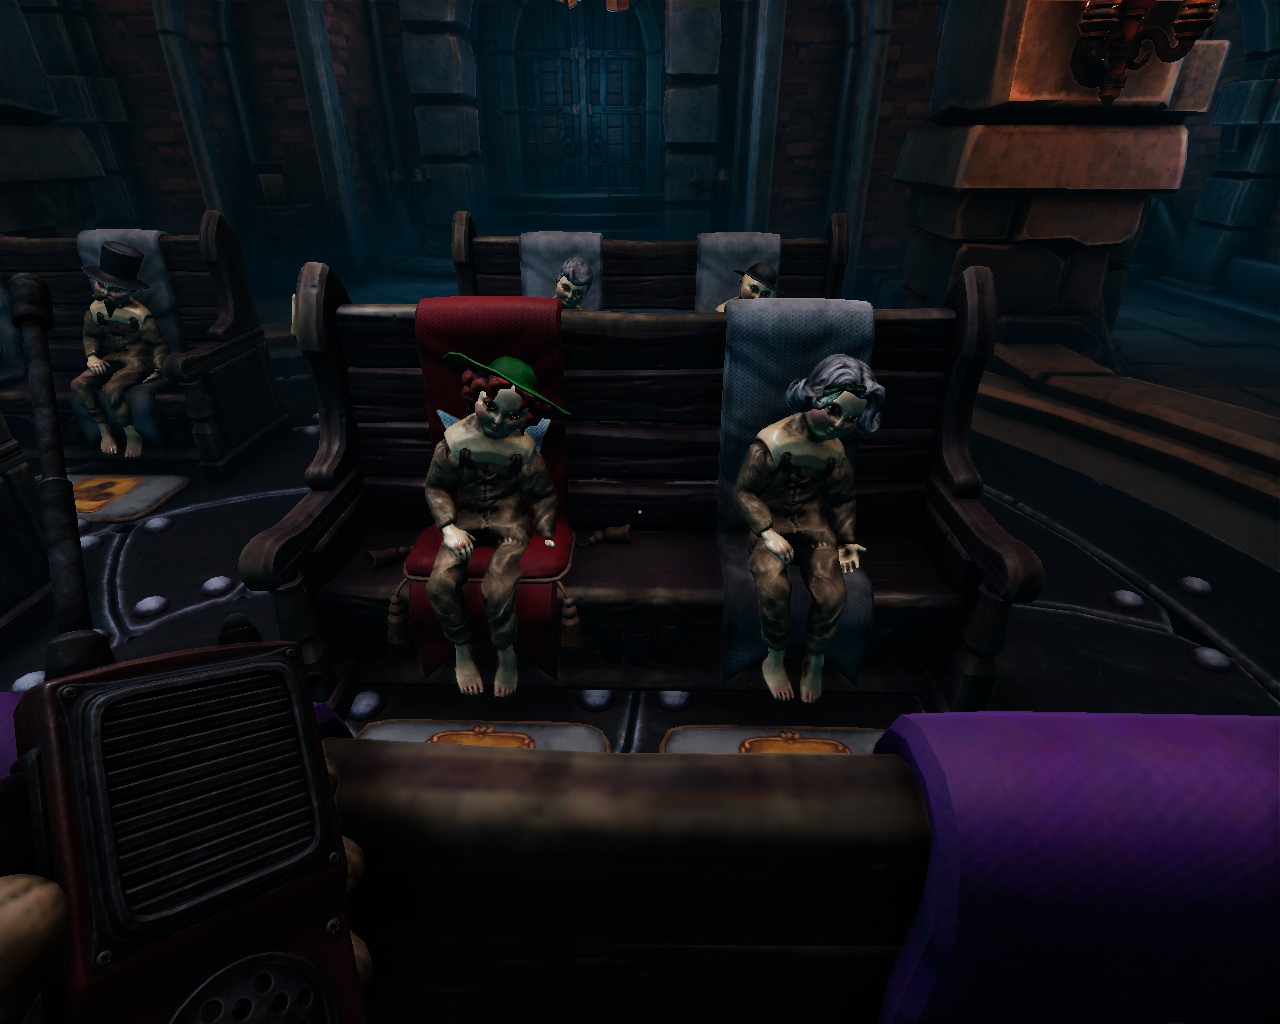
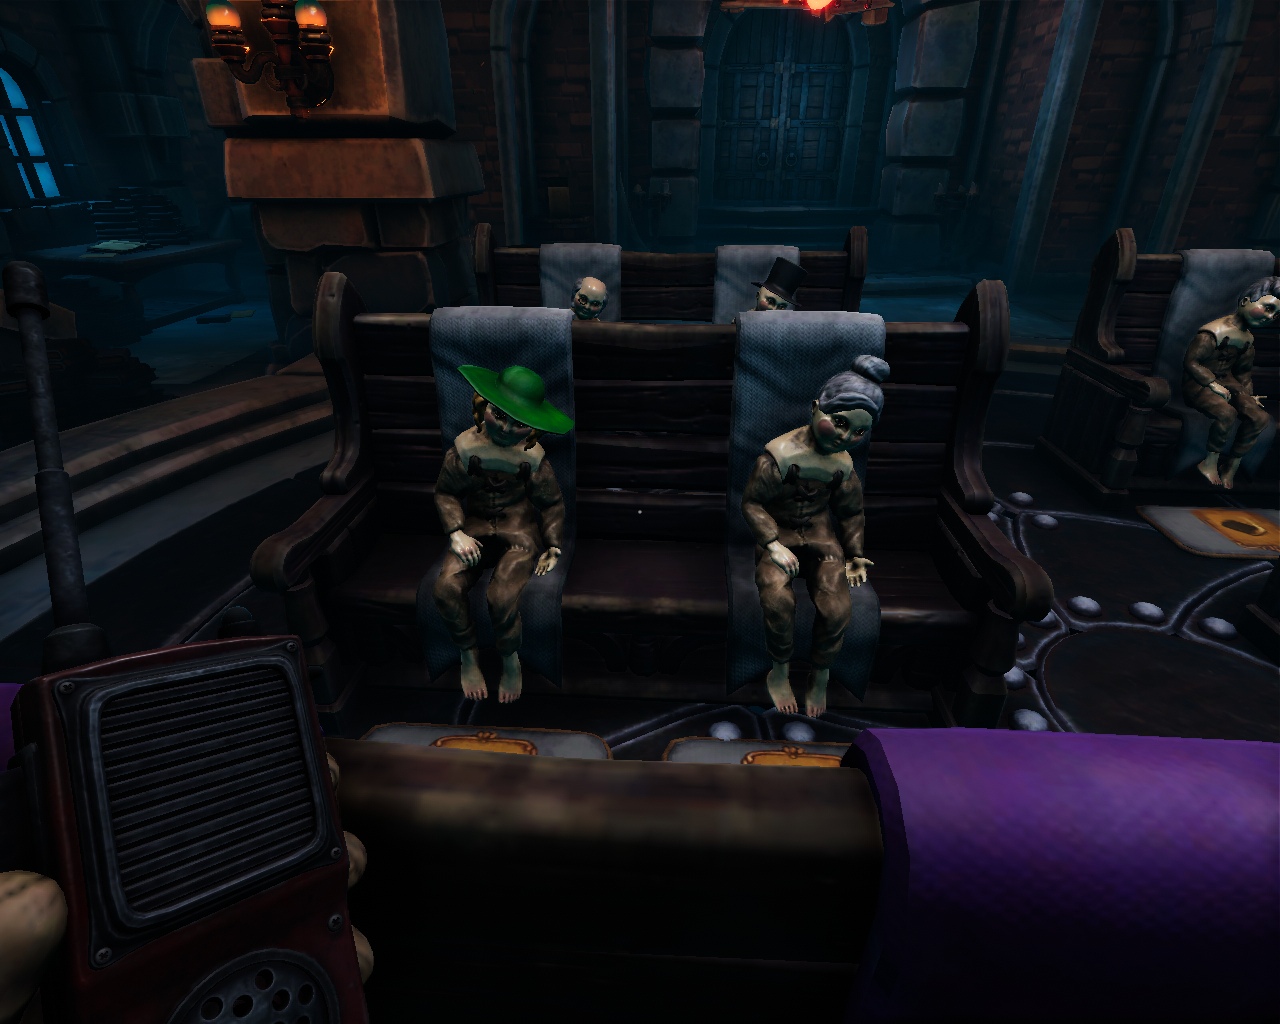
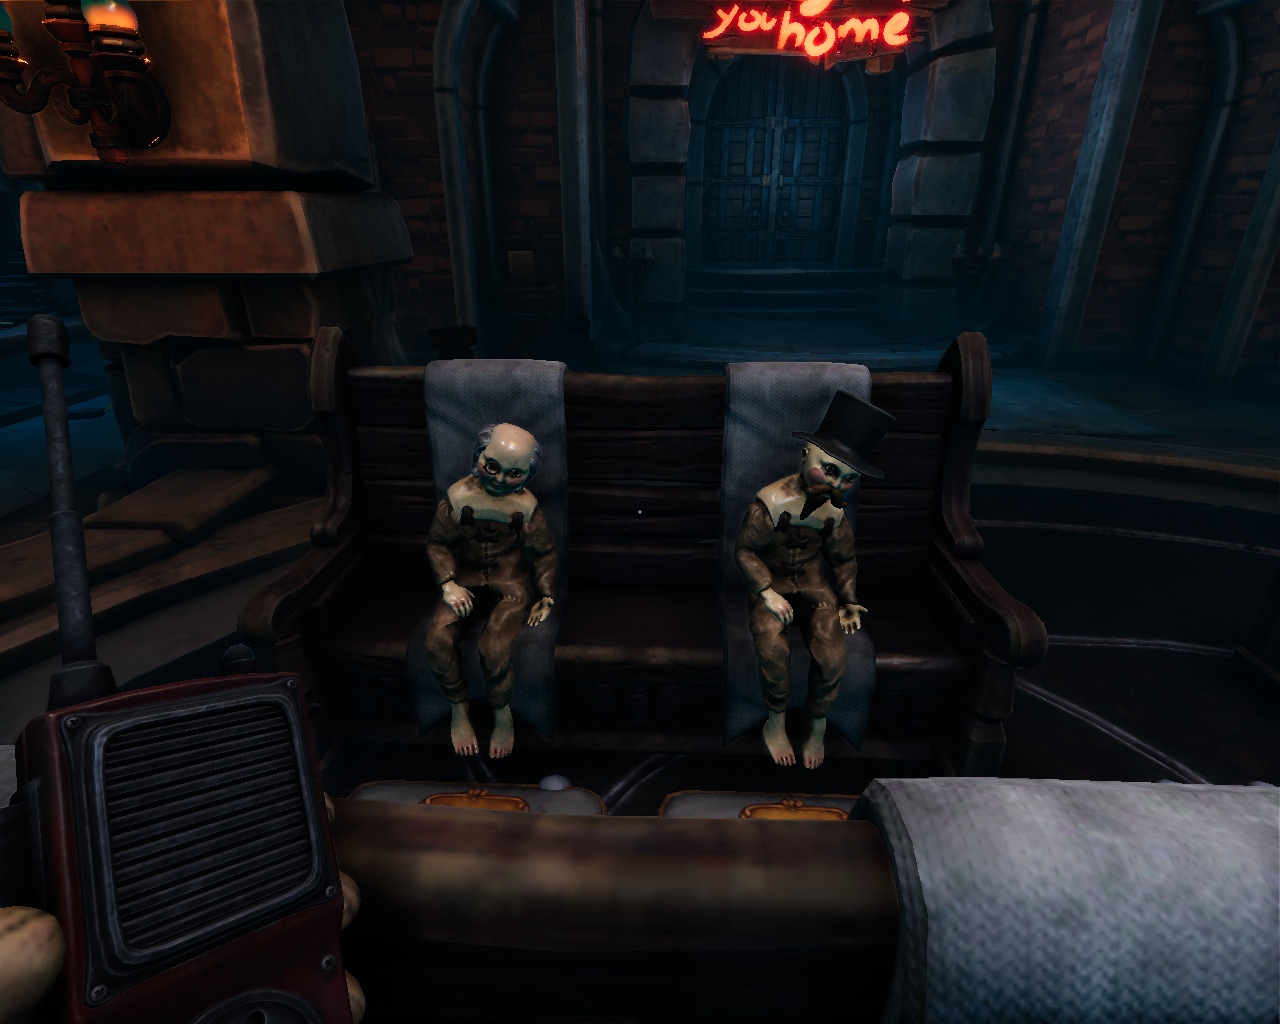
The first player walks along the walls into the room and pulls a lever that opens the room from below. There are dolls that need to be placed in places in the center of the hall.
Here is their correct arrangement from front rows to back rows:
D4DEC3A68%2F"> 

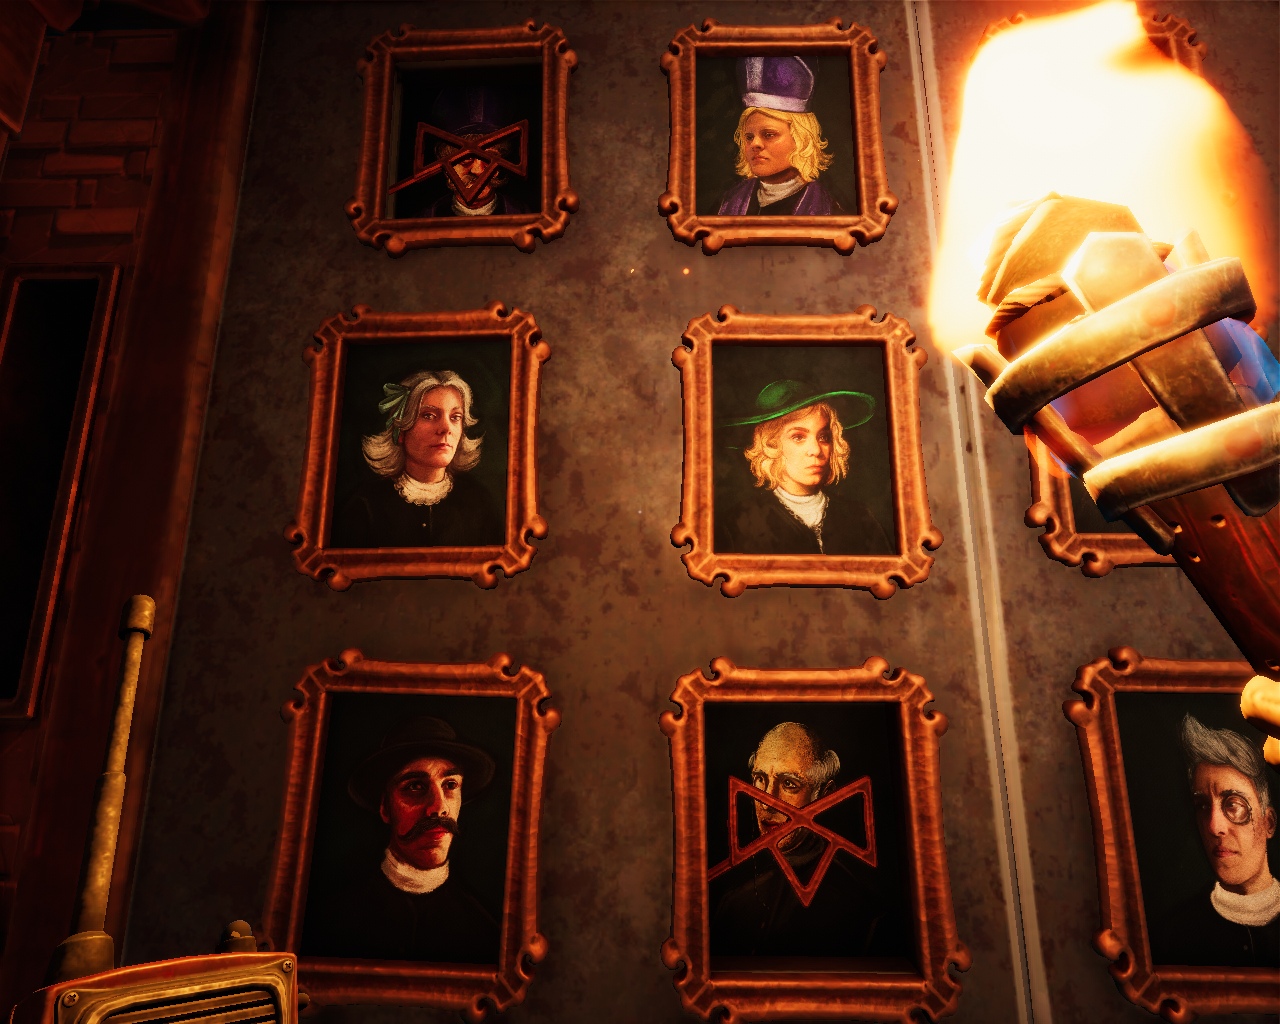
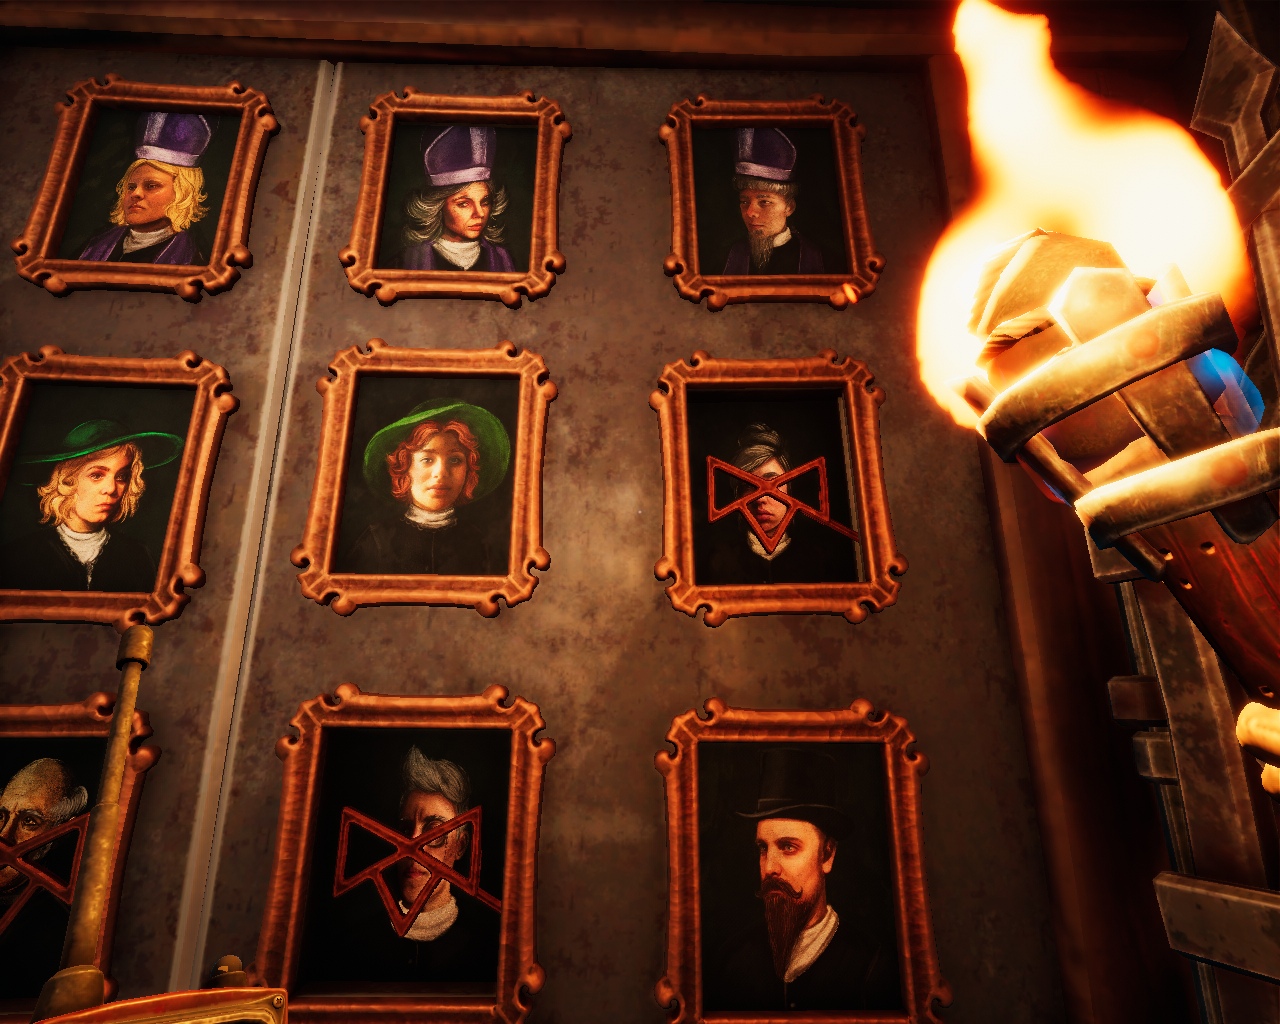
Next, you need to go up to the second floor again in the last room. There will open a wall with portraits. You need to click on 4 portraits.
Then the second player left below must play 6 melodies on the musical mechanism. Melodies are played in 4 notes, for which the keys with letters are responsible. You need to play these melodies in a certain order. Tips for notes and for the order of melodies are divided into two parts. The first player has one in the room behind the portraits, and the second player has one to the left of the musical me?Anism. But we still don't care and we'll just write the order of melodies and notes.
After that, both players stand on the platform behind the musical mechanism and pull the handles together. After that, a cutscene starts.
At the end of the cutscene, both players leave the castle through the main entrance and go down the elevator down to the fork to the next puzzles. You can run any three chapters.
The graveyard has players split into two different spots when one of them touches a coffin that emits a green light.
Then the first puzzle begins.
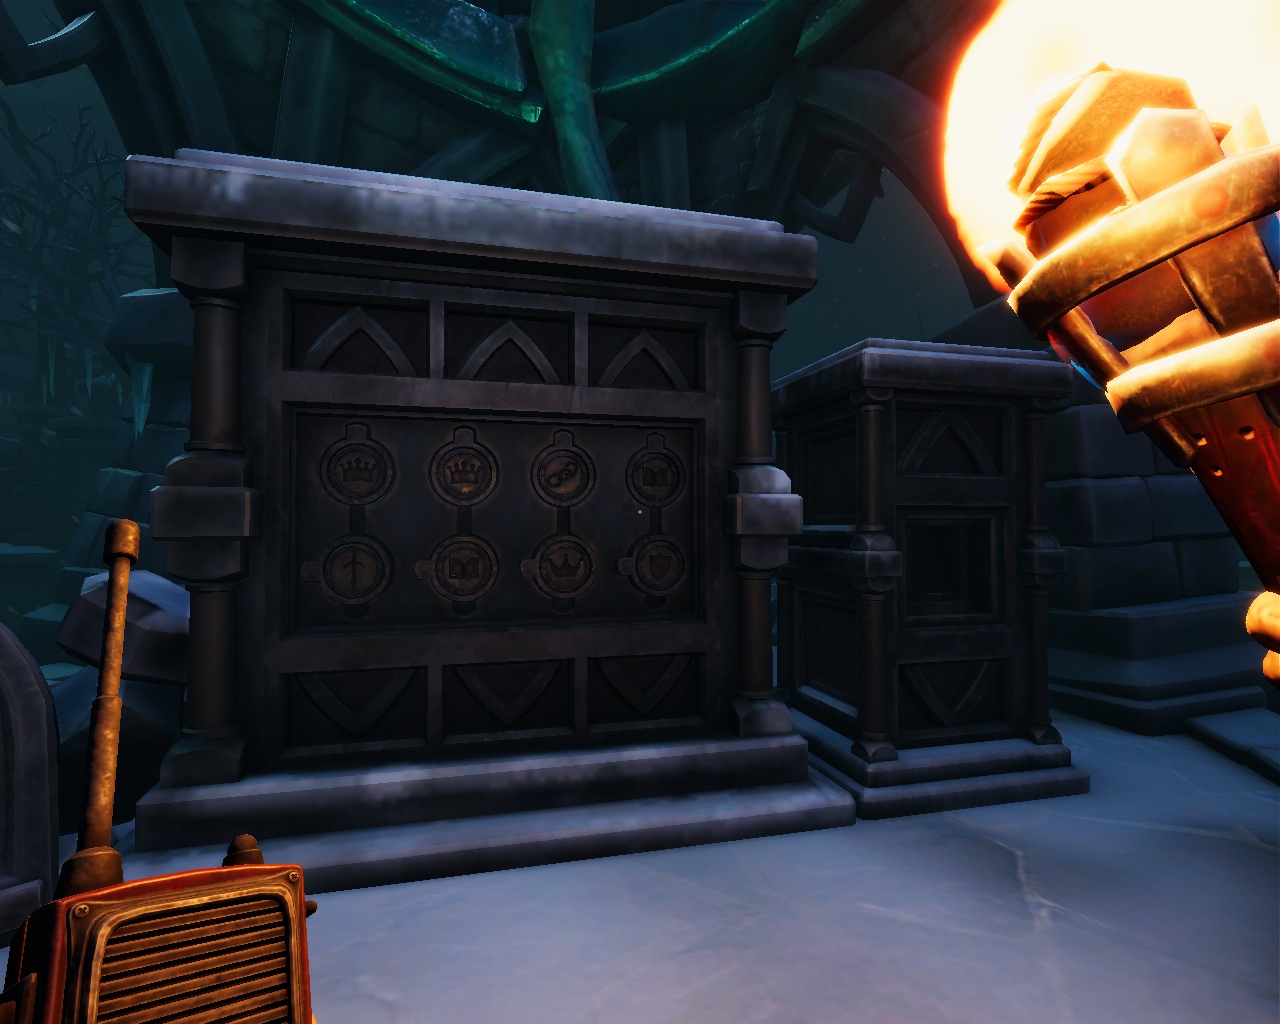
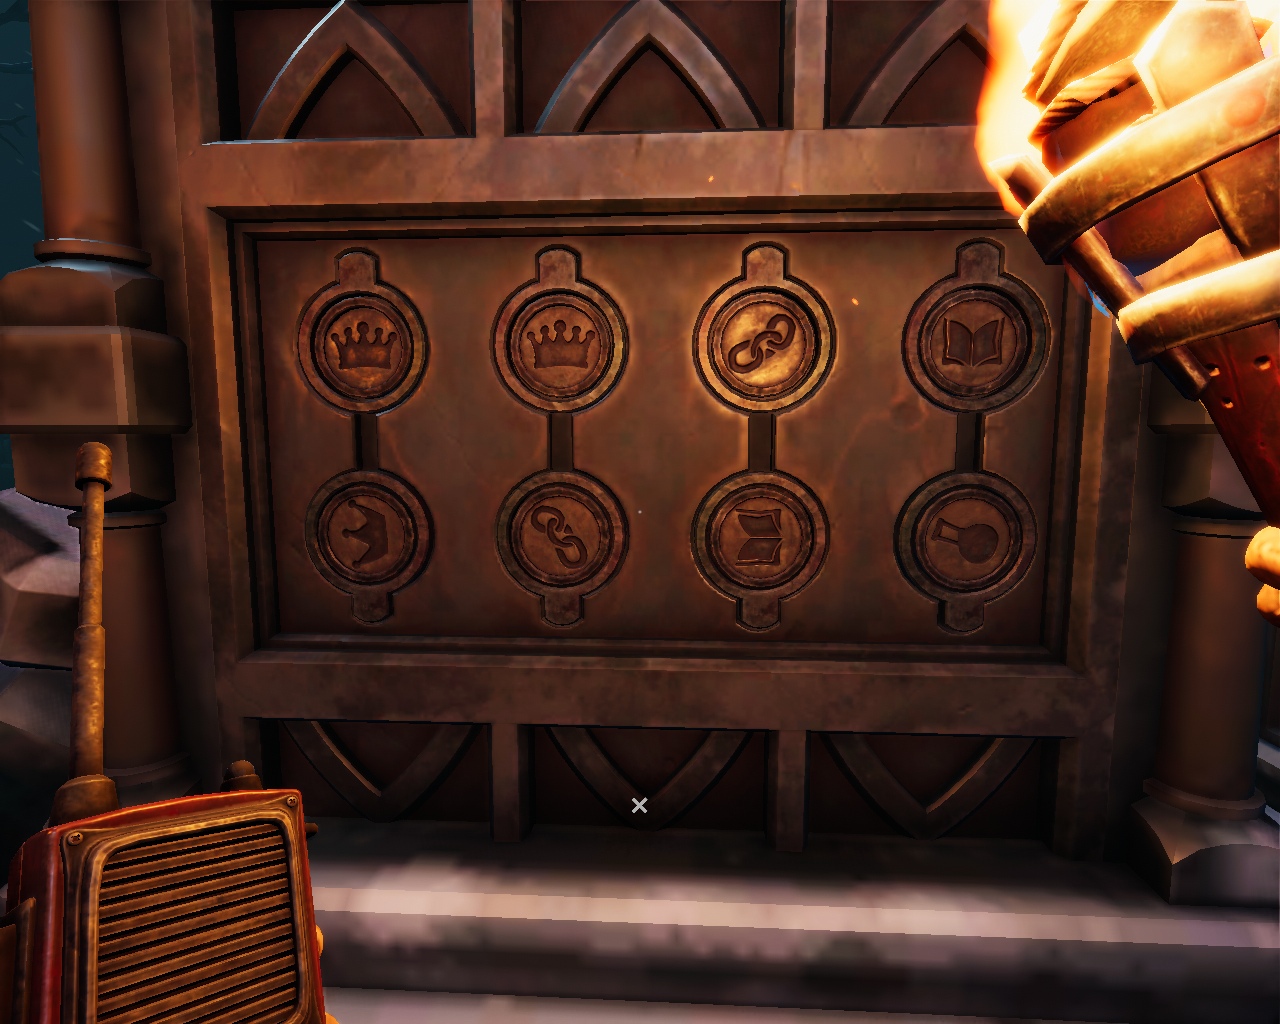
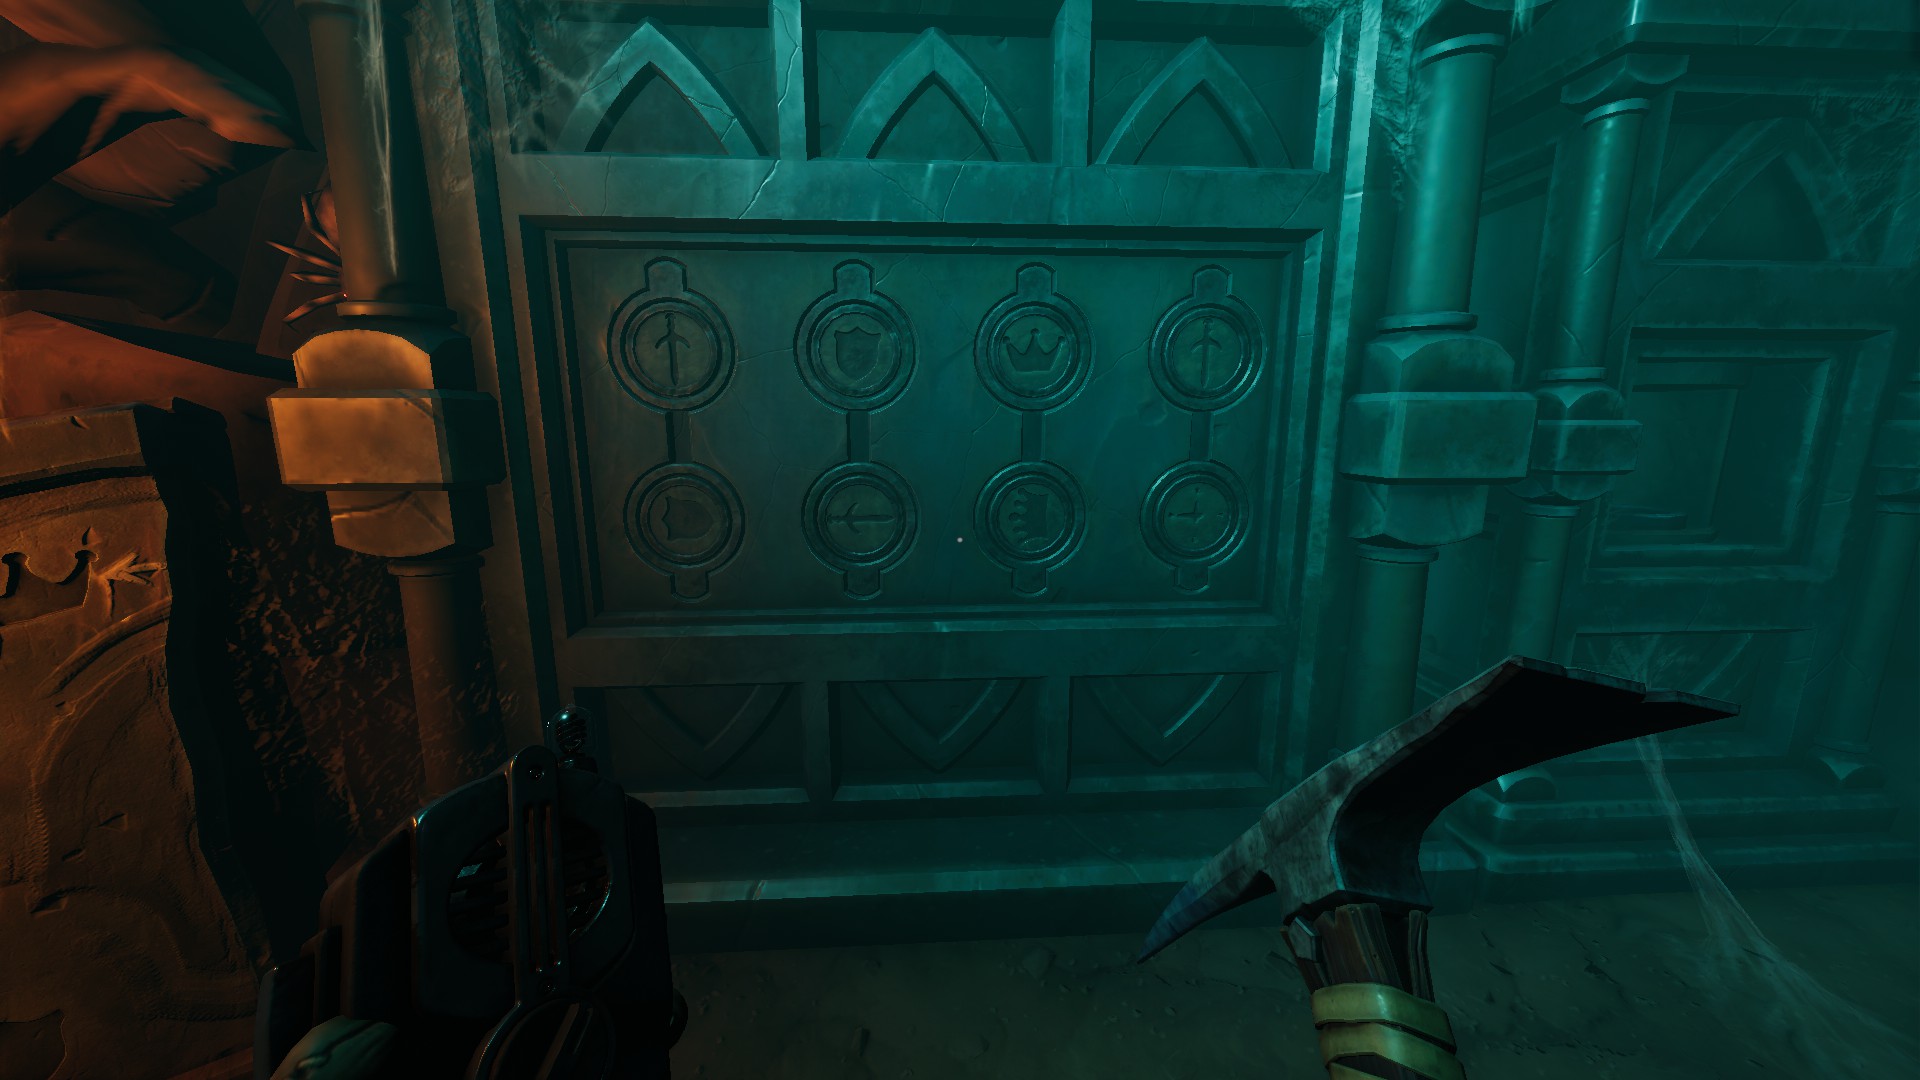
Both players have a scoreboard with 8 chips. 4 upper touch is not allowed. 4 can be rearranged and transferred to another player through the device on the right.
In our version, we started and described the process from the perspective of the player on the surface (the first player):
Here are the final results for two players:
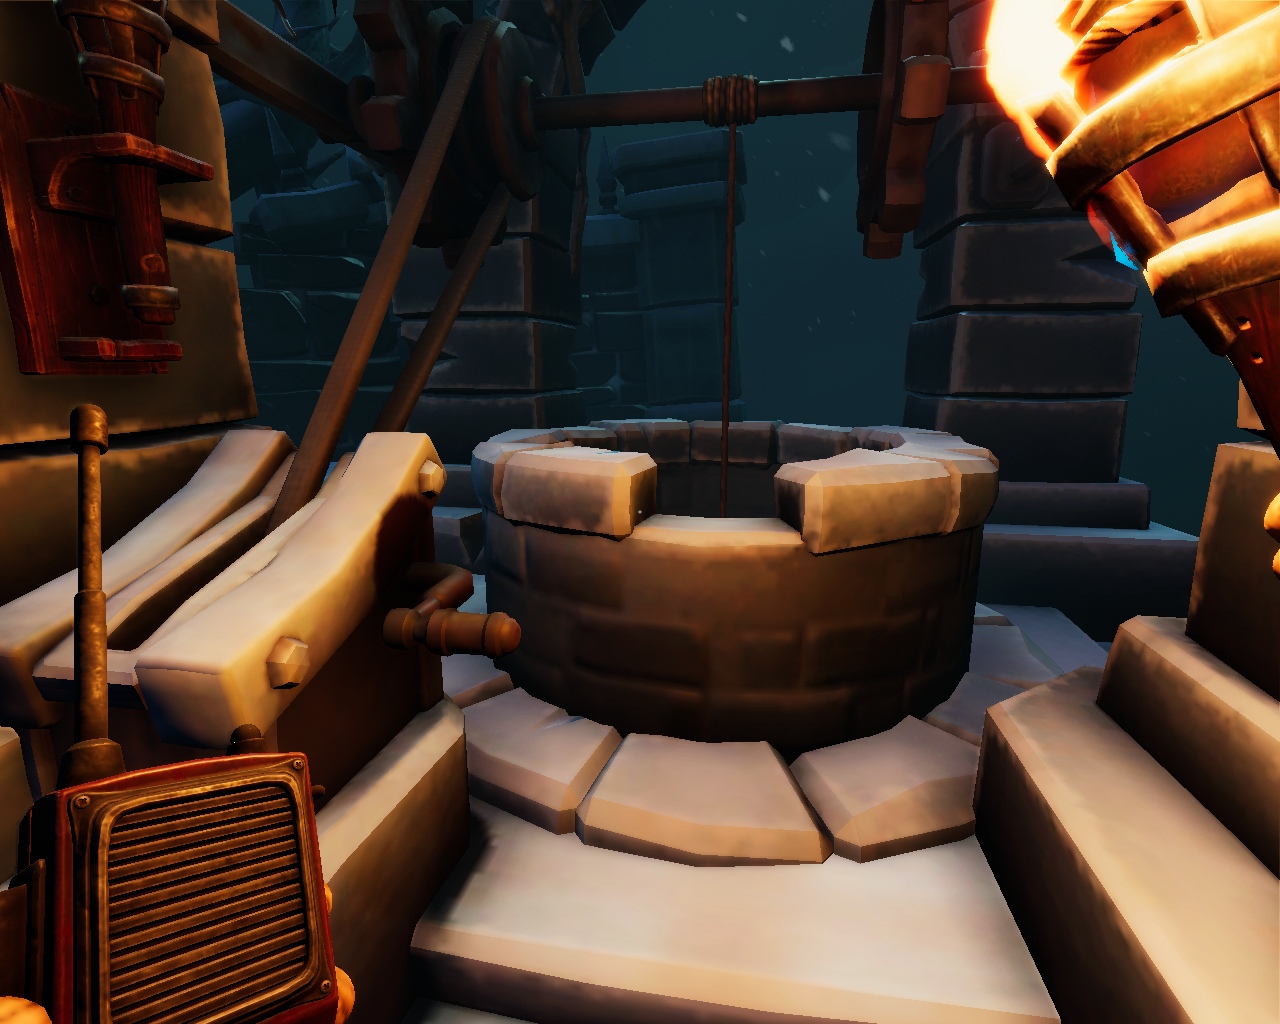
After the first riddle, the second player goes into the open passage and from there passes the pickaxe to the first player. The first player must go to the well and use the lever to raise the bucket, in which the second player must put the pickaxe.
269CEB76C636232E2/"data-modal-content-popup-url="https://steamcommunity.com/sharedfiles/displayimageformodaldialog/?imageurl=https%3A%2F%2Fsteamuserimages-a.akamaihd.net%2Fugc%2F1808769604181044334%2F DE28BB778656B1F8C34484C269CEB76C636232E2%2F "> 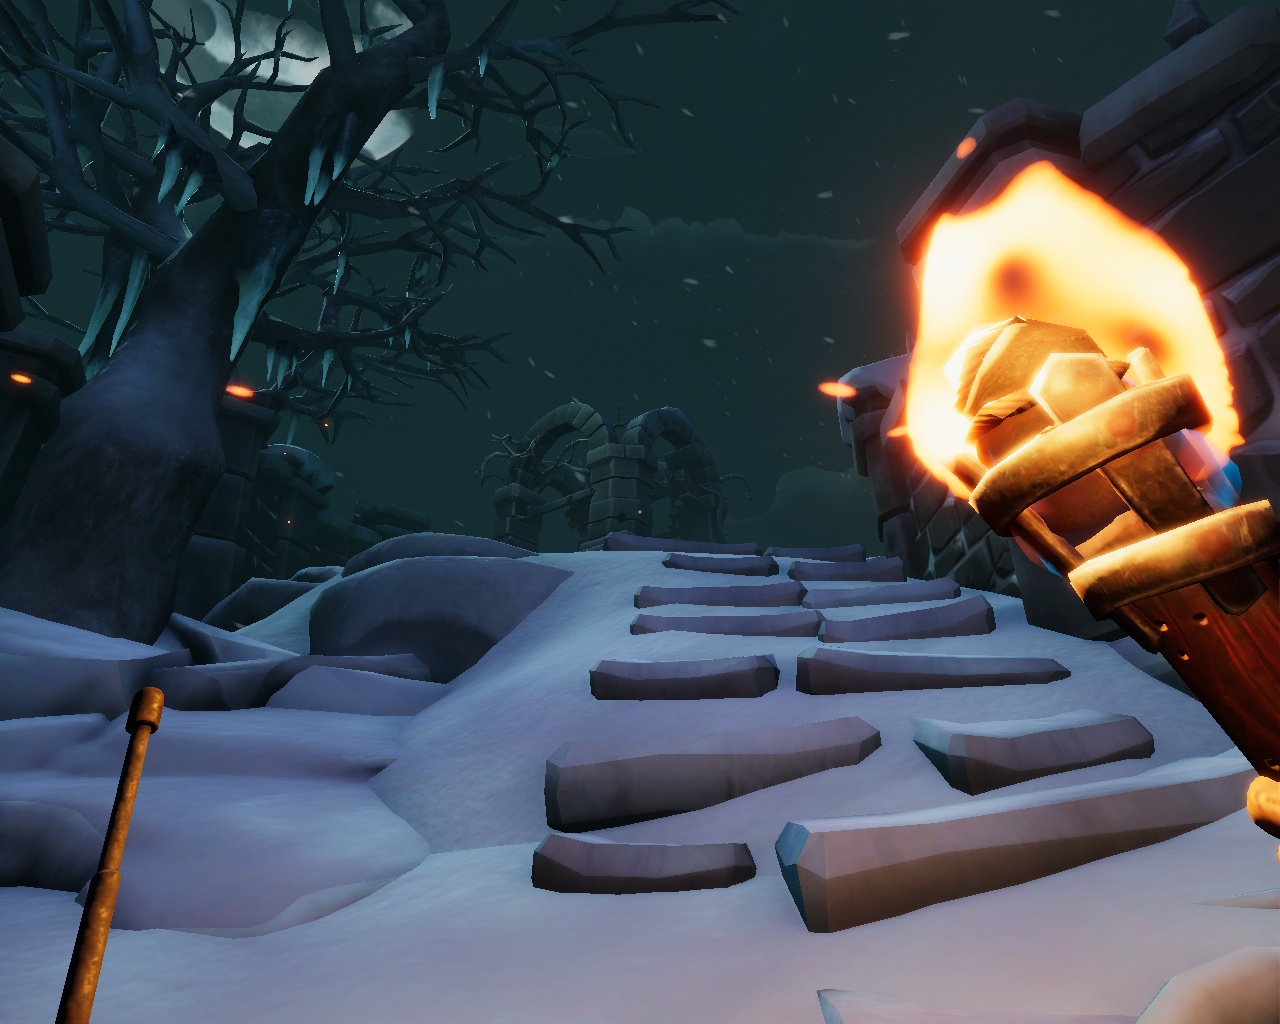
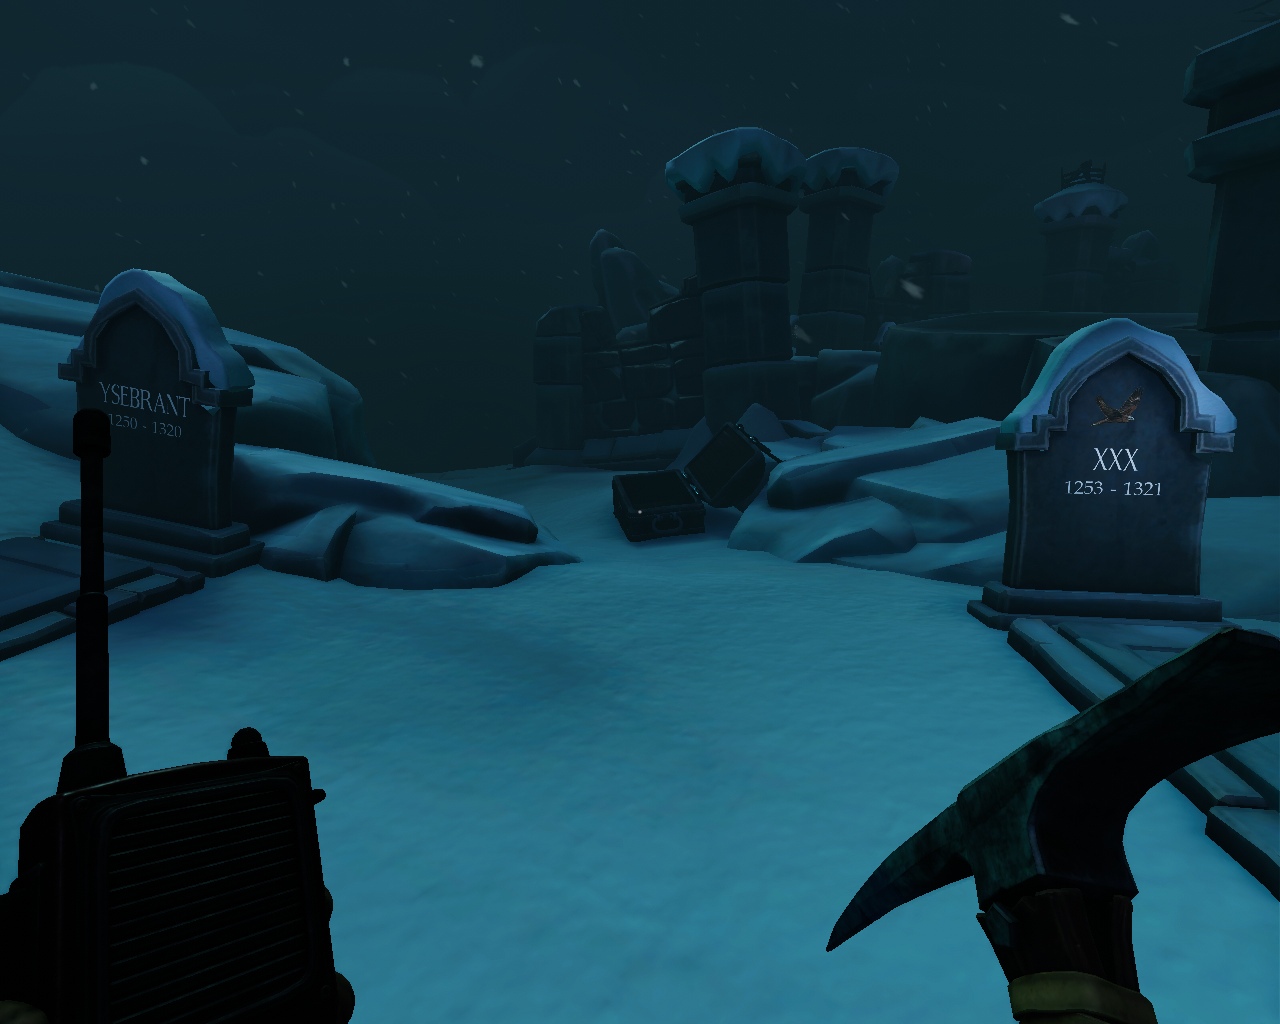
The first player must use a pickaxe to break 5 graves containing keys. These keys will need to be passed one by one to the second player through the well. The second player applies these keys to the figure door with four arms.
Here are the locations of all the graves.
Truden (1256-1339)
Reynwi (1261-1339)
Gertruid (1232-1310)
Ysebrant (1207-1285) and XXX (1253-1331)
079919/141A58F78603698568466E4C6714F430400F5F07/"data-modal-content-popup-url="https://steamcommunity.com/sharedfiles/displayimageformodaldialog/?imageurl=https%3A%2F%2Fsteamuserimages-a.akamaihd. net%2Fugc%2F1808769604181079919%2F141A58F78603698568466E4C6714F430400F5F07 %2F"> 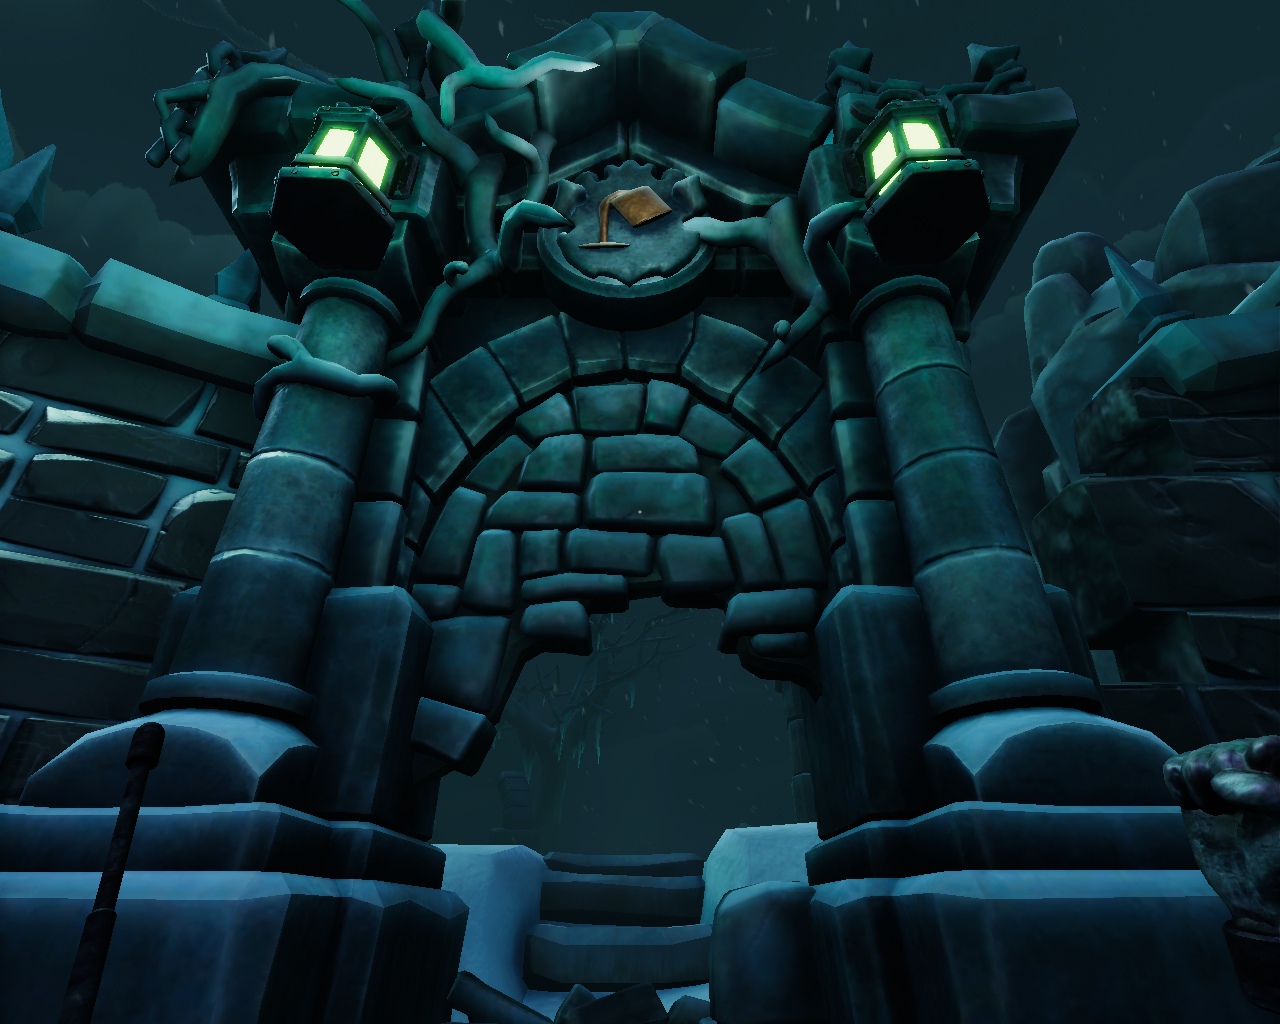

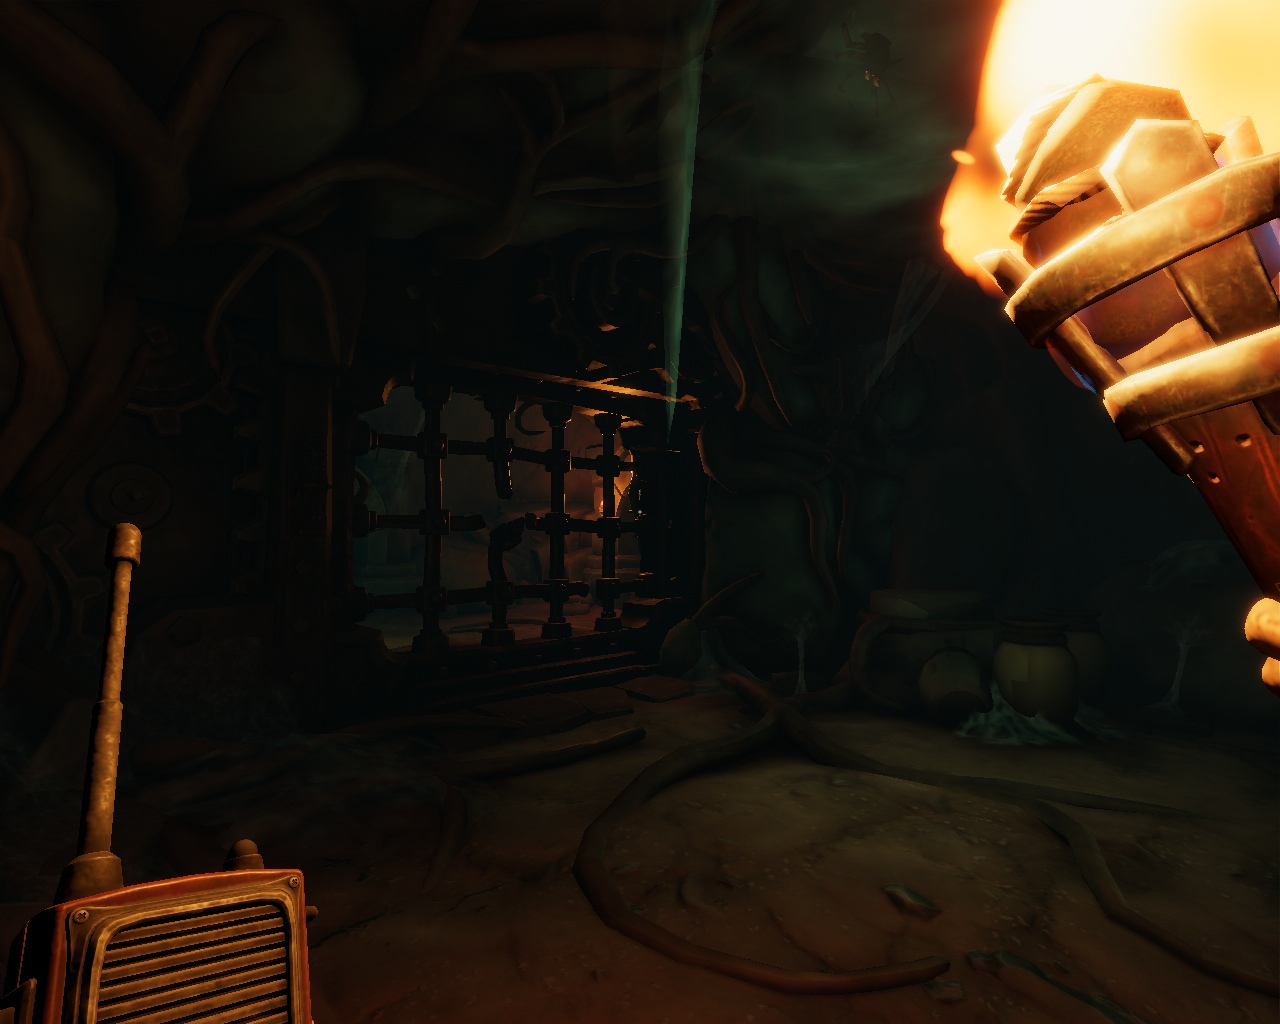
After opening the figurine door, the second player goes through it and takes another pickaxe, which lies near the map.
The first player runs into the alley to the left of the gate with the owl. There he digs a chest with a number with a pickaxe. At this time, a passage opens for the second player.
<="" html="">c="https://steamuserimages-a.akamaihd.net/ugc/1827909901845614906/919F8970B8D9F768A037753C1BDA8E36F8D71C46/" alt=""> 
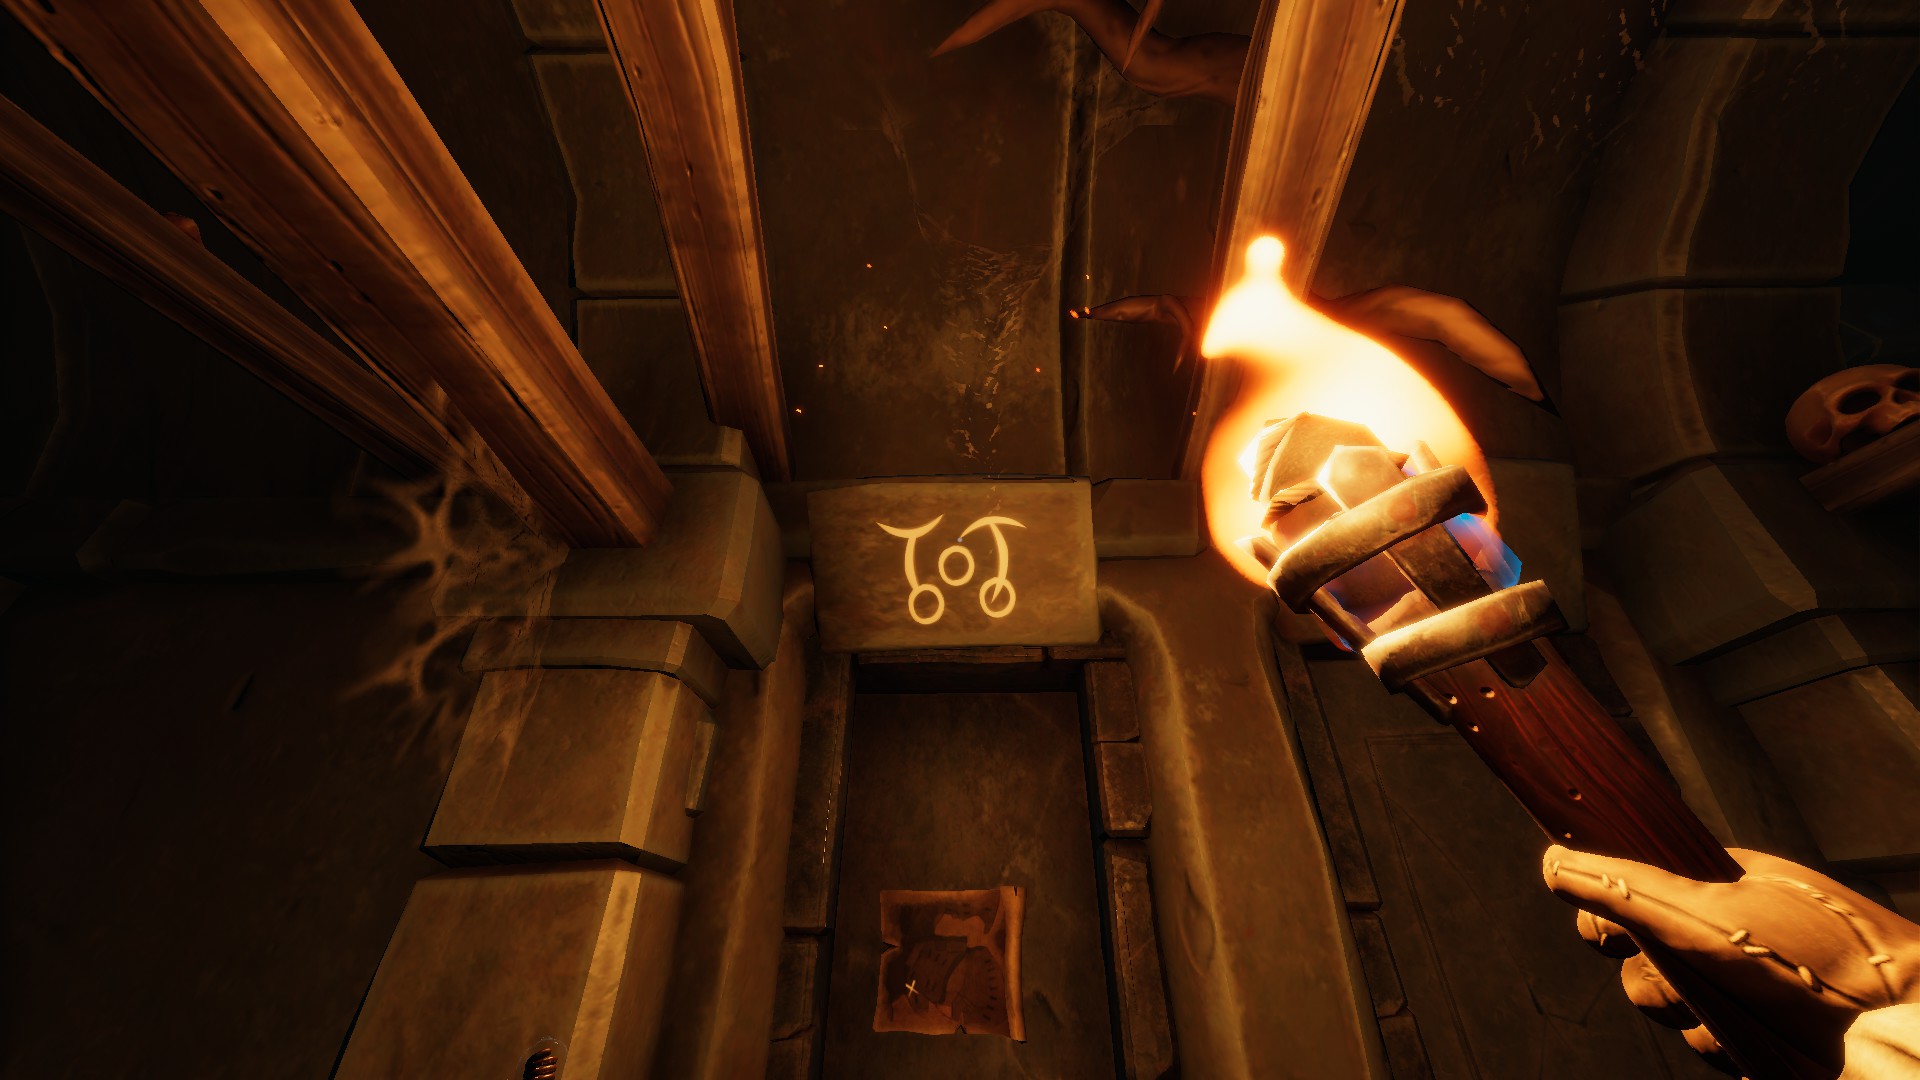
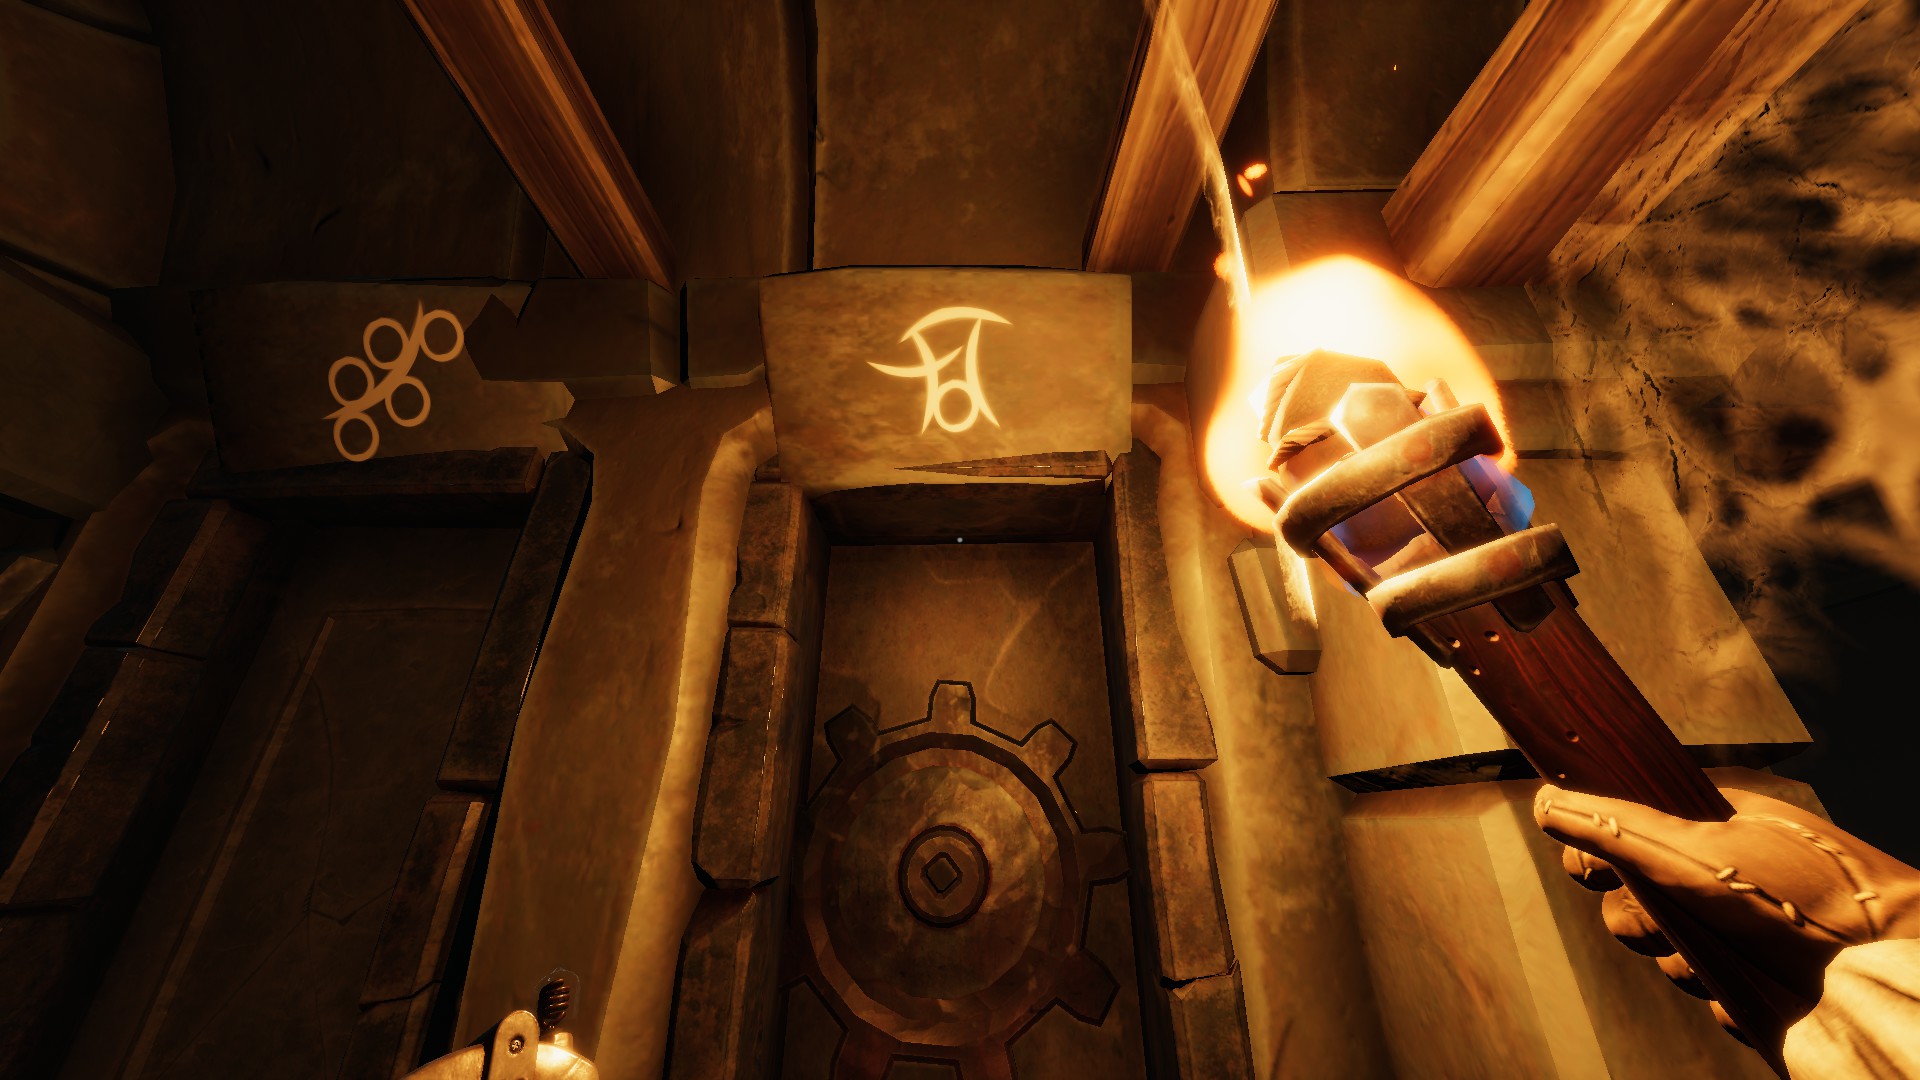
The second player is looking for a grave with a designation on top, where 3 circles and 4 lines are drawn (the picture may change, but the number of elements is the same). The first player is given access to the next step.
The first player runs to the graves of stonemasons and digs up the hill indicated on the screenshots.
.com/sharedfiles/displayimageformodaldialog/?imageurl=https%3A%2F%2Fsteamuserimages-a.akamaihd.net%2Fugc%2F1808769604181150045%2FFA0249D75AB7859610863BB59BFBCF5FE31A2B48%2F"> 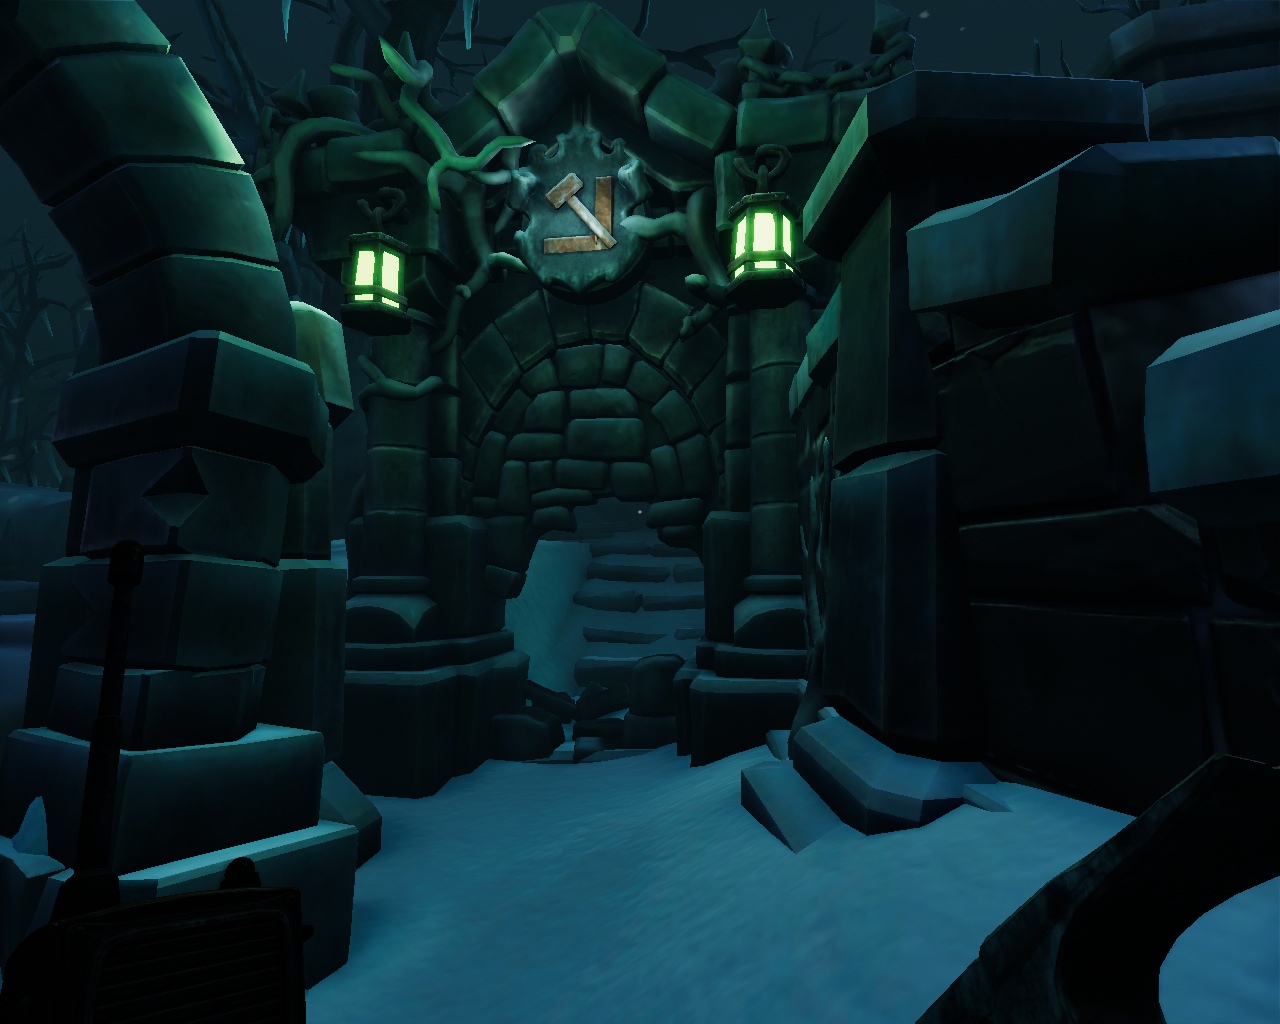
The second player is looking for a grave with 1 circle and 4 lines.
From the last graves, both players receive a gear, which must be applied to the mechanism in the common room. The first player can go to it through the passage behind the first token puzzle.
FirstThe th player goes to the side of the second and both players go through the door that was opened with the keys from the graves. Both players spin the mechanism in the room in the same direction to get the first of three fragments. The fragment must be carried through the opened passage to the elevator and the fragment must be delivered to the castle through the elevator (inserted into the "like cannon").
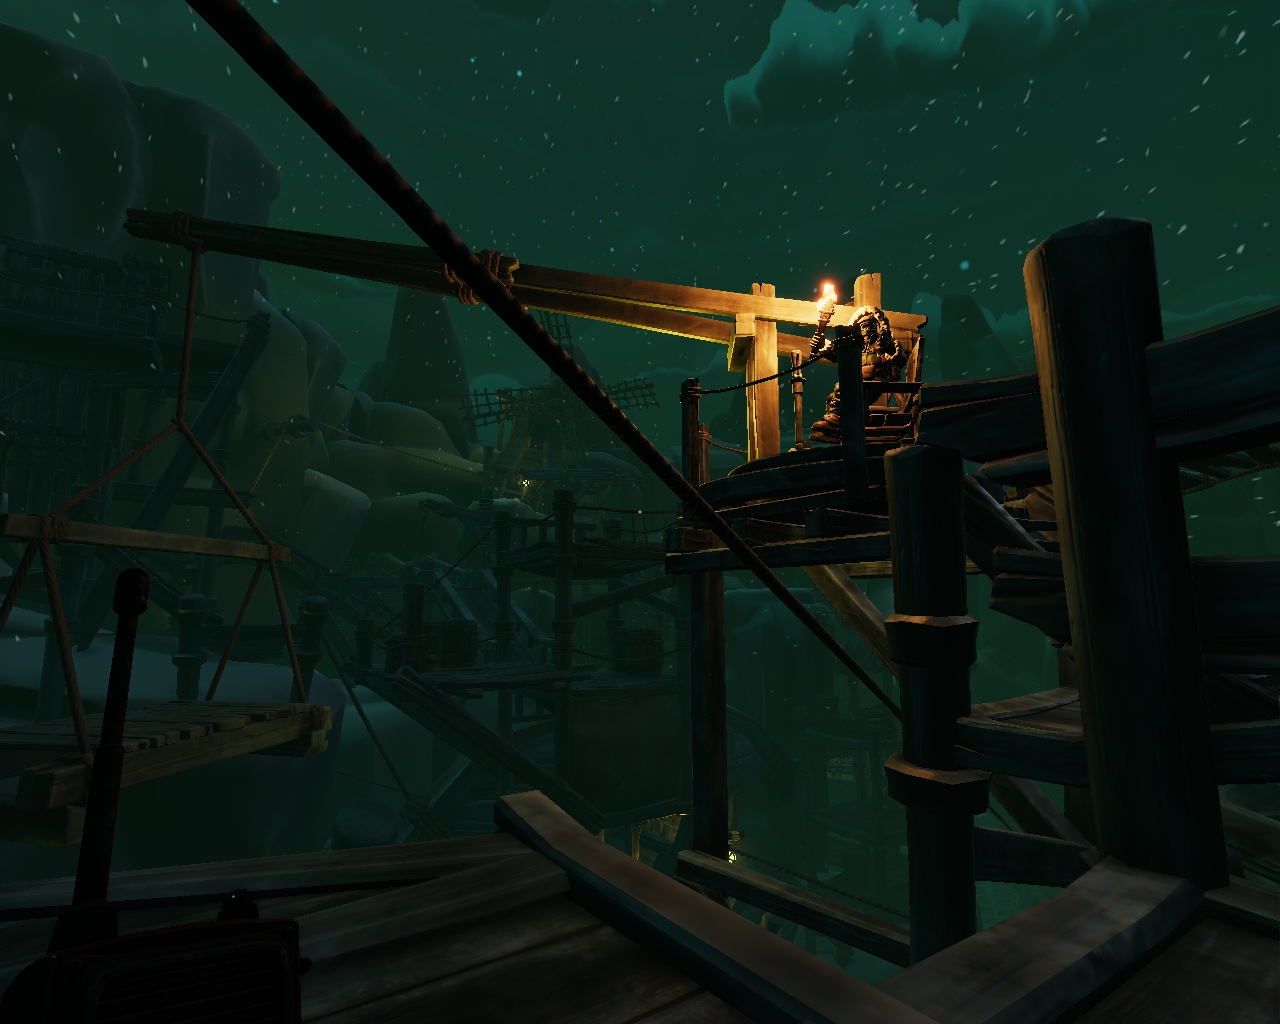
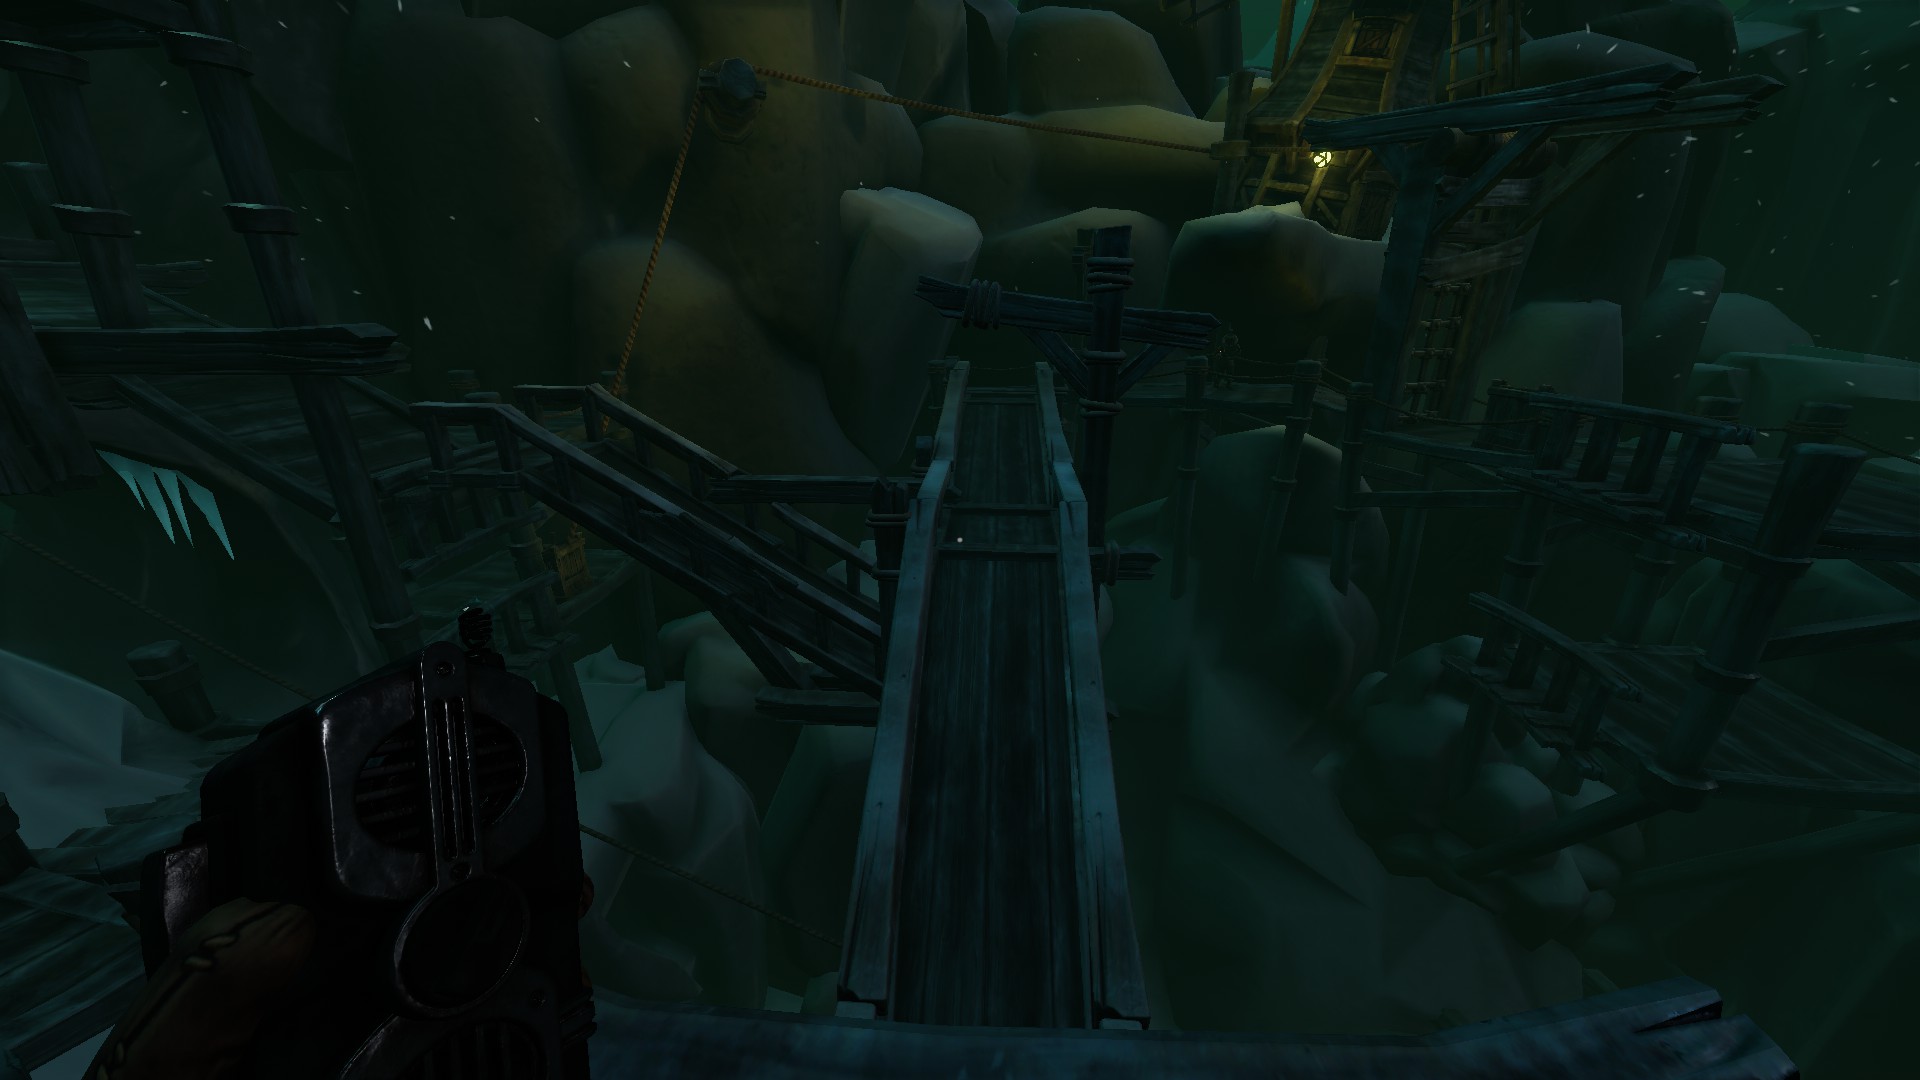
Both players walk across the bridge for a long time to the elevator, which is used by players from both sides. The same elevator separates the players. The one that turned the elevator closer to the rocks should, after lifting it, go upstairs and pull the lever. After that, he goes further to the funicular and moves along it to the other side. On the other side, the first player holds a lever that lowers the bridge for the second player. As soon as the second player gets on the bridge, the first player releases the lever and both players climb further.
Two players run down the road to the elevator-boat. The second player gets on the boat, and the first one lifts it with a lever. The second player goes to the control lever of the platform, which needs to deliver the first player to the other side. Delivering ?The first player through the crane, the second player runs further along the bridge.
Both players approach the puzzle.
Both players run to the stones and click on them. After that, they go further to the trigger handles, on which they drive down to the next riddle.
Players descending find themselves on two tiers. The player below goes into the room next to it, in which l?press the lenses to solve the puzzle. There are 6 reflective lenses and 6 picture lenses in total. They need to be arranged so that light passes through all the lenses with pictures. At the same time, the lenses must stand with the right side to the light source, so that the desired image is collected from the dark spots of the lenses on the second tier.
In order for the light to pass through all the lenses, the second player must rotate the slots on the top tier.
Here is one solution. As you can see, one lens in the upper left corner is already standing and cannot be moved.
Some lenses will need to be rotated 180 degrees to match the dark spots with the desired image on the second tier.
After completing the puzzle, both players go into the opened passage and turn the mechanism in one direction to get one of the three fragments, which also needs to be taken to the castle by elevator.
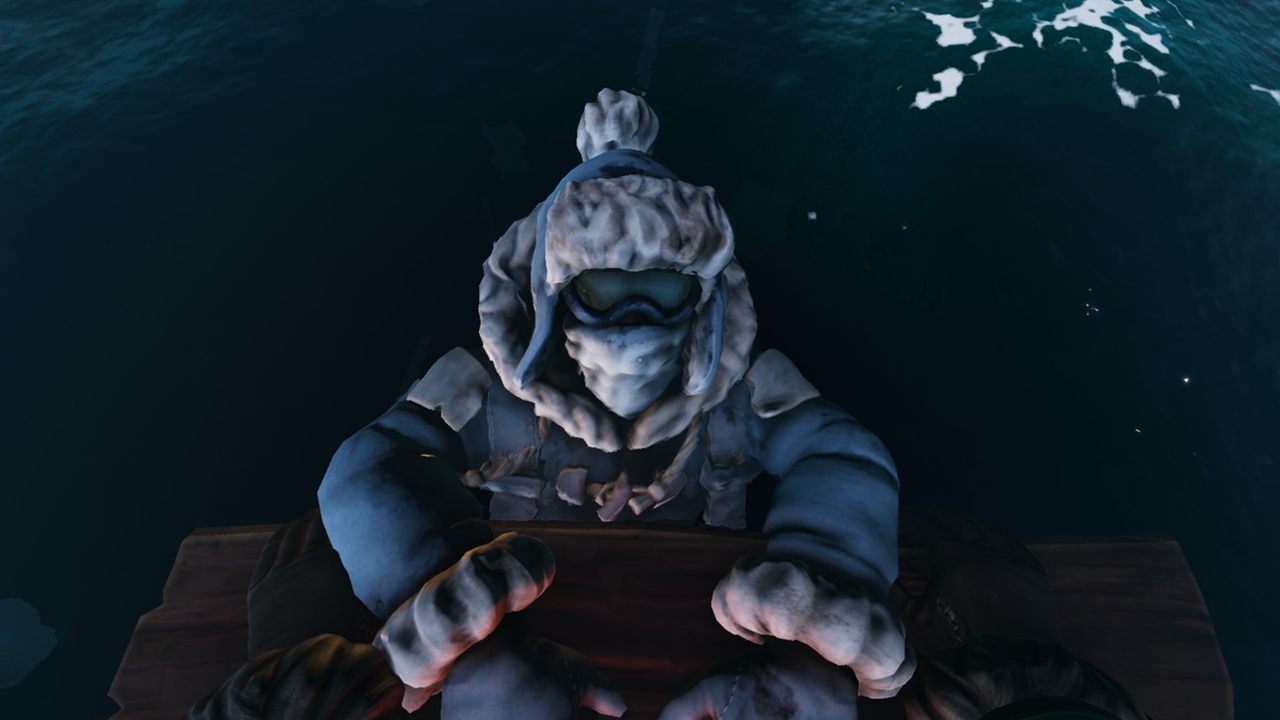
At this location, the first player puts on a diving helmet and goes to the separation chamber, through which the second player lowers the first to the depth. The second player must direct the first player and let him oxygen by tr??bam, otherwise the first player will suffocate. Sounds intimidating, but it's not all that complicated.
PS: THE FIRST PLAYER MUST ALWAYS RUN THROUGH SHIFT. THIS WILL SAVE TIME AND OXYGEN.
The second player goes down and waits for the first player.
The first player goes to the valve in front of him to open the passage for the second player. After that, the first player immediately connects to the pipe on the right to replenish air supplies.
The first player goes further and opens the door (Opening such a door consumes oxygen. You can go back and breathe some more).
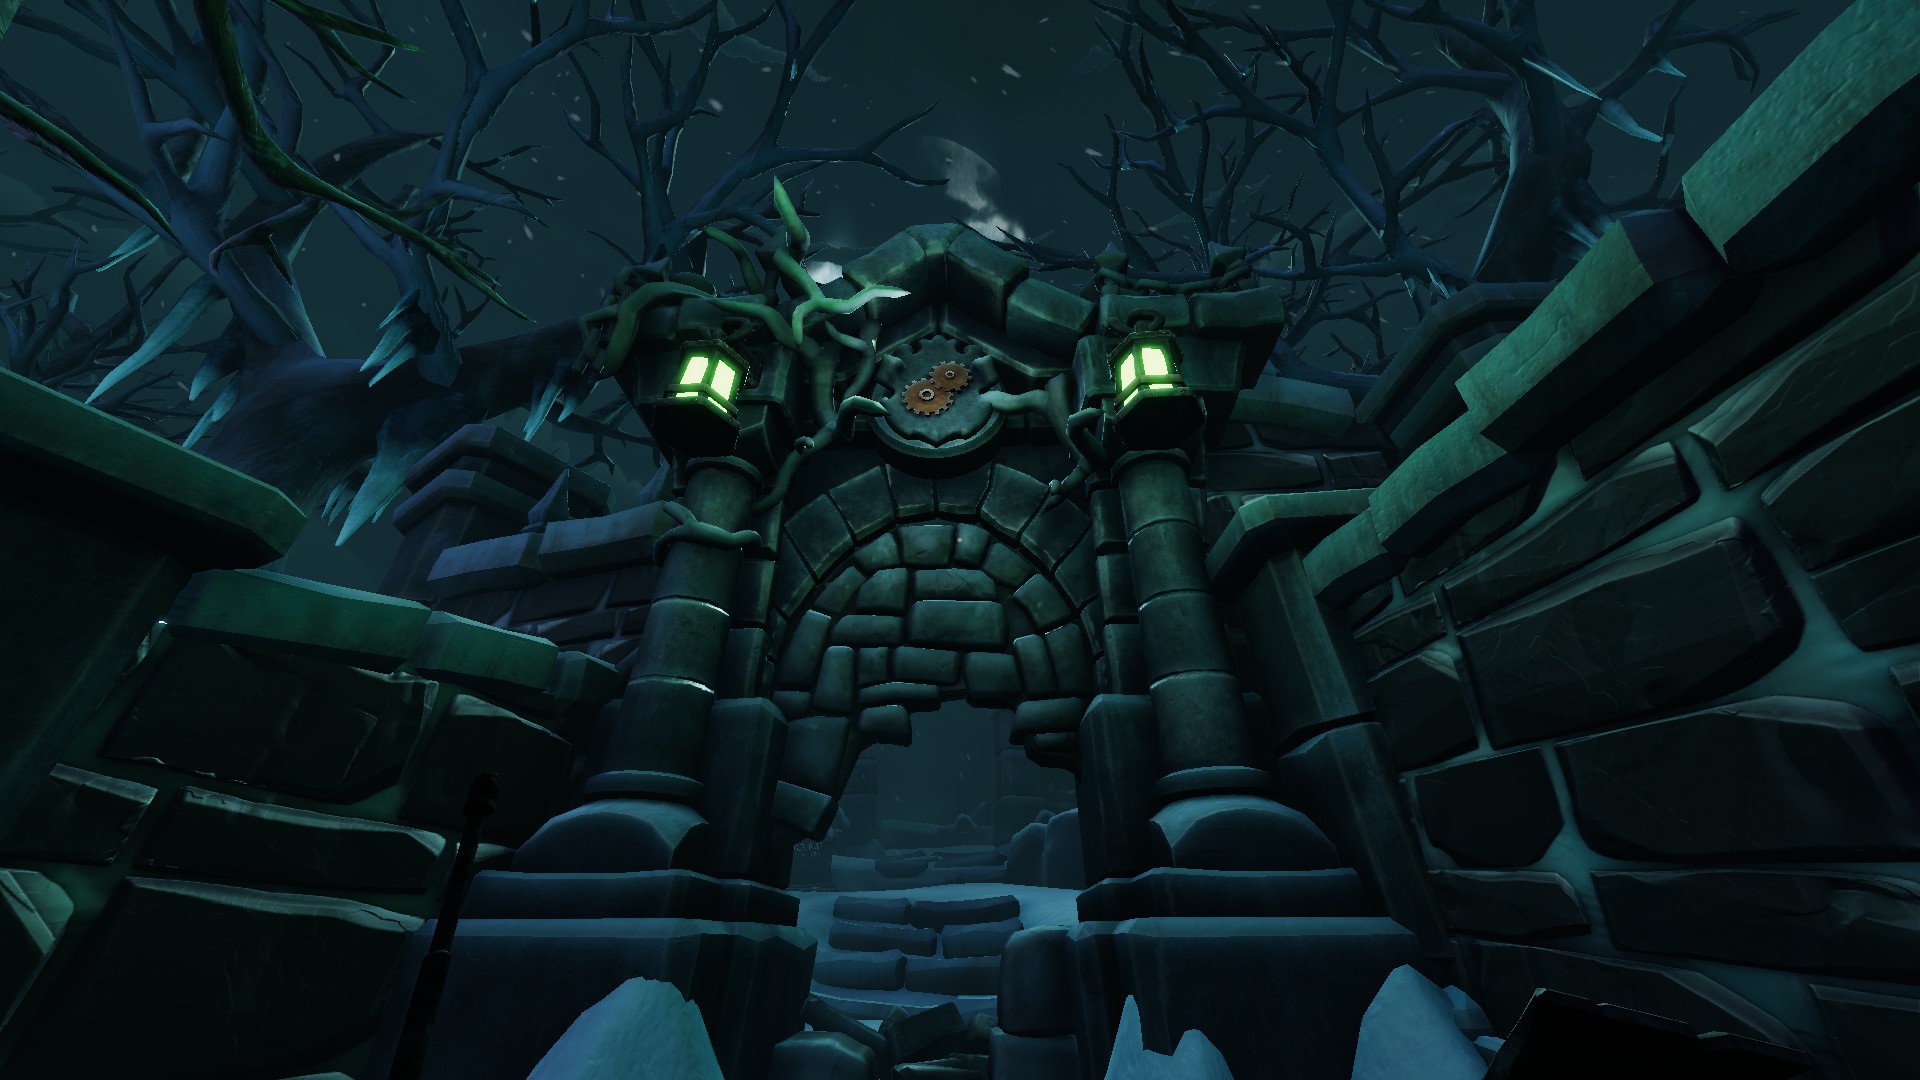
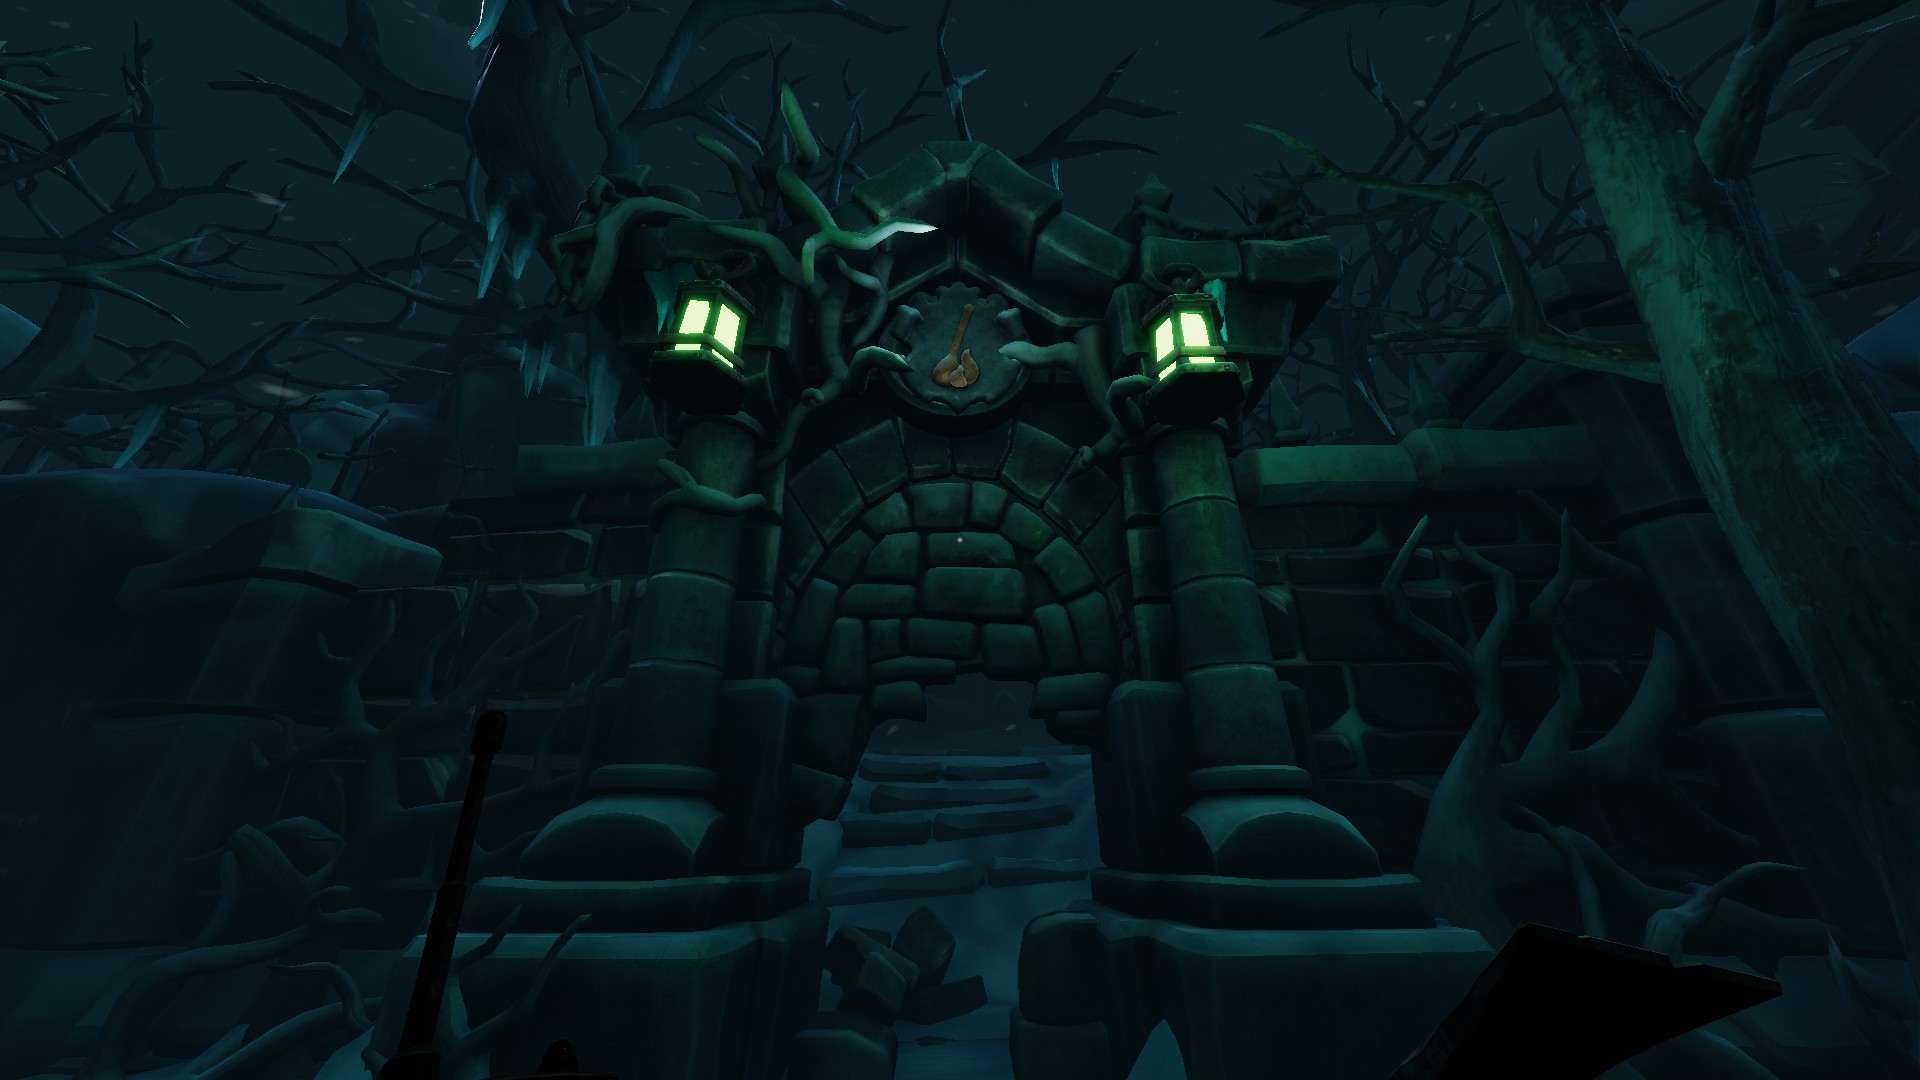
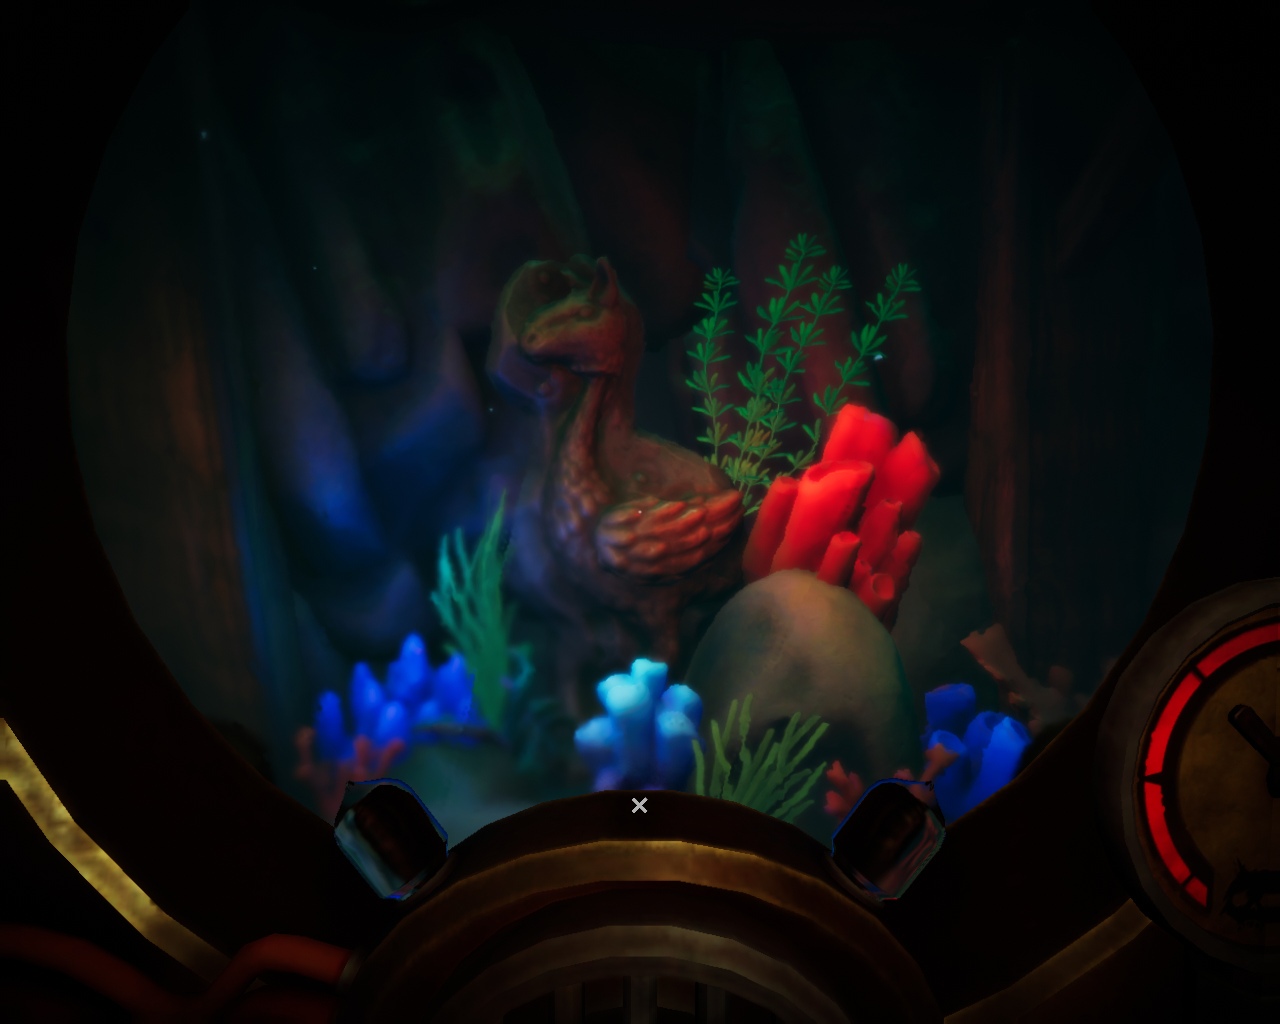
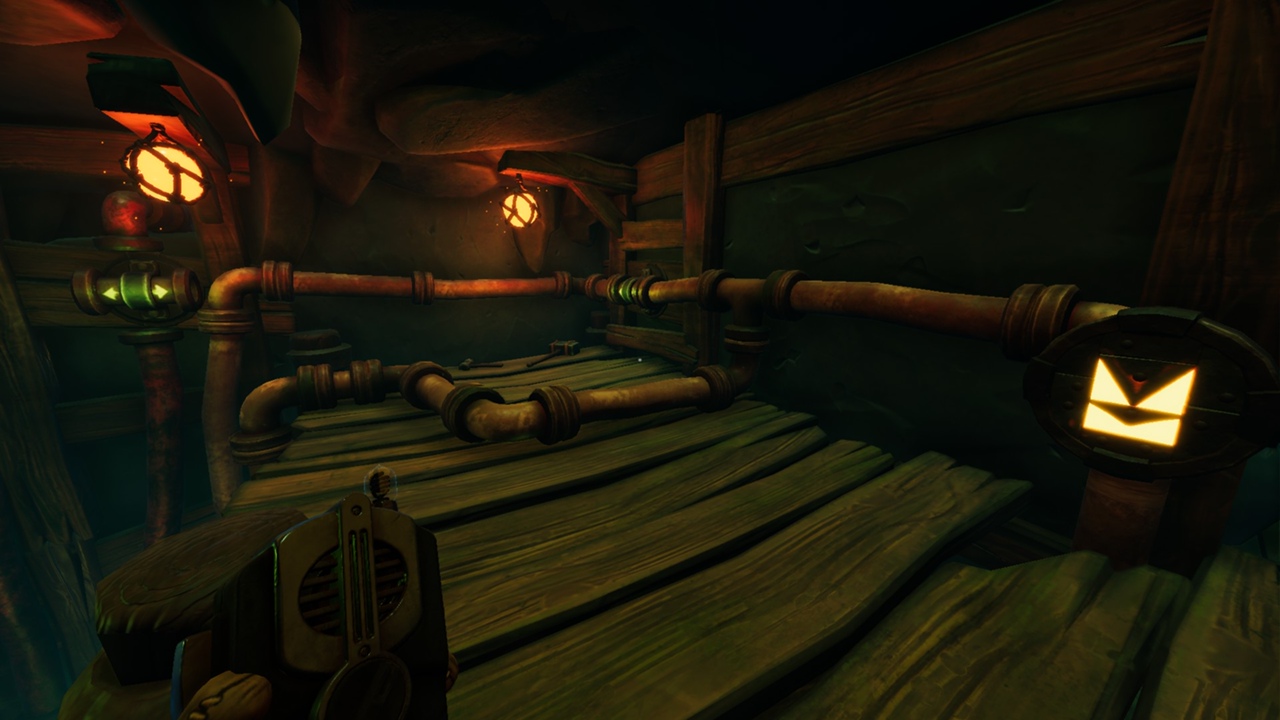
The first player turns right from the statue of a bird with a sheep's head and goes to the lamp. On the right there will be a valve with the image of an anchor, it turns it and goes further in the other direction (ignoring the first turn to the right). Having reached the same statue, but with a shell on its back, you must first go further along the corridor and to the right to turn another valve with the image of a jellyfish.
1439019%2F29C700FBB0B9C7E8609112AB5524547591C5AF59%2F">
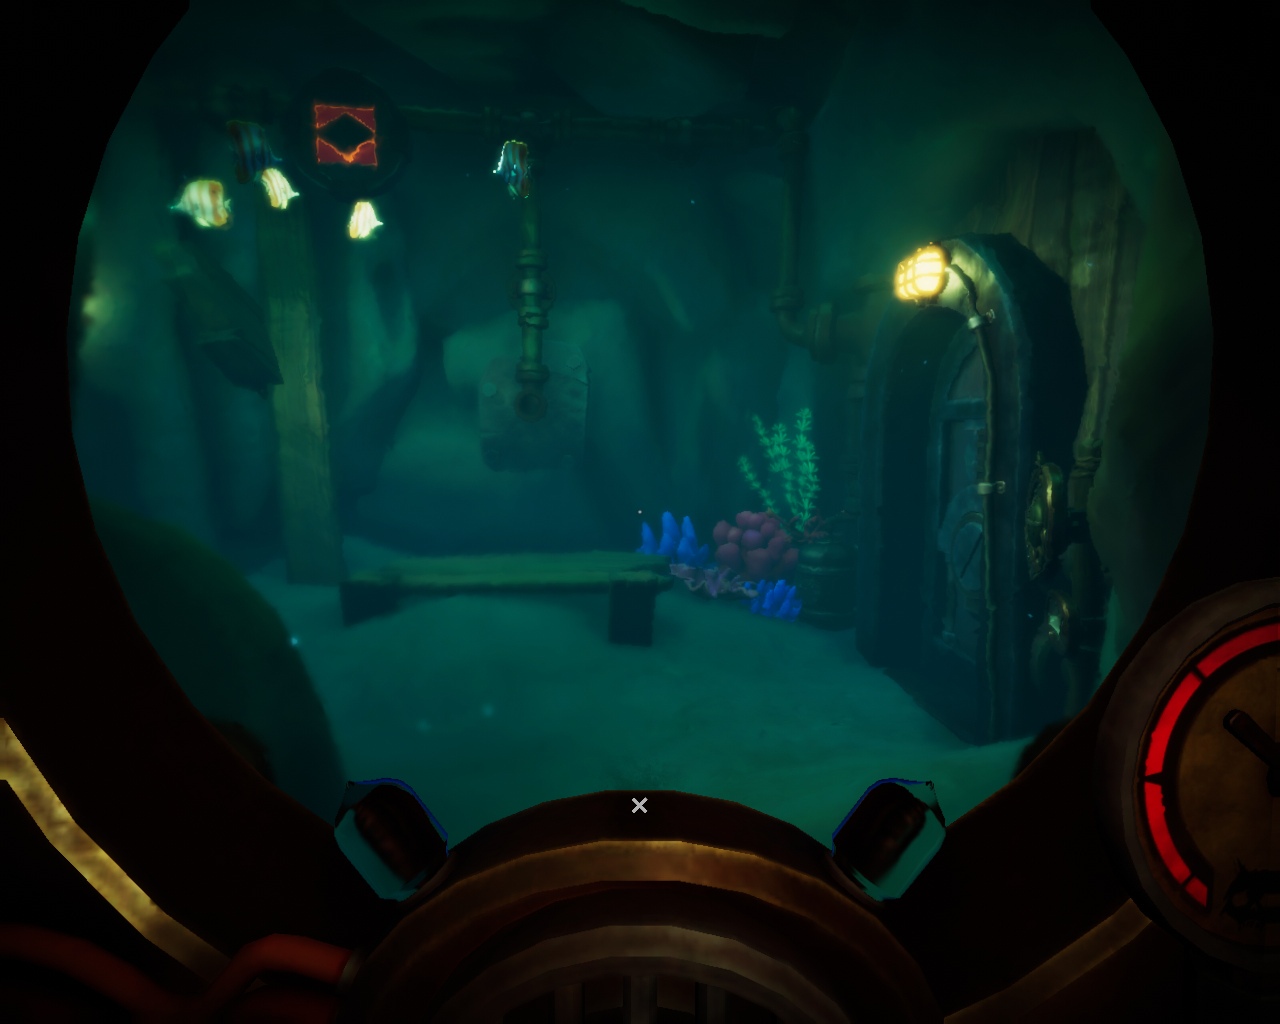
We return to the statue with a shell on its back and follow the arrows from it, where a pipe and a closed door will be waiting for us.
The second player places the pipes in the following way to let oxygen into the pipe and open the door.

The first player goes to the descent down.
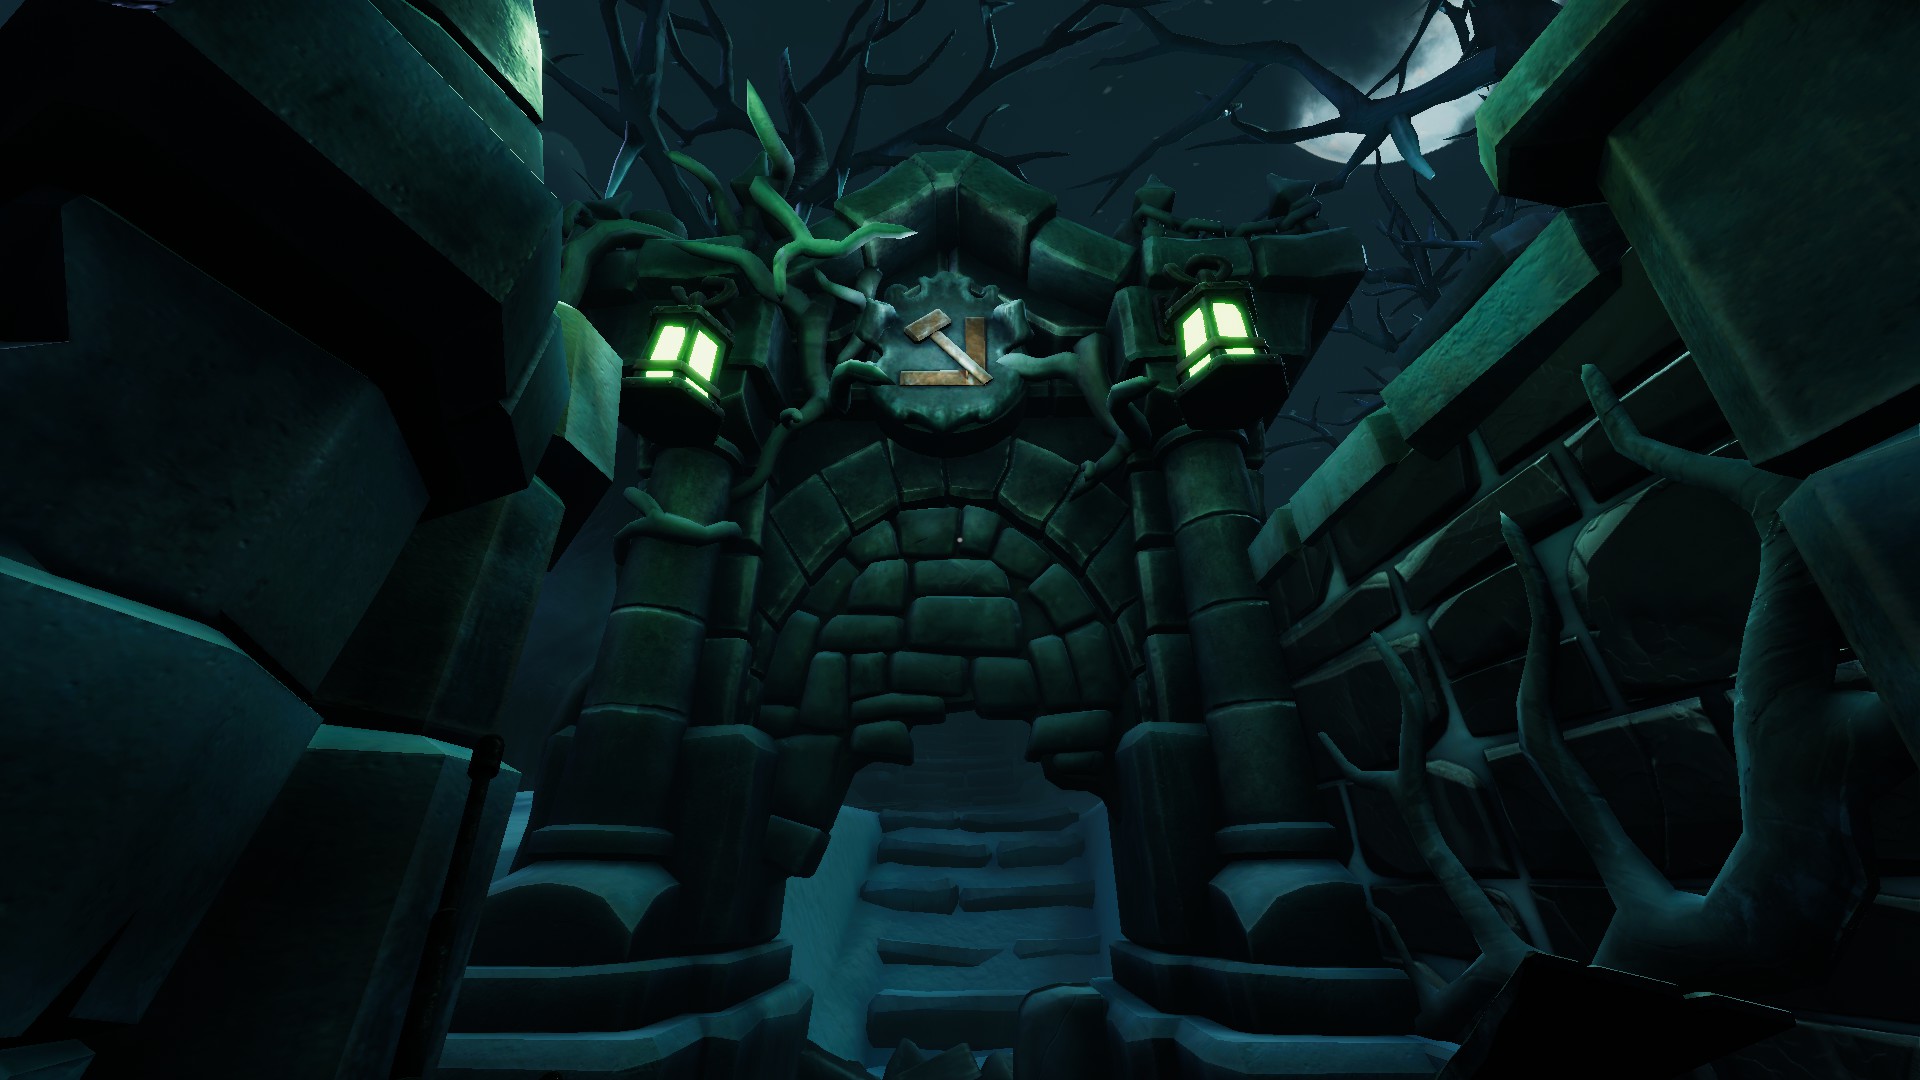
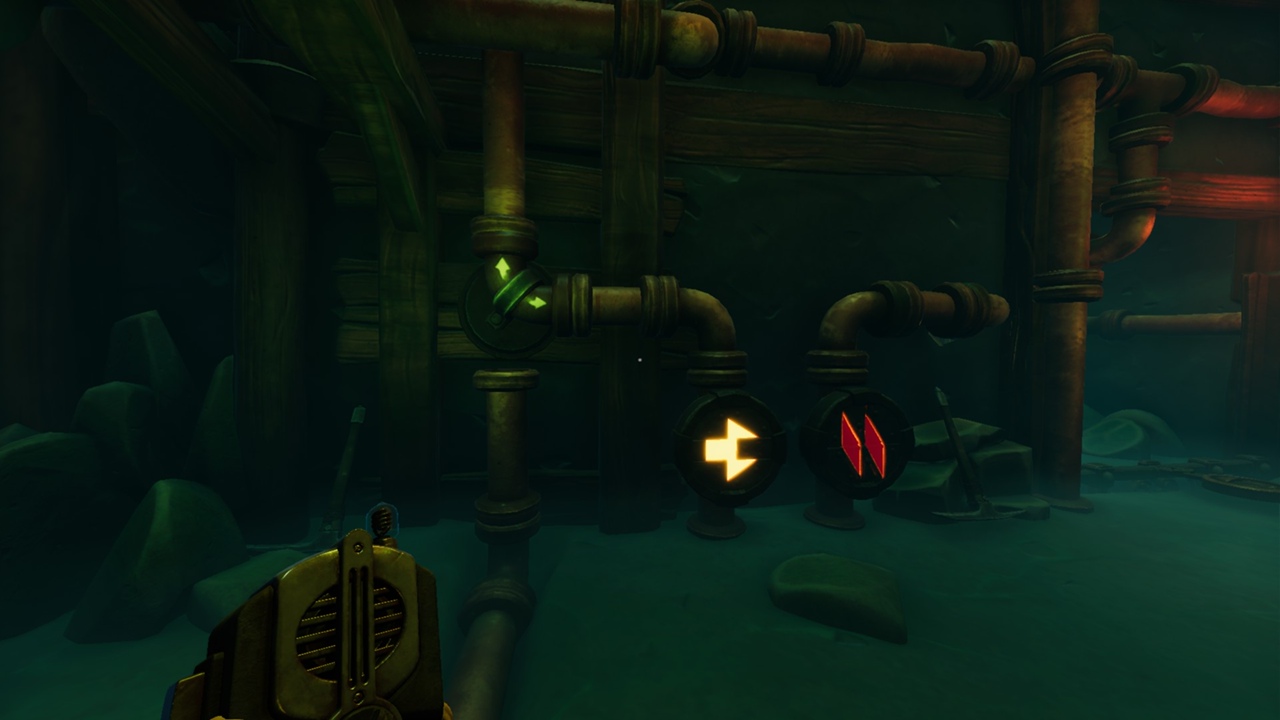
Having descended, the first player follows the arrows. Getting to four??that arrow, the player encounters a pipe without oxygen.
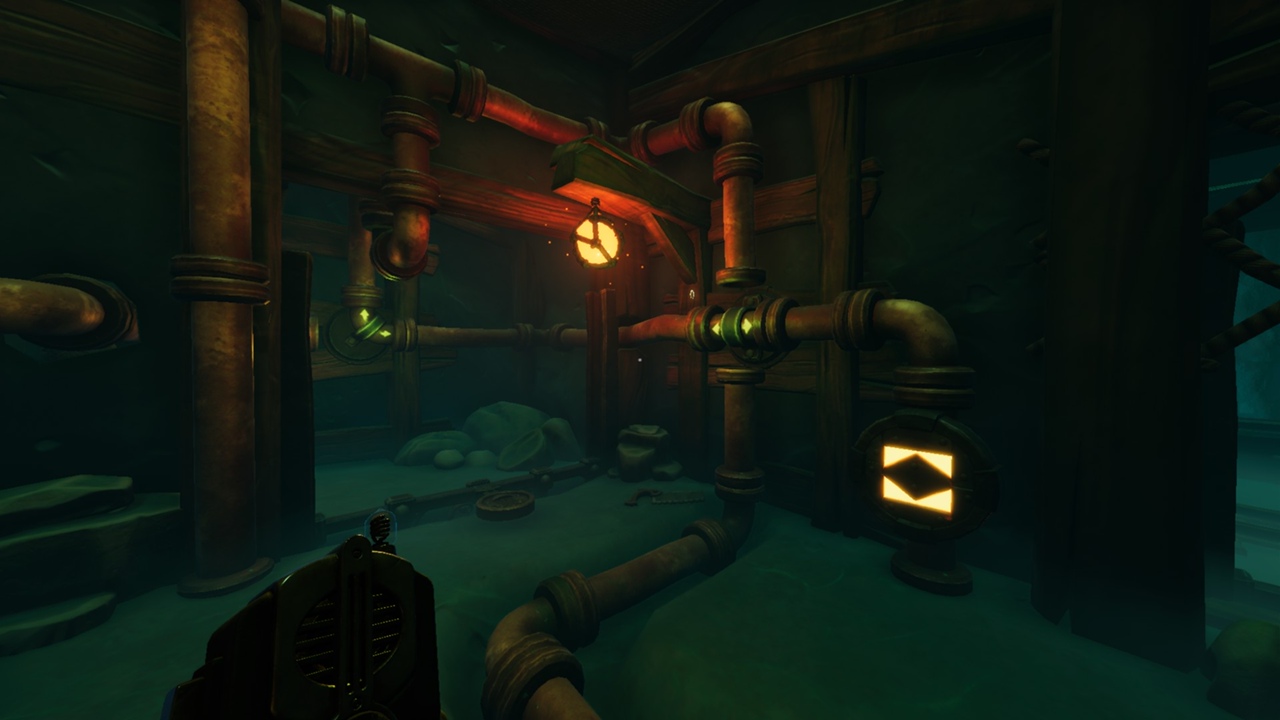
After that, there will be a left turn. At the end of that path there will be a valve with the image of the steering wheel. The first player spins it to open a new passage for the second player. He climbs up the new path and turns the pipe at the top to give oxygen to the first player and open a new door for him, to which the arrows led.
The first player, crossing the threshold of a new door, immediately turns right. Then it goes past a similar statue with a peacock's tail until the next descent down. After the descent, it goes further to the pipe. To let oxygen in there, the second player needs to turn the following pipe:
mageformodaldialog/?imageurl=https%3A%2F%2Fsteamuserimages-a.akamaihd.net%2Fugc%2F1808769604181552241%2F6B098F555DB04F864C303B517CC69BB610C9CB8B%2F">
The first player goes further along the arrows through two doors opened by pipes. After the second door, there will be a closed door on the left. To open it, the second player needs to turn this pipe:
The first player proceeds to the end of the maze and the room places the helmet on a mannequin in the wall. The passage to the submarine opens. The second player goes through the open end gate and pulls the lever to lift the first player on the sub.
The first player after the rise exits the submarine to the next puzzle.
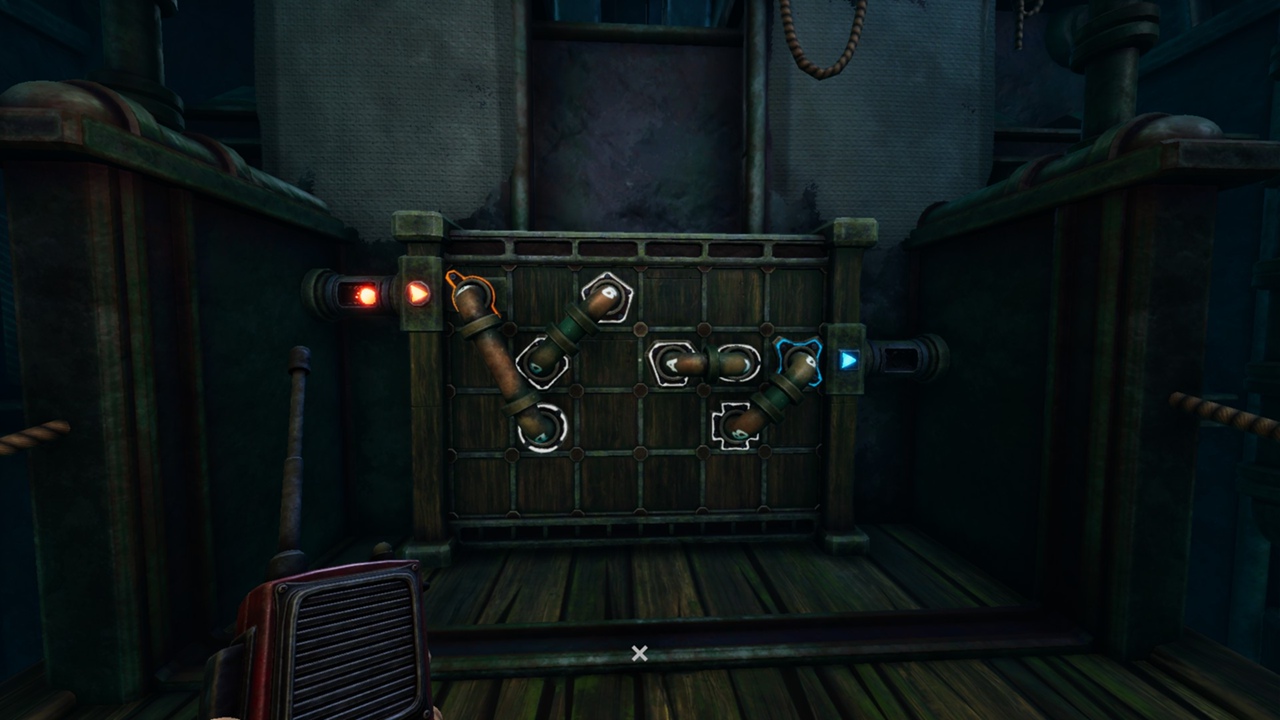
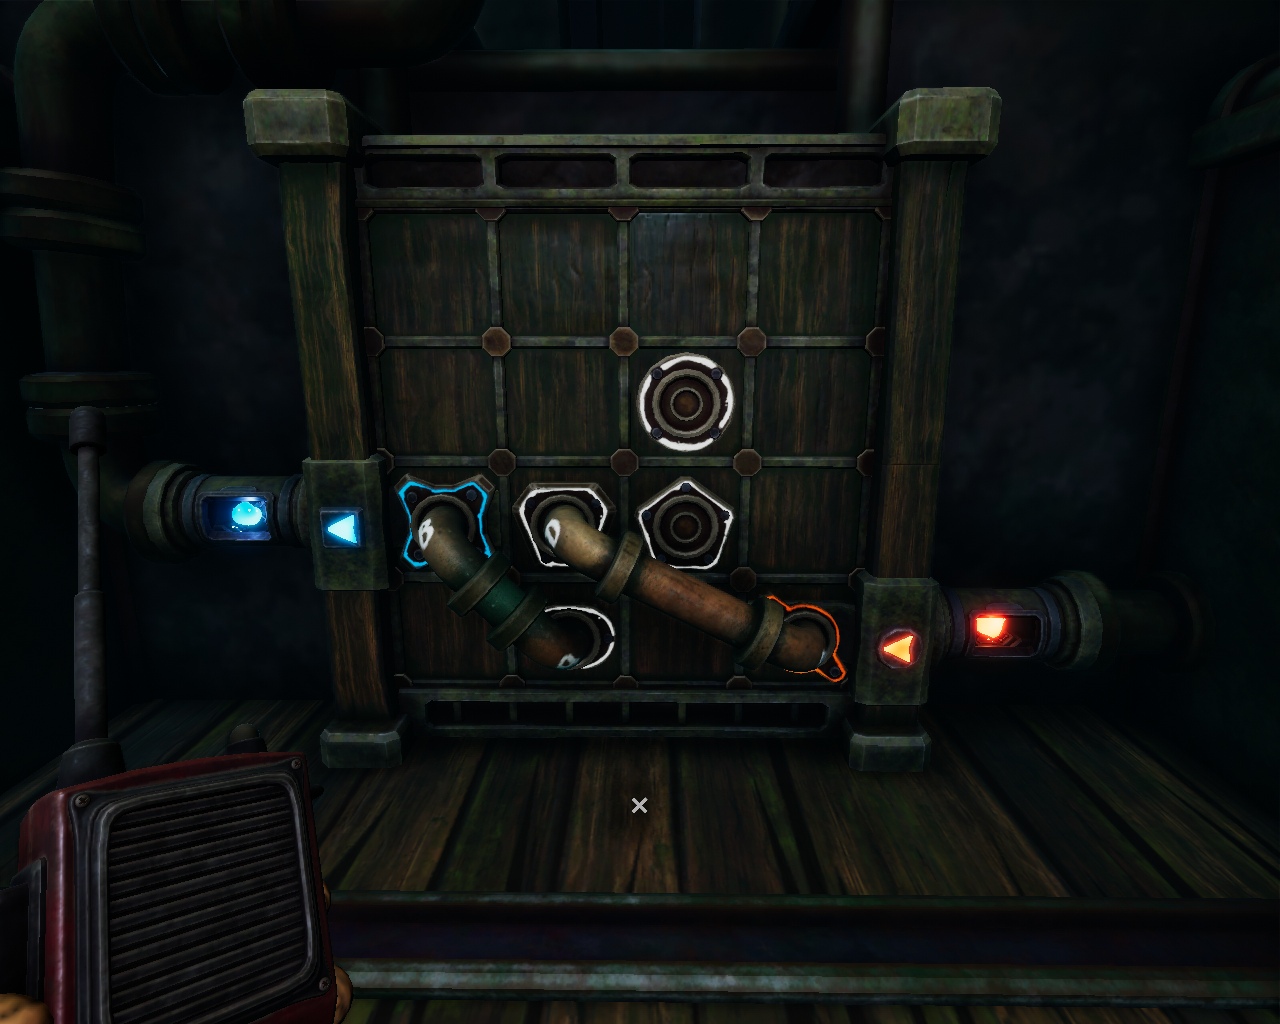
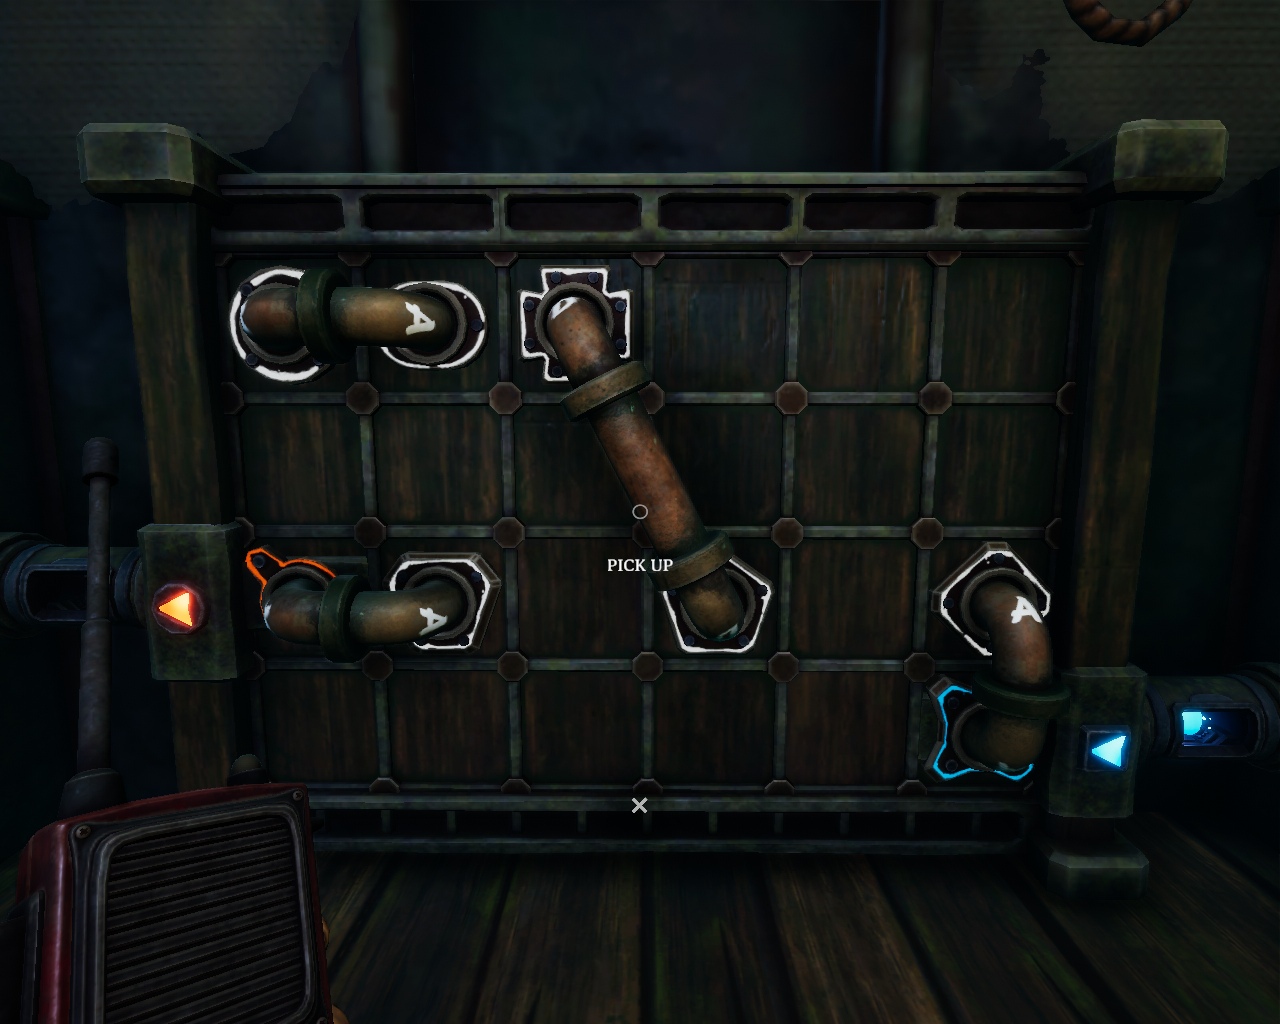
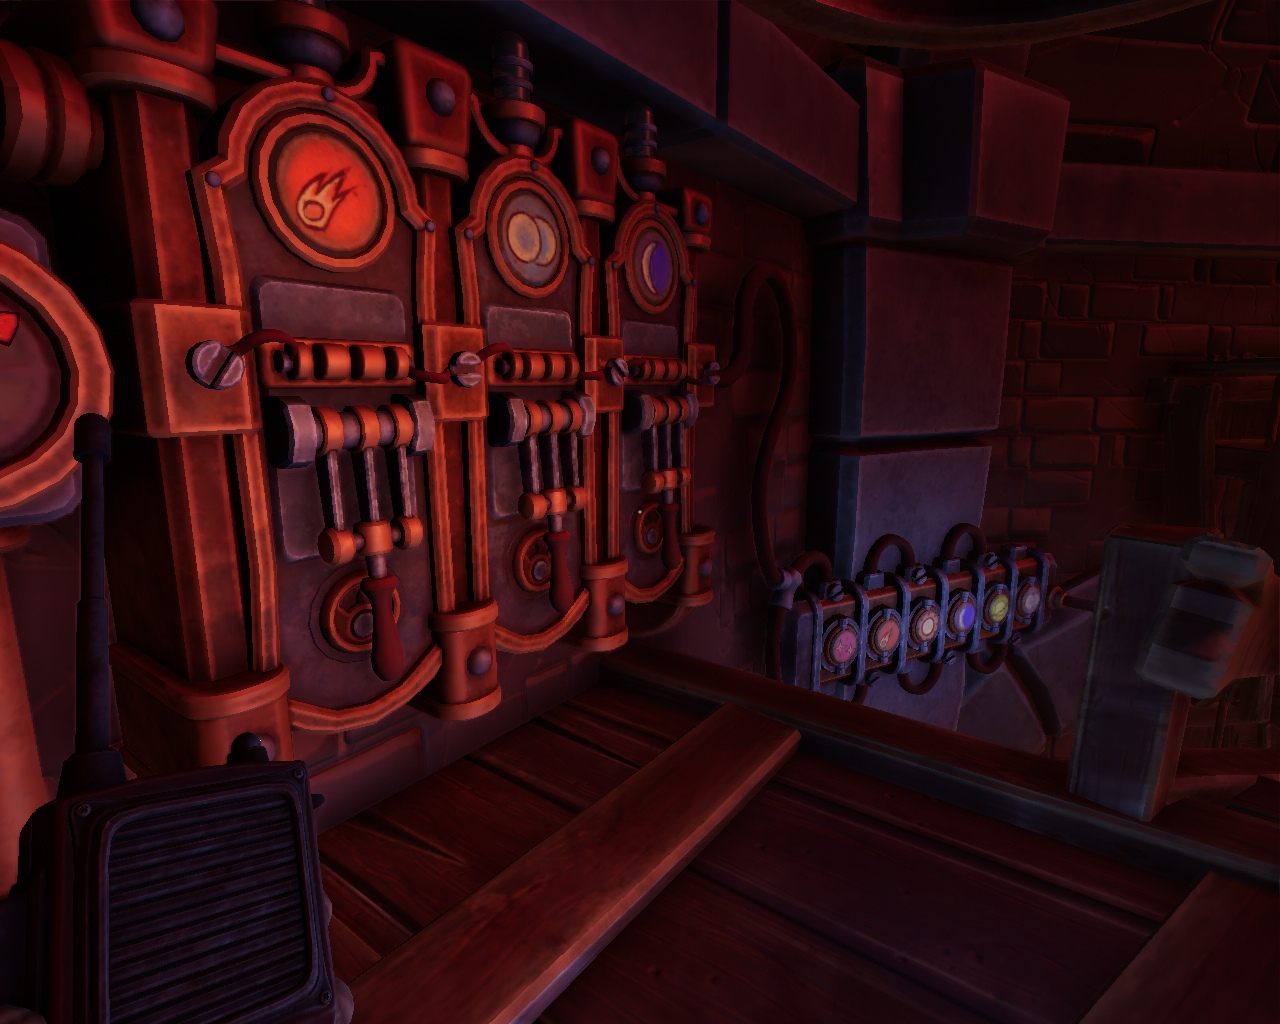
In this part, both players place pipes to transmit a signal to each other. Pipes are issued from a special distributor. Each type of pipe is marked with a letter and the number of these pipes is limited.
In total, you need to solve three paired puzzles. Here is the solution for the two sides of each puzzle:
First
data-modal-content-popup-url="https://steamcommunity.com/sharedfiles/displayimageformodaldialog/?imageurl=https%3A%2F%2Fsteamuserimages-a.akamaihd.net%2Fugc%2F1808769604181601598%2F312A8516BF6C8530CC6A 52155A242B8618865C62%2F"> 
Second
=====
Third
=====
%2F">
After that, both players head into the submarine and together pull the levers at the control panel to go underwater to the next part.
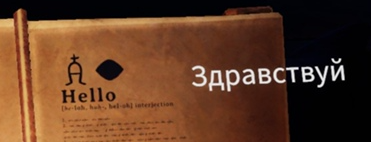
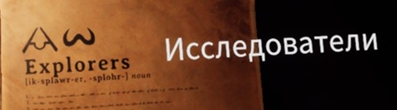
In this part, one of the players will climb into the signaling room for a deep-sea monster that has grabbed a submarine. He asks 4 questions in his own language, and the players must translate the question and give an answer. Usually the monster's questions are translated by the remaining player. A book appears in the middle of his room, with which you can translate the sounds of the monster. But we have already translated everything for you, so you can just give quick answers and pop up.
The player in the booth has buttons to enter the answer. The answer consists of two characters. The symbol on the right side of the panel comes first, and then the symbol on the left side.
PreviewImage sizeOriginal inline" title="" src="https://steamuserimages-a.akamaihd.net/ugc/1808769604181641886/DC30B0E46876C3EA04E0FF6D517A35A59BC10900/" alt="">
Here are the answers to each of the four questions in order:
At the end of the questions, both players together pull the levers and go to the separation chambers, through which they are lowered to a new location.
The location is divided into two sides: Left and right.
The essence of the puzzle is to create the necessary fragment, following the instructions. The difficulty is that the ingredients and tools are also divided on both sides, so players will need to transfer the missing components to each other.
The transfer of resources occurs through the river, which rotates the plates. Initially, 10 saucers float down the river. 6 empty and 4 with colored liquids. Liquids are needed to extract other resources and smelt the final components.
Each cooking process is started by lowering the levers (those farther from the center) together. For each such session, a limited time is given, during which you need to have time to cook all the components.
There is no single correct algorithm. But there are some notes:
When all the components are ready (which will be visible from the flasks sticking out of the giant machine), both players pull the two levers in the center to create the missing piece. The players take the fragment and take it to the chamber, where they will rise to the surface.
You need to put the enemy in the groove and sit on the chairs.
On the surface, the fragment, like all the others, must be taken to the castle through the elevator.
Having inserted all the fragments into the mechanism, both players turn the handles of the mechanism and climb with it to the top of the tower.
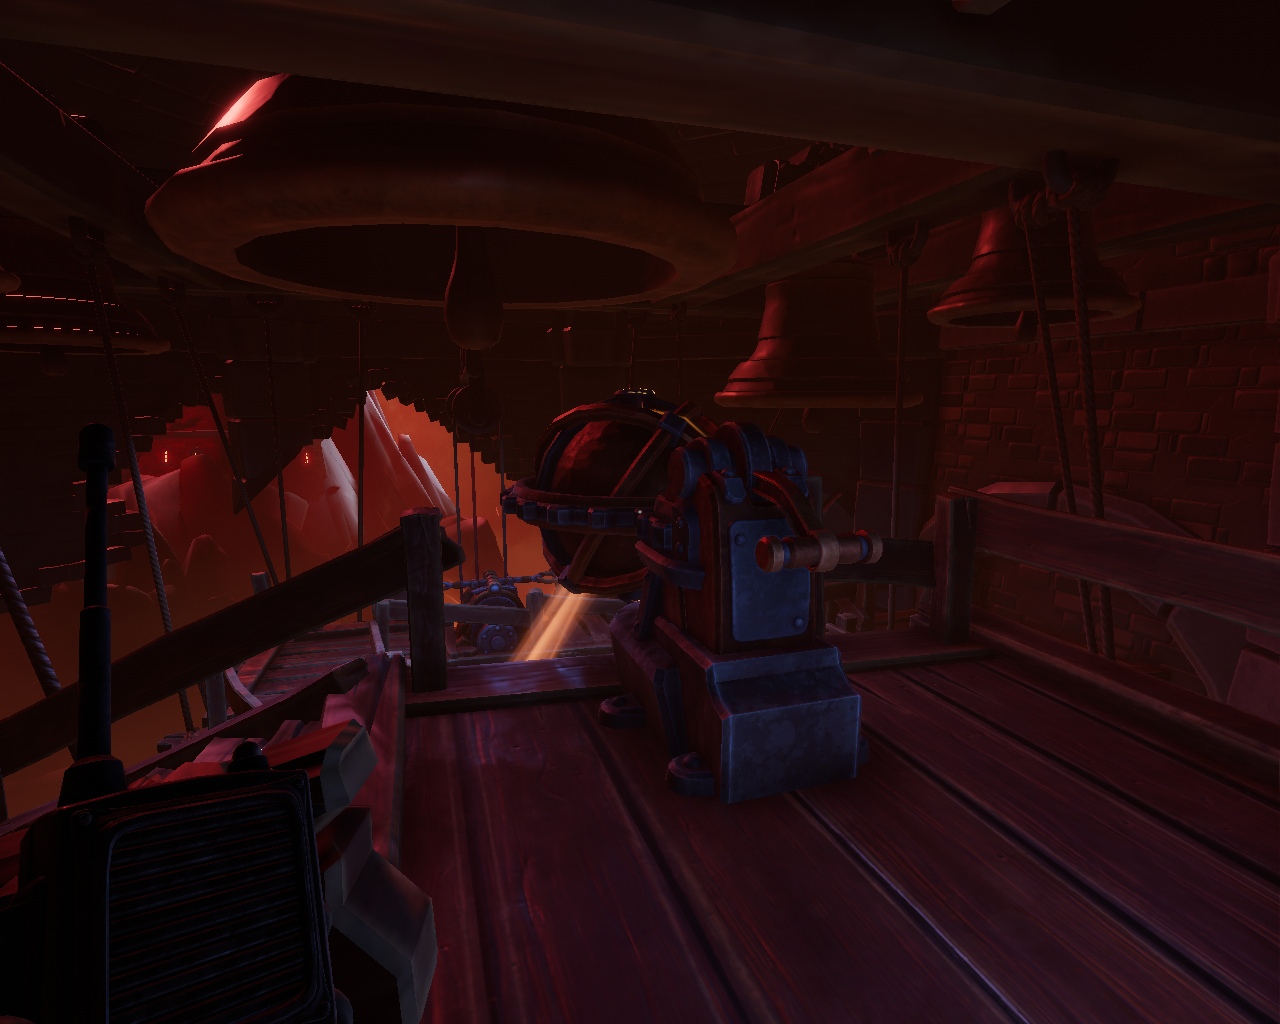
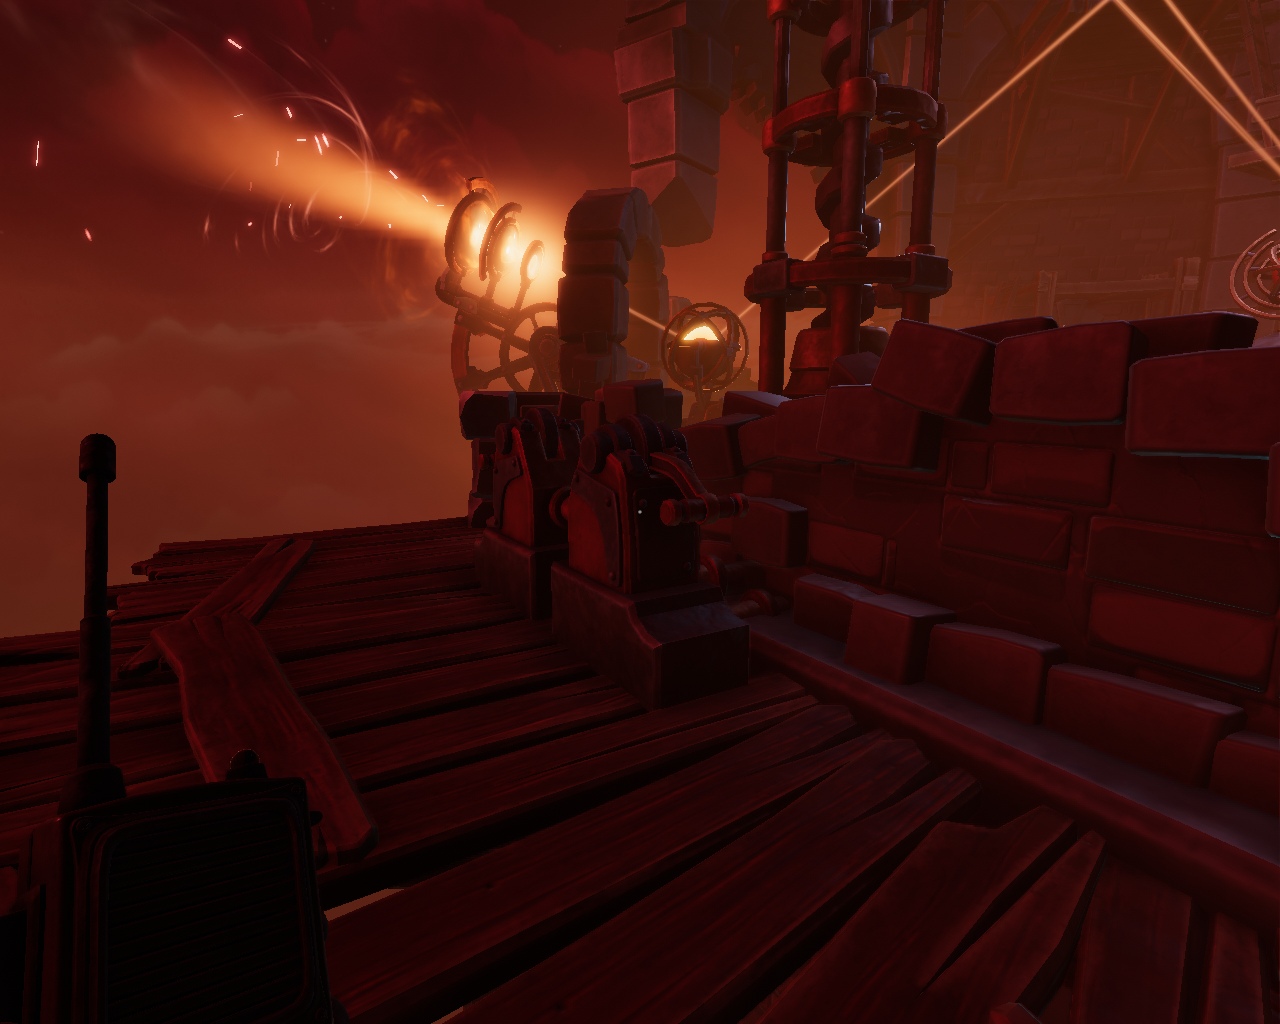
Players need to direct the beam of light to the gate. Does this require a spread??move or move the spheres over which the ray must pass.
First, one of the players goes to the elevator, and the second player climbs the stairs to the left of the light source in order to lift the first player with a lever. The first player moves on and pulls the lever. The first sphere is rotated.
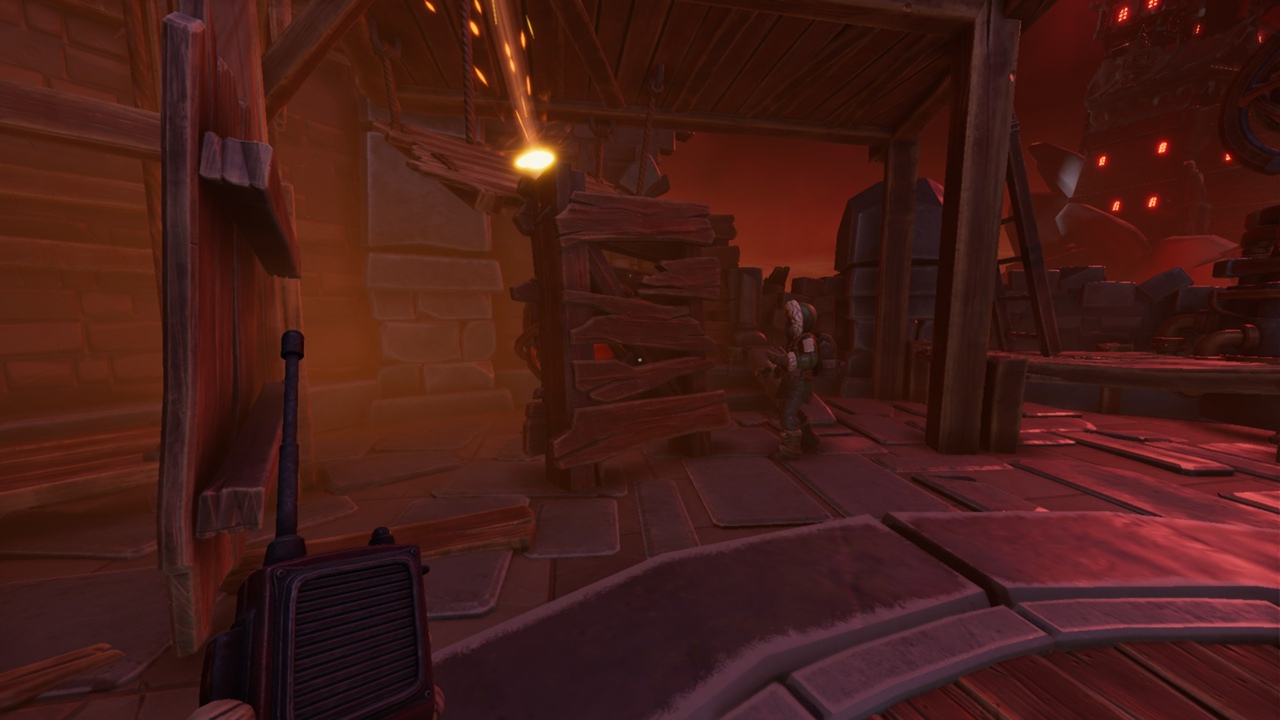
Both players descend and push together the boards, which block the path to the sphere for the beam of light.
Next, both players climb the ladders to another platform and take turns pulling the levers to bring the next sphere up to the beam of light. Technically, this part can be done by one player, running back and forth.
2F1808769604181782855%2FD393B7E624B6C027470A325E4A12D0A5A4F9484E%2F"> 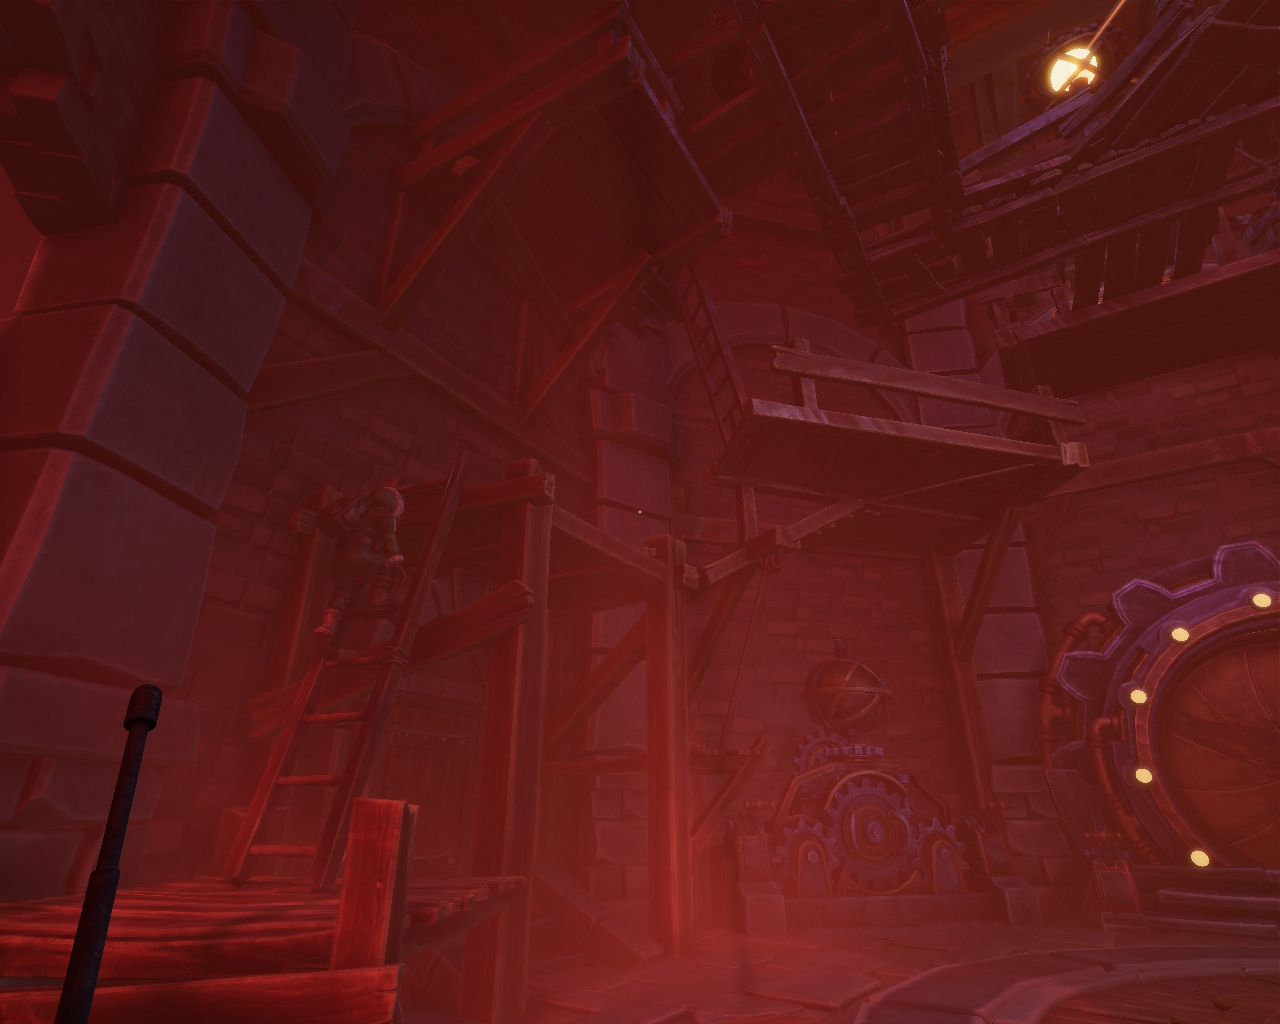
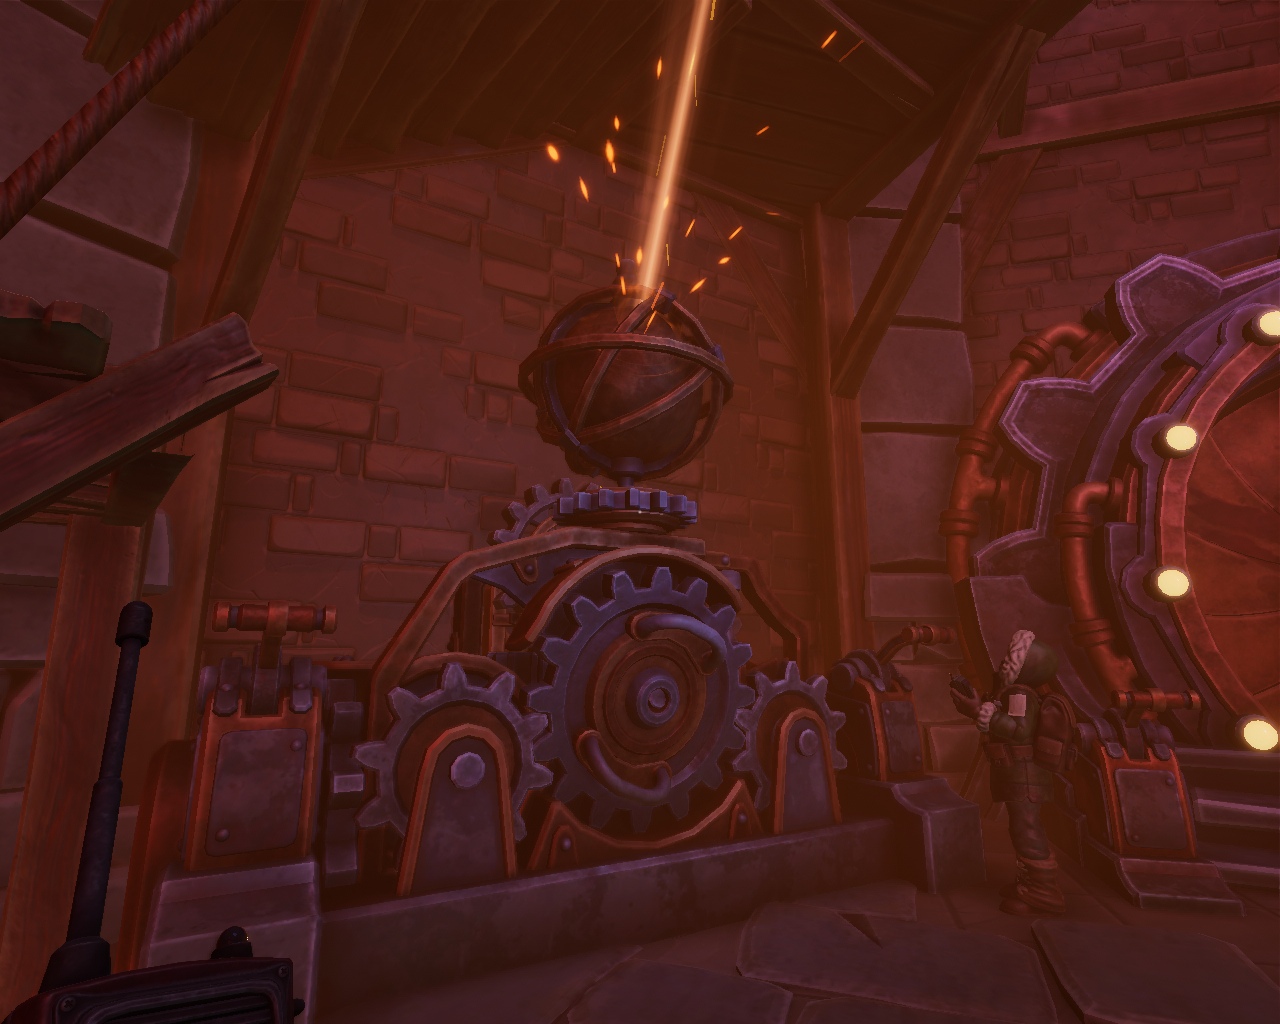
Then both players go down to the installation under the stairs and pull the levers together. The first time one gear will fly off and it will need to be inserted back into place. After that, the players pull the levers again and the sphere above the installation turns.
In a place behind the boards that the players had previously pushed, a passage appeared in which you need to pull the levers together. But before that, according to the scenario, one of the players falls through a hole in the floor and waits for help from another player. The levers can only be pulled after one player has helped the other to stand up.
5EC839A93251B7F096BB4B2D/"data-modal-content-popup-url="https://steamcommunity.com/sharedfiles/displayimageformodaldialog/?imageurl=https%3A%2F%2Fsteamuserimages-a.akamaihd.net%2Fugc%2F1808769604181802 078%2F6F1CAE709BB6A3BD5EC839A93251B7F096BB4B2D%2F "> 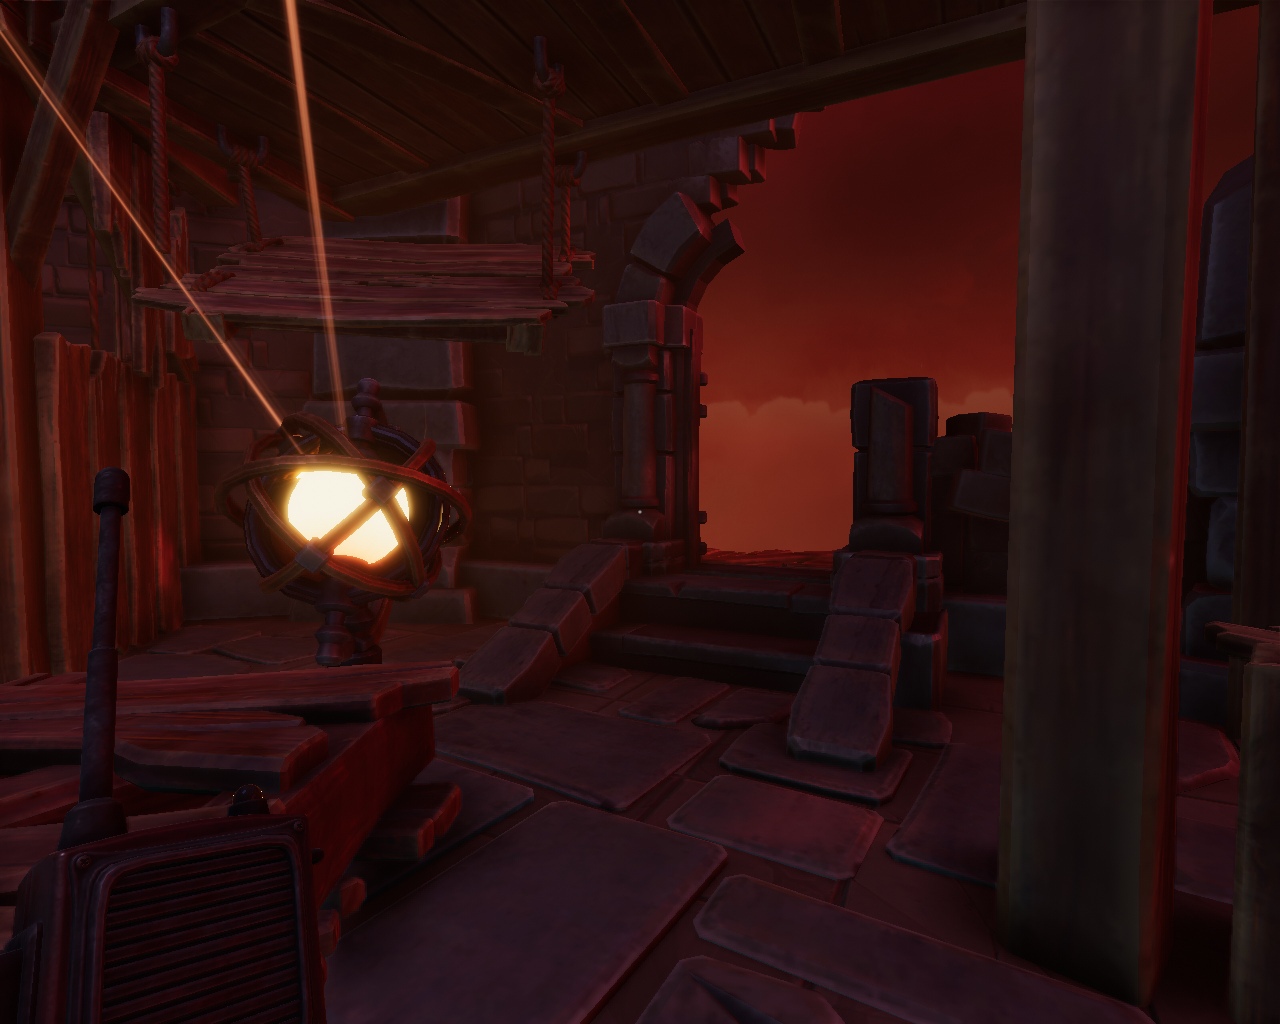
After that, one player climbs the first elevator with the help of the second player, and the second then climbs to the other side using large stairs. Both players will be waiting for three levers and an indicator on the side. It is necessary to press a total of 6 levers in the desired sequence in a short time. The sequence is indicated on the indicator. At the end of the timer, the indicator changes order, and the levers return to their original position.

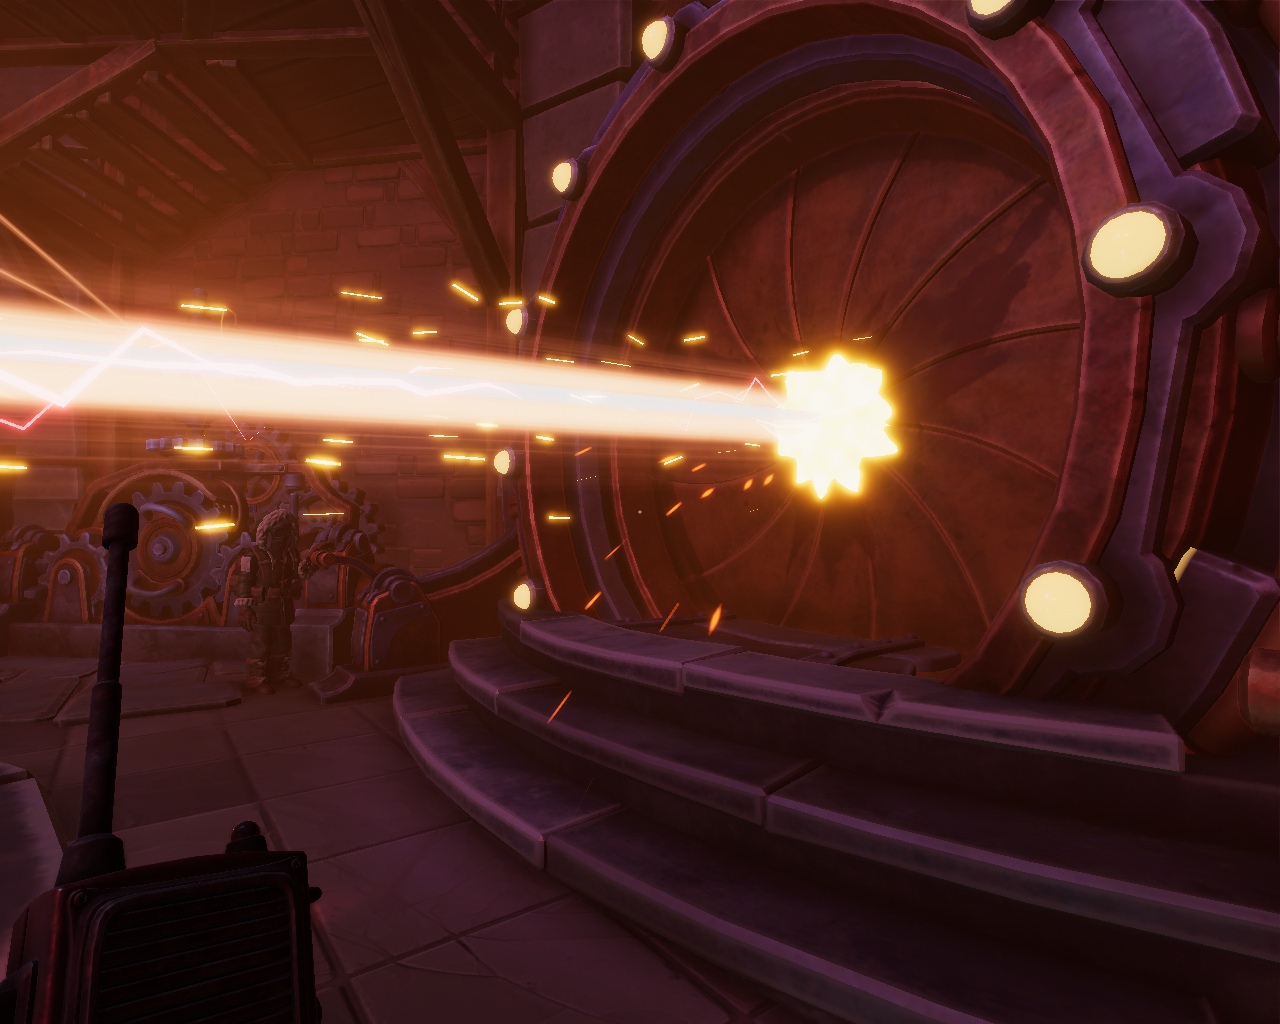
Now both players go down and go to the center mechanism, which began to rotate. Both players pull levers. After that, the mechanism should accelerate the movement and direct the beam of light at the gate. Next, the players approach the edges of the gate and pull the levers together.
The cut-scene starts.

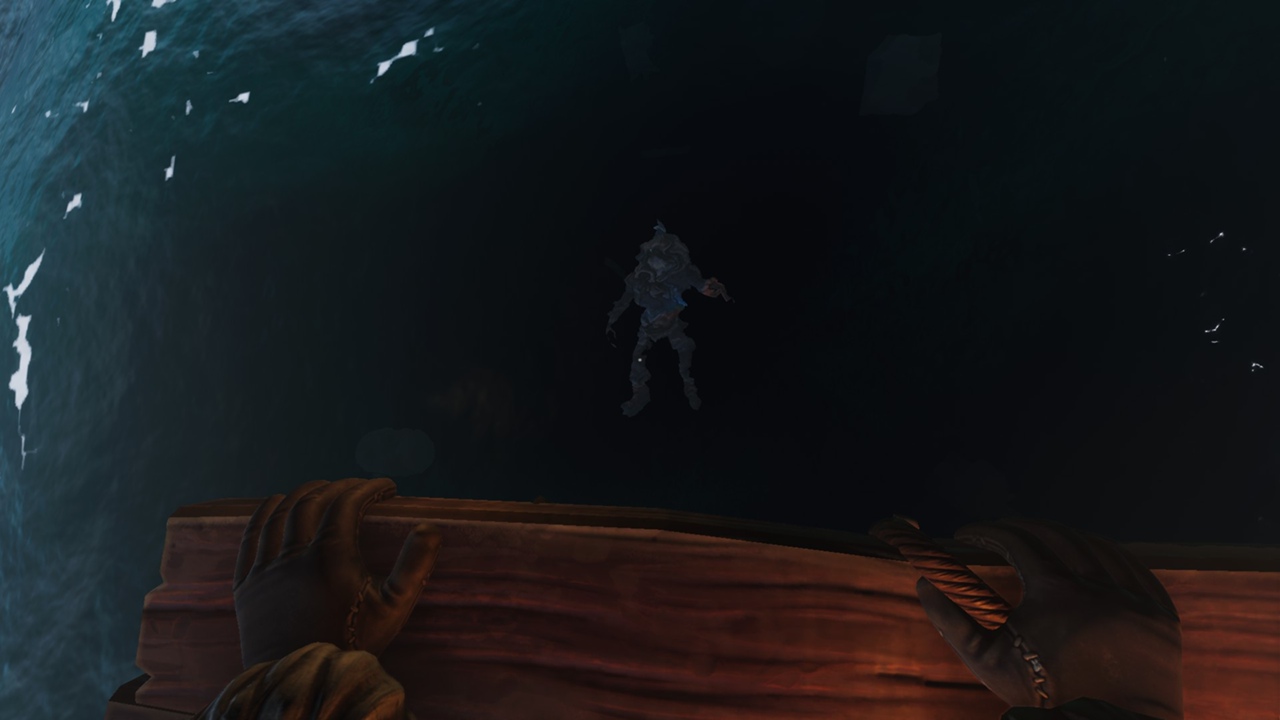
After the cutscene, everything explodes and the players are thrown into the sea (?).
Players need to swim towards the light, where a floating board is waiting for them.
=https%3A%2F%2Fsteamuserimages-a.akamaihd.net%2Fugc%2F1808769769517664111%2FFC94C552B5C1500CB0510BC4DE0D5692952A3D70%2F">
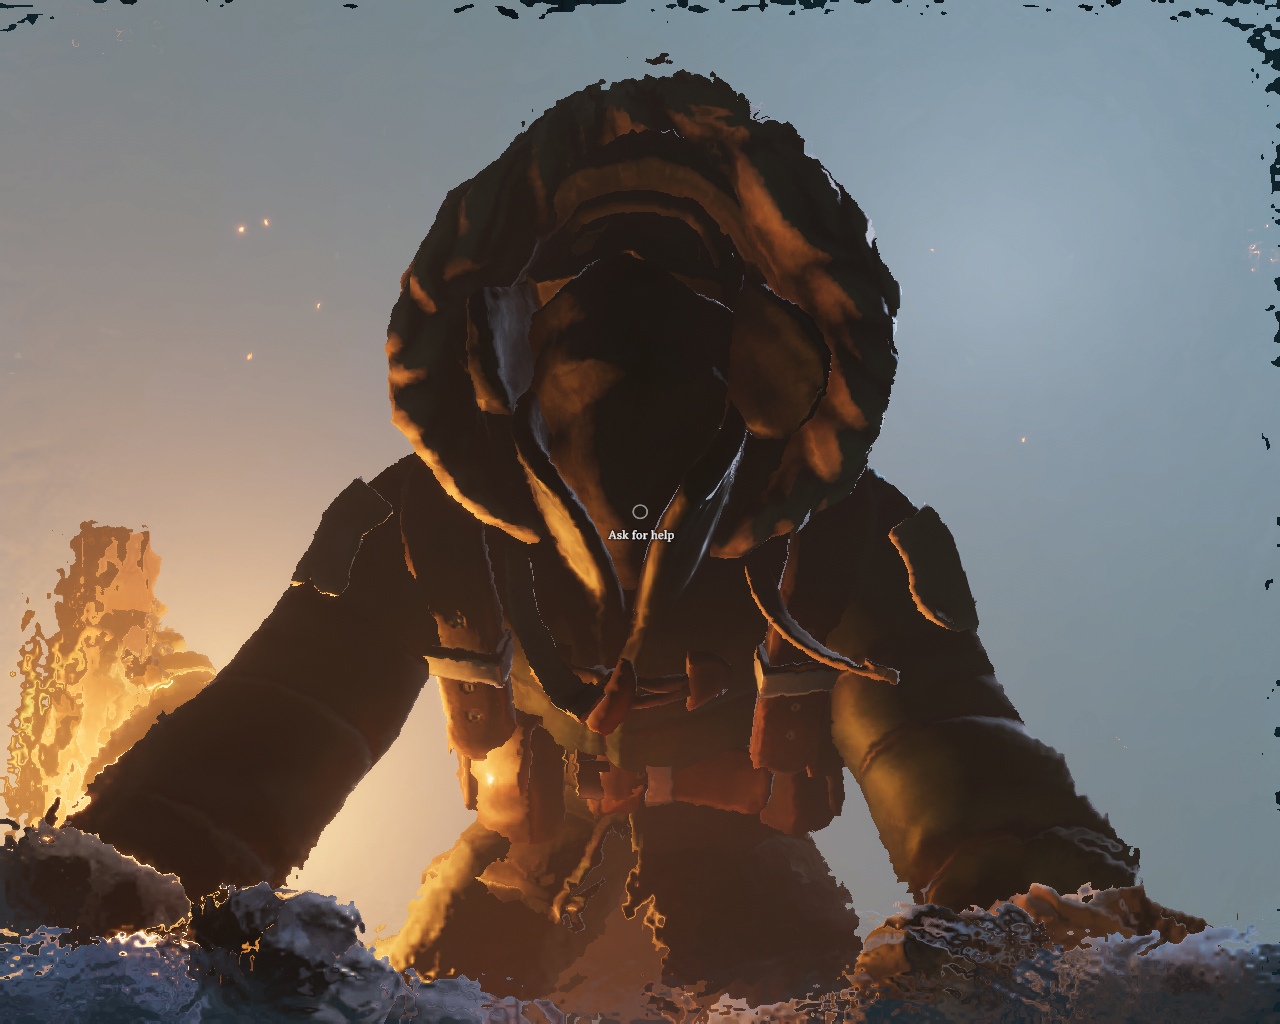
One of the players climbs the board, and the second asks the first to help. If the first one helps him, he will be thrown into the sea and he himself will have the option to request help.
Only one of the players will remain on the board. The second must sink. The only question is what role you will take. And it depends on what achievement each player will receive. When one of the players finally decides to drown, the credits roll and the game ends.
69769517664137%2FF99A5B291E258835FCE04CCD819C86C0FC34E7D5%2F">
It is recommended to replay the game, but already changing roles, in order to get the achievements of the other side.
He will be the last one for the game.
An incredible success for the studio's debut project.
In short, the company is aware of the problem and is solving it.
It will be an animated prequel series.
A free drone piloting simulator designed for schoolchildren and teachers. The game develops drone piloting skills in a safe virtual environment and is available on Steam.
All materials on showgamer.com are protected by copyright. Partial copying is permitted with an open (for search engines) link. ShowGamer (2015)


 Our YouTube channel
 Our VK group

.jpg)
